Sunday, 15 April 2012

Photo challenge!


Hey folks! Today Bec, Jane, and I had a craft day which was heaps of fun ^_^ I only made two granny squares though (slacker!) so I thought I would share with you my progress into the month of craft photos challenge, inspired by Robbie's wonderful photos for the same.

Here is the challenge list


I recently got a new photo app for my phone; I really wanted to get Instagram but it won't work on my cheap phone ; _ ; so I got Lightbox instead. I still really want to get Instagram (maybe on my next phone ...) but I thought I'd embrace the underdog and have some fun experimenting with all the different filters while completing this challenge. I've only done three so far!

This is my work-in-progress; a Crochet Today pattern (May/June 2010 for those that want to know) which is a re-print of a pattern from the 50s. My motifs are a bit smaller than the pattern advises (I'm using a thinner yarn, smaller hook, and have a quite tight tension) so I'll be making a few more than recommended. I've made four motifs so far, a bit of which you can see in the top corner. The motifs are joined as one does the final row which is an interesting method that I haven't done before.


This is my favourite drink ^_^ Bubble Tea! (I'm obsessed!). I used the fish-eye filter on this one which I think suits it quite well. This flavour was watermelon with green apple jelly and you can see that I had already drunk quite a bit before snapping this photo ~_^ You can also see a corner of my pirate skirt in the top corner ^_^


And this is something new - Octavia, my new Thumpy Thump (what a name, right?) Blythe Doll. She's very pretty and has awesome purple hair ^_^ The background is also new; it's a vintage tablecloth, but it's new to me! It has a lovely cross-stitched border.

How was your weekend? Want to join me in this photo challenge? ^_^

- Lisa x

Monday, 9 April 2012

Crochet peas and carrots, plus Spoonflower fabric napkins


Hi, how has your long weekend been? Mine is almost over, and I didn't do quite as much craft as I planned to. But, I slept and cleaned more than I planned to, so I guess it all evens out ^_^


I crossed another thing off my giant craft list - yay! I crocheted a pea pod and a carrot using the pattern in the fifth issue of Mollie Makes. The photo above was taken using one of pages of Mollie Makes as a background ... don't you just love that font and the tiny little flowers? ^_^

Esther the rabbit was happy to participate in a little photo shoot ~_^
 

I like how the pattern turned out some pretty life-sized vegetables! I have no idea what I'm going to do with them now though ...


I also *finally* finished making napkins from some of my designed fabric, printed by Spoonflower. I made twelve napkins, they have a plain white fabric backing and are finished with a rolled hem.  

I'm not really sure how to take exciting photos of napkins though, sorry!

What did you do this weekend? Any tips for how I could add interest to my photos? Or actually take good photos? ~_^

- Lisa x

Saturday, 31 March 2012

Goulia Yelps - Makeover edition


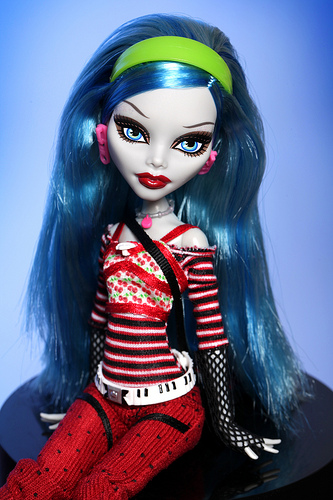
Hey! Do you remember that ages ago I brought a Ghoulia Yelps Monster High doll? Well, anyway I did, and she looked like this:

Not very zombie-like.

So, I sanded off her makeup, gave her a repaint, and made her a new outfit and now ...


... she's zombiefied ~_^


"BRAINSSS!"
 

What do you think? Do you like her? I hope you do!

- Lisa x

Handmade handbag


Hey! Let's talk about handbags ^_^

The handles on my old bag were so completely stretched out, and I wanted a new bag that *didn't* use fake leather for the handles, but I couldn't find *anything* in the stores that wasn't faux cow.

So, I got out some fabric and some cotton rope and made myself one! ^_^ Yay!

I am really happy with how it turned out, and I can't wait to give it a test run tomorrow ^_^


The outside fabric is this cute quilting cotton with colourful pictures of eyeglasses - I've had this fabric for *ages* so I'm glad I've finally used some of it.
 

The bright yellow interior fabric is from IKEA - it's so happy! ^_^

If you'd like to make your own, I based my bag on this one here I made the shape slightly different and used longer lengths of rope for the handles (I like mine to go over my shoulder, so I used about 50 inches for each handle) but the instructions work anyway ^_^

I hope you had a great day today! 

- Lisa x

Thursday, 29 March 2012

A granny square rope rug, a Royal Guard cross stitch, granny squares, and crochet WIPs

Hey! I'm back! I still haven't found my camera, but Scott dug out his old one which, luckily, still works! ^_^ 

So, here's what I've been working on ...

The cotton rope granny square rug - it's finished! Yay!
 

I ended up using over 200 meters of rope ... and I probably could have brought a rug for about the same price and less effort. *But* I love how it turned out and I enjoyed making it, so I think that's worth the cost ^_^


I finished this cute little cross-stitch - I'm going to give this to Scott's grandma for Mothers' Day. I'm glad it's finally finished!


I've also been making granny squares ... so far I've made 54 squares towards the Death Star blanket! Only 418 to go ... >_<
 

Nikita was happy to model for me ... photos of granny squares can be lovely, but when they're this monochrome, it's a little boring. She livens it up a bit! ^_^


I haven't done much on this granny ripple rug so far, but it's getting there! I really like the colours ^_^
 

I'm still not sure if I'm doing the edges right; I'm following the pattern but they look like they're increasing still. I might do a swatch in some scrap wool to practice a bit more.


I've also been making a cover for my little ottoman. I need to buy more wool though (what a pity!) as I have already used up the two balls of wool I had in those colours.
 

Still, it looks pretty, doesn't it? ^_^
 

That's all for the crafting today *but* I will say - go and watch the Hunger Games! It was *such* a great movie; relatively true to the books, great casting choices, and amazing set design. (Yes, set design is important to me ~_^)

I hope you had a fantastic day today! Tell me, are you working on anything at the moment? I'd love to know! ^_^

- Lisa x

Monday, 20 February 2012

One Day Bow Belt!

Hey! Posting on a Monday - weird! I normally don't post because of work (boo!) but I was SUPER PRODUCTIVE today making a *really easy* crochet bow belt. 

I made this by crocheting on public transport to and from work, for a little bit during my lunch break, and a bit more when I got home. So, if you do this on a day that you *don't* have work, I bet you could make this super fast!


 It's hard to take a flattering photo of one's own middle ... anyway, you can see how this works; it's a skinny belt with a big bow designed to brighten up simple outfits and look super pretty ^_^

Here's how you make it!

Belt 
 Make a slip knot and then crochet five chains, or however wide you want your belt to be. Chain another two, treble into the fifth chain.
Treble into each chain stitch.
<Chain two, turn your work, make five trebles into each stitch along the row>
Repeat <...> until the belt is long enough to encircle your waist.

Now you want to extend the belt a bit more so you have an overlap of the two ends; you will sew your bow in the centre of this overlap, and put fastenings on either side of the bow (check the picture below to see how the belt overlaps).

To make a button hole, skip one treble stitch and chain two instead. Then treble along the row as per normal.


Bow
Chain 30 (or as long as you want your bow to be), then chain another two and treble into the 30th stitch.
Treble along the row, chain two, turn your work, and treble across again.
Repeat for nine rows.

Fold the resulting rectangle into a bow shape. Thread a large needle with a long length of wool and make a stitch to hold the bow into place. Then wrap the wool around the centre of the bow to hide the stitch. Once you're satisfied with how it looks, sew the bow onto the belt, in the centre of the overlapping section.

Finishing up
Sew a button onto the belt so that it is opposite to the button hole. Add a snap onto the other side of the overlapping section. Weave in all the ends.


And it's finished! Huzzah! Put it on and force everyone in the vicinity to admire your skills ~_^

I really hope you like this project, and if you make one, I'd love to see it!

Lisa x

Friday, 10 February 2012

Crochet and Spool knitted Princess Leia Hat!

Oh my gosh - I finally finished this hat! Squee; I am so happy! This is actually a really simple hat, but the spool knitting simply took ages >_< I really love it though, it's really comfortable and because the wool I used is 100% Baby Alpaca it is so soft ^_^


I used the thickest brown wool I could find (Vera Moda Husky), which helpfully didn't have a ply on the label. I crocheted the hat with a 6mm hook though, so based on that, I'm estimating around 12 ply. The base hat is made up of trebles; if you're looking for a simple pattern, try this Pokeball Hat - obviously just ignore the colour changes ^_^ Then I made a big spool knitter using a wrapping paper tube and four skewers; I cut the tube down to about six inches and then taped the skewers evenly around the tube, leaving them sticking up about an inch above the top of the tube.


And then I spool knitted. A lot. I spool knitting 202 inches for each bun, which used up just under 100 grams per bun.
Then I coiled the spool knitting tubes into the buns; they have a diameter of about 5 inches and are about 2 inches high. Sewing them together was a bit tricky! Possibly using hot glue would have been better, but I was concerned it might be seen and hot glue also does make things a little less soft.

Anyway, once they were sewn into a bun-shaped, I sewed them onto the sides of the hat.
 
And now it's done! Yay! ^_^ I am so happy that I finally finished it!
See you later - with all the backed up pictures for the drawing challenge!

- Lisa x