Tuesday 29 July 2014

Pineapple and AT-AT string art


Hello! Today I really felt like I needed a break from my crochet project (so. many. trebles!) so I had a look through my idea notebook and found one that said, in shaking just-woke-up-in-the-middle-of-the-night handwriting, "geometric string art AT-AT". There was also a drawing of what I assume to be the aforementioned AT-AT but it looked more like a cow. Good attempt nonetheless, sleeping-Lisa. A for effort.


So anyway I gathered my supplies, and got to crafting! It turned out well, but my desire for hitting things with a hammer wasn't yet sated, so I made another string art; this one a pineapple. I'm still not over the pineapple trend, and it works with the 70s-esque medium of string art oh so well! And I even made a little tutorial and a template for you to make your own ^___^
 

1. You'll need a hammer, upholstery tacks (or some other kind of small nail), string (I used cotton thread), a piece of wood (mine is a chopping board from IKEA), scissors, and a scalpel.
 
https://drive.google.com/file/d/0B_MO0cK8Qg7meVExRU5NdkItdW8/edit?usp=sharing

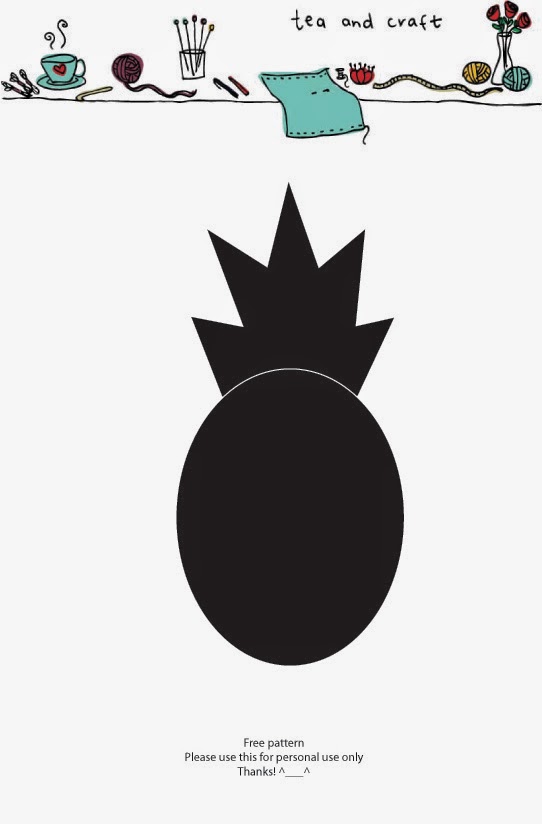
2. You'll also need a silhouette. For my AT-AT I used this one, and for my pineapple I made my own. If you'd like to use my pineapple silhouette, you can download it by clicking on the image above ^___^
 

3. Add your tacks around the edges of the silhouette. My pine board was soft enough that I could push in the tacks a little before hammering them in; this adds a little bit of stability and reduces the chance you'll hammer your thumb ~___^


4. Once you've got all your tacks in, you can remove the paper template. Just rip it off! ^___^
 

5. Some of your tacks might have a little bit of paper stuck underneath them. I used a scalpel to cut these little scraps off.


6. To start off the string wrapping, I did an adjustable slip knot which I tightened around the first tack. I wrapped the string around each tack around the outside of the shape and then started criss-crossing through the middle.


7. To finish off, I also used an adjustable slip knot. It can be a bit tricky to get the knot in the right place so that your string is kept tight enough, but it does look very neat once you get it done. ^___^

8. Cut off the tails of your strings, and you're finished! Huzzah!


It's still quite cloudy and rainy here, being winter, but I feel like these little bits of art cheer up the place quite nicely ^___^


I'm back at uni again next week which means that craft will, once again, be relegated to the back burner but until then I shall be working on my crochet project. I hope I can finish it in time to show you soon! 

- Lisa xx

Thursday 24 July 2014

Time to play video games! An upcyled BMO clock


Hello! As you probably already know, I really like Adventure Time. In fact, I'm watching it right now. And getting very distracted from writing this blog post. Ahem, anyway, turning my back on the plight of Tree Trunks, I was hunting around my craft room for inspiration and found an old metal clock that was truly crying out for a makeover. I didn't take a photo of it before, but it was browny beige and very ugly. I gave it three layers of white spray paint as a primer and then I got to work with my acrylics!


I drew my BMO based on my tiny action figure, but I think the button placement is a little off. Ooops! Nonetheless, BMO is very cute and I like how excited he is! I used Kaisercraft colours for the entire painting; BMO's case cover was made by mixing together "Sea Breeze" and "Spearmint", his face is a mixture of "Spearmint" and "Lime". The buttons are the aforementioned colours, plus red, yellow, and black, and the background is "Hot Pink" mixed with a lot of white. I also gave his screen a coating of glow in the dark paint, so I'm hoping that this evening I will be able to see his screen glowing like he is a real computer ^___^

"Video Games" is written in Lobster font and "time to play" in TallAndSkinny font (which I can't find a link to unfortunately). To transfer the fonts onto the painting, I printed out the phrases and coloured in the back of the paper with a lead pencil. Then I placed the paper onto the painting, and traced around the letters with the pencil. You just have to make sure your paint is really, really dry before you do this, otherwise you might get some smudging around your words >___<

I saved the original hands from the clock and while they don't totally match the rest of my painting I think they still look ok. I am not sure where I will hang this new clock up, but I think it will be best in the lounge room, where Scott and I *do* spend a lot of time playing video games. The great thing about this clock is that it means that every time is video game playing time! ^___^


I'm really happy with how this clock has been transformed and it's great to have another Adventure Time piece in the house. There are so many great characters in Adventure Time, there are plenty of future projects left to create! 

Do you have a favourite Adventure Time character? I've done three Lumpy Space Princess crafts so far (including a cosplay!) so I should continue to craft tributes to some different characters now I think! ^___^

- Lisa xx

Friday 18 July 2014

Alien, bee, and WTNV hair clips


Hi! Have you noticed that the 90s are totally back? I went to a 90s themed ice-skating night last week that was totally fun (albeit very very cold and we didn't actually end up skating since it was so overbooked) and while researching what people wore back then I started really regretting getting rid of my massive butterfly clip collection realising that so much of the clothes in the store right now are very 90s inspired! This is probably not a revelation to most of you, but I'm usually pretty out of the fashion loop so it was for me ~___^ I wanted to make something to go with my grunge-inspired outfit, but the only 90s crafts I could find were scrunchies and elastic chokers. And then I remembered how all the cool teenagers in my town had alien jewellery. I was both too young and too uncool to keep up with the trends as they actually happened, but now I finally have some extraterrestrial hair clips. And only 15 years after the nineties ended! ~___^


I made these little guys with white fimo, but if you already had a light green shade of clay then that would save you some painting time later on. Even better would be if you had glow in the dark fimo! I didn't know this existed until just now, and I desperately want some. Anyway, I rolled the fimo into spheres, squished them flat with my palm, and then pinched in the sides to give these aliens some Cumberbatch worthy cheekbones. I squeezed a plastic straw into a more oval shape and pressed it into the clay to create the outlines of the eyes and then baked them in the oven.
 

I painted the heads with Kaisercolour acrylic paint in lime, the eyes with black acrylic, and then gave them a couple of coats of glow in the dark paint. I used Tarzan's Grip to adhere them to the hair clips and then they were done!
 

They do glow, but they have a bit of a streaky look so I think the glowing clay would work much better if you were to make these yourself ^___^


For my 90s outfit, I did my hair in what I seem to remember being called "alien buns" (this is probably entirely wrong though); basically two small buns on the top of your head with the rest of your hair out. My clips weren't dry by the time we left though, so I didn't get to wear them that night. Still, I think they're pretty cute (in a creepy kind of way) so I think I'll still get some wear out of them ^___^
 

I had two hair clip bases left over, so I also made these tiny bee clips. They were ridiculously easy to make! The wooden bees are from the scrap booking section of my local craft store; I just spray painted them silver and glued them to the clip backings.
 

I really like how these look against my hair, they're so pretty and delicate which is a bit different to my normal creations ~___^ These pictures have also reminded me that I need to redye my hair soon! The red that turned my blue into purple has faded out quite quickly ...


While I do still have purple hair though, this next craft seems especially appropriate!
 

I wear *a lot* of hair bows (that, and the baby face, probably explains why a lot of people assume I'm still a high schooler) and I hadn't yet made a single piece of WTNV fancraft; two birds, one stone, you know?


I made this by crocheting two tubes, one large and one small. I placed the small tube on top of the larger one, and then pinched and sewed them together. I wrapped some yarn around the middle to make it look a bit neater and then sewed on the little Night Vale moon/eye/thing that I made from felt.
 

I sewed this hair snap onto the back and it was done! It makes a rather oversized hair clip ...


But it also functions as a smashing bow tie! ^___^ I can really only wear it this way with button up shirts, but basically it just clips in between the buttons.
 

Scott and I were brainstorming ideas for more WTNV crafts last night, so you may see more of this fandom here soon. I'd recommend listening to the podcast, if you haven't already! And that's it for me tonight, dear readers, so ...


Goodnight, Night Vale. Goodnight.

- Lisa xx

Sunday 13 July 2014

Braids, cats, and galaxies: jewellery making


Hello! As is apparently typical for me during holidays, I have been suffering a little from crafter's block. It's rather frustrating! As soon as I have plenty of time to work on projects, I start feeling aimless and unsure of what to make; add in a couple of failed crafts and I'm not a happy camper! So I decided to fall back on jewellery making to help me get my mojo back ~___^


Although I did do crafts as a child, jewellery making was what roped me back in as a teenager. There was a huge trend of wearing beaded necklaces and earrings when I was in high school and I gleefully jumped on the bandwagon; I brought tons of tiger tail and seed beads and spent lunch time selling my creations from a small container in my school bag. I still have a pretty extensive collection, even though I haven't brought any beads for years. I think maybe they multiply somehow? ~___^


Anyway, this necklace was super easy to make, and finally creating a successful project was very satisfying! ^___^ To make this, I cut three lengths of tiger tail and formed one end of each length into a loop using crimping beads. I threaded each length with a different colour seed bead (pink, blue, and clear, as you can probably tell) and then crimped the other ends into loops as well. Then I used a jump ring to gather the beaded strings just on one end, braided the lengths, and added another jump ring at the other end.


Once I had my beaded braid complete, I attached chain through both jump rings. If you wanted a long necklace, you could stop here, but I wanted mine to sit higher up so I cut through the middle of the chain and added a lobster clasp. It's a relatively stiff necklace, it doesn't have much drape and it's a little heavier than you would expect it to be, but it's still comfortable to wear and I think it looks really pretty ^___^


Since jewellery was working for me, I decided to make a cute little ring from some shrinky dink scraps. I find it really hard to throw out cut offs of shrinky dink; it's like, that could totally be something! In this case, one scrap I had was large enough to make a tiny kitty face.


I ran out of E6000, and haven't yet gotten anymore, so I used Tarzan's Grip for this, which I hadn't used before. This glue swells up and becomes puffy as it dries, so I would recommend using less than you think you should. I had to cut away some of the excess dried glue from this ring, but at least I know for next time! ^___^


Lastly, I made these galaxy pendants. I found some great images on tumblr of nebulae and since I kind totally missed out on the galaxy trend a few months ago, decided to make something for myself. I couldn't decide between the pictures though (they're all so gorgeous!) and so I ended up making three.


I'm not sure if these are super recognisable as space images though, and I think if I make any more I will add some glitter to the pictures. To make these I used some epoxy stickers which I positioned on top of the images; I trimmed the excess paper and then glued the domes into pendant cabochon settings. I added chain to one of them so I could wear it to work today, and I'm thinking about turning the other two into brooches ^___^ 


I've got some hair clips drying on my craft table at the moment, so I'll show those to you next post. In the meantime, fingers crossed my crafting block is a thing of the past! ^___^

- Lisa xx

Monday 7 July 2014

Crochet BMO brooch, shrinky dinks, and a flower crown.


Hello! I had a different project planned to show you next, but it didn't end up working out how I wanted it to so I'm going to frog it, and then maybe try again with a different medium. But I really did want to crochet something, so I whipped up a little BMO brooch ^____^ Since I've been doing Novelty Brooch Friday on Instagram I've really been expanding my collection - after all, wearing the same brooch over and over would get a little boring, don't you think?


The brooch is about 6cm high by 4cm wide, and I used my tiny BMO action figure to figure out the placement of the buttons and screen. Don't they look cute together? ^___^


I used "Beetle" yarn to make the main part of the brooch, it's a cotton-acrylic mix and was luckily the perfect colour so I didn't have to buy anything ^____^ The rest of the colours only required small scraps of yarn; the green button and the grey line are done with cotton yarn, but I think the rest is probably acyclic. To make the brooch I crocheted two rectangles using a 4mm hook; I did ten chains, then did single stitch into nine of the stitches (the tenth chain becomes your turning stitch). I did single stitch for a total of 13 rows (with a turning stitch at the end of each row). The screen was done the same way, but I only did seven chain stitches to begin and a total of six rows. The buttons and face were too small to crochet so I embroidered them with wool, but I think that embroidery thread might have been better for the face. 
 

After I weaved in all the ends, sewed on the screen, and did the embroidery, I stitched a badge back onto the second large rectangle and then sewed the two pieces together. This gives everything a nice clean finish, and you don't have to worry about messy embroidery backs ~___^
 

I also made a couple of shrinky-dink brooches; shrinky-dinks are so satisfying because they are so quick and easy to make ^___^ The geometric anatomical heart was inspired by this string art project, and the hello by this wire wrapping project. The jackalope is all my own though! ~___^ 


Lastly, I made this flower crown which was so easy to do it can barely be called a craft ~___^ I found these great foam roses at Spotlight and since I hadn't seen red ones there before, I snapped them up quickly! I made a flower crown using some pink and white foam roses earlier this year, just by using some floral wire to shape them into a ring, but I decided for this one I wanted a more arch shape.
 

I've had this black headband for literally years, but I wasn't wearing it as much as I used to, so I decided some roses would spruce it up nicely ^___^ The band has small holes in it, so all I did was stick the stems of the roses through the holes, and then wrap the rest of the stem around the band.
 

They're attached quite solidly, but if I ever decide that flower crowns aren't for me (I hope this day never comes ...) then I can easily remove them without any damage to the headband.
 

I ducked out into the garden during a pause in the rain to snap a quick picture to show what it looks like on - it's big, but I like it that way! ^___^ Also, you get a peek at how my hair looks when it's not straightened; curly fringe, ahoy! If you follow me on Instagram, you will have already seen my new hair colour; I'm still getting used to it and missing my blue locks a little, but at least it still looks good with a flower crown, right? ~___^


The rain has started pouring down again, and it's getting cold in my little computer corner so I guess that's a good a reason as any to scurry back to the couch and get some more hooking done! What are you working on at the moment? And is it warm where you are? Regale me with your tales of sunny days and dry shoes! ~___^

- Lisa xx

Wednesday 2 July 2014

Eat Your Greens embroidery hoop


Hello! I am so glad to have finished this embroidery, because honestly I've had so much trouble with it! Not with the pattern, which is a lovely one from Urban Threads, but with actually stitching it up ...


I started off stitching on a floral piece of fabric, but the thin lines were almost impossible to see, even when you were close up, so I started fill stitching everything. However, fill stitches take approximately a million years to do (hyperbole, me? Never! ~___^) and I still wasn't loving how it was looking so I stuffed it into my WIP box and tried again!


This time I used a darker, less busy piece of green fabric for the background, and decided to stitch everything in white. I used to do redwork when I was a kid, and this project kind of reminded me of that. Except, you know, in white. ^___^. The fabric was too dark for me to transfer the pattern using a lightbox, so instead I printed it onto tracing paper and stitched through the paper. This technique is not perfect, and there are definitely some wobbly areas, but it is a lot easier than attempting to eyeball it! I do still want to get some water soluable transfer paper to try, but my local craft store doesn't seem to have what I need so I'll have to keep searching.


I think that the hoop this piece is in right now is a touch large, so I'll be sizing that down before I finish off the back, but otherwise this is another completed project. Yay! I've been picking up some relief shifts at work so I'm not doing quite as much crafting as I had hoped for my break, but I'm glad I've been able to *finally* call this design done!
 

I used almost all back-stitch for this project; big surprise, huh? ~___^ I did work in a little lazy daisy chain on the asparagus though, and the petal lines on the pansies are just large running stitches. Overall I'm pretty happy with it, and I really like how the white thread looks against the geometric print on the background fabric. I've got some more colours of this same design, so I'll definitely be using them for more hoops further down the track ^___^


And that's that! Huzzah! This project is a present for Bec, so I really hope she likes it ^___^. And now it's time for a new project - I'm thinking something crocheted this time.

- Lisa xx