Showing posts with label glitter. Show all posts

Thursday, 18 May 2017

Blast from the past: "Don't give up your daydream" glittery unicorn pegasus sign


Another blast from the past: this glittery unicorn pegasus sign. I have this on top of one of the bookshelves in my bedroom - it's so pretty and sparkly!


You'll need a piece of wood or canvas for this project; I used a 7cm x 38cm piece of plywood because that's what I had in my stash ^___^ The first step is to paint it pink!
 

I have a stencil pack from Typo which includes this unicorn pegasus; if you don't have a stencil you could make one by cutting out the shape with a scalpel from a thin piece of plastic like a transparency sheet. I used an old paintbrush to spread mod podge over the stencil; I did it a bit thick though so I'd recommend trying for a thinner layer.
 

Then you can cover it with glitter! Yay!  Pro tip: shake the excess glitter off onto a piece of paper with a fold through the middle. This makes it a lot easier to return the leftover glitter back to the jar.
 

While you wait for your mod podge to dry, use a ruler and washi tape to make guidelines for your words.
 

Use the washi tape to guide where you place the base of your letters; the ones I used are called "thickers" and are by American Crafts. When I'm using letter stickers, I find writing out the phrase and then counting to determine which letter is in the middle of the line makes placement a little easier.


Carefully remove your stencil when the mod podge is mostly dry but still a little tacky (this will also make it easier to clean off your stencil!). Leave it to dry completely and tap off the excess glitter again. After this, you will probably still have loose glitter around your unicorn. Glitter is almost impossible to get rid of completely, so instead of trying to remove every speck of it, make it a feature! I used my dry paintbrush to brush little flecks of glitter all over my sign. Then you can use spray varnish to seal your sign and leave it to dry.


Most of the signs and canvases in my house just lean against the wall (mostly because I hate drilling holes to hang things!) but you can add a hanger with a couple of nails and a piece of wire.


I don't normally go for inspirational or motivational artworks, but I really like this one! Do you have a favourite inspirational quote? And would it be improved with the addition of a glittery unicorn? I think we both know the answer to that one ~___^

- Lisa xx

Wednesday, 30 December 2015

Glittery antler flower crown


It's the middle of summer here in Australia, so I'm dreaming of cool spring evenings and lush woodland groves. Recently some friends and I were planning a crafternoon and trying to decide which project we would make. I'll show you what we decided on next week, but I couldn't resist recreating one of the other suggested projects - an adorable antlered flower crown by Georgina Doull, featured here on Mollie Makes.


Creating the antlers was definitely the trickiest part of this project; Georgina makes it look so easy, but I made and remade mine several times! I also wasn't sure if I was going to glitter them or not, so I didn't follow her instructions to press the glitter into the clay before baking. Getting the glitter onto the antlers after baking was quite difficult, so if I was to do this again, I would listen to Georgina ^____^


My headband was already covered with white ribbon, so I left it as is. I did use some baby blue ribbon that was originally from a bouquet of flowers to help attach the antlers, but it's barely visible from the front.


The flowers I used are all foam roses. I was originally planning to use some of the larger size roses, that you can see in the top corner in the photo above, but then decided they were too big and instead stuck to the medium and small sizes instead.


I cut off the wire stems with scissors and then attached all of the flowers with hot glue. There is a patch were a bit of glue leaked onto the front of the band, but when I'm wearing it the glue isn't visible.
 

The back of the band isn't as pretty as the front; I'm considering making some felt leaves to cover up the backs of the roses.


I feel like I should be waiting for some fairies to drop by for a tea party while I'm wearing this! ^____^ Despite the clay antlers, it's quite light and very comfortable to wear. I'm thinking it would also be lovely for a Christmas outfit or a casual party costume.


Considering that 2016 starts in two days (whhhaaaatttt??), this will be my last project for the year. Thanks so much for spending time with me; I hope you've had some fun and maybe even found a little crafty inspiration. As always, I love to hear from you; what you enjoyed, what you'd like to see more of, what you created this year, and what you plan to create next.

Enjoy the rest of December, and I'll see you in the new year!

- Lisa xx

Tuesday, 22 December 2015

Harry Potter book quote ornaments


I'm usually on the fence about book art; I love the look, but the thought of destroying books makes me slightly anxious. However, recently Scott and I were weeding our book collection and we discovered his old copy of Harry Potter and the Goblet of Fire. Teenage Scott was obviously pretty hard on his books, because it was falling apart. Like, literally; the back cover was gone, the binding was shot, and pages were coming out. (Don't worry - mine is still in perfect condition! ~____^)


This was apparently all the encouragement I needed to start destroying it more - and creating some new ornaments out of the leftovers!
 

These are honestly so easy to make. All you have to do is cut up the book pages into thin strips (I cut out single lines of text), push them into clear ornaments (I got mine from the craft store, and the tops come off!), and add some glitter ^____^


I still don't have my big tree up (!!!) so I did a little photo shoot with my baby tree.


I really like how they turned out! I chose lines that I thought were interesting, or funny, or just mentioned favourite characters (Fred! ; ______ ;) so it's fun to look at the ornaments and try to read the little sentences.


To all those who celebrate around this time of year, I hope you have a merry, joyous, and/or happy one! To everyone else, I hope you still get a day or two off work! ~____^

- Lisa xx

Tuesday, 28 July 2015

"Let's be mermaids" papercraft pendant


Hello! Next time Summer comes around and I'm complaining about how hot it is, will you remind me of this Winter? I have been stuck in Struggletown, folks; my immune system is caving to the pressure and I have been sick soooo much. Happily, I have two days off work and I plan to rest up and hopefully be well enough to do some skating later this week! To help pull myself out of the Winter doldrums, I decided to make something to remind me of warmer weather ... and mermaids, because why not? ~____^


Here's what you'll need to make your own:
- lots of paper (I used a combination of scrapbooking paper, glittery card, card that I had practiced my watercolours on, and crumpled brown paper bags)
- a circle template
- scissors
- a pen or pencil
- a large piece of thick paper or cardboard
- glue (I used a glue stick)
- a ruler
- some string
- alphabet stamps and ink and/or a felt tip pen
 

The first thing I did was cut out my base banner shape; it's 30cm wide across the top, 31cm long down to the top of the pointy bit, and the edges of the pointy bit are 22cm. I used a quilting ruler to help measure out my pendant shape which was really helpful because it's big and see through. The card I used was recycled from a massive envelope which Rebecca once gifted me a hoop in; as you can see, it has folds and a hole in it but this won't matter because it will all be covered up ^___^
 

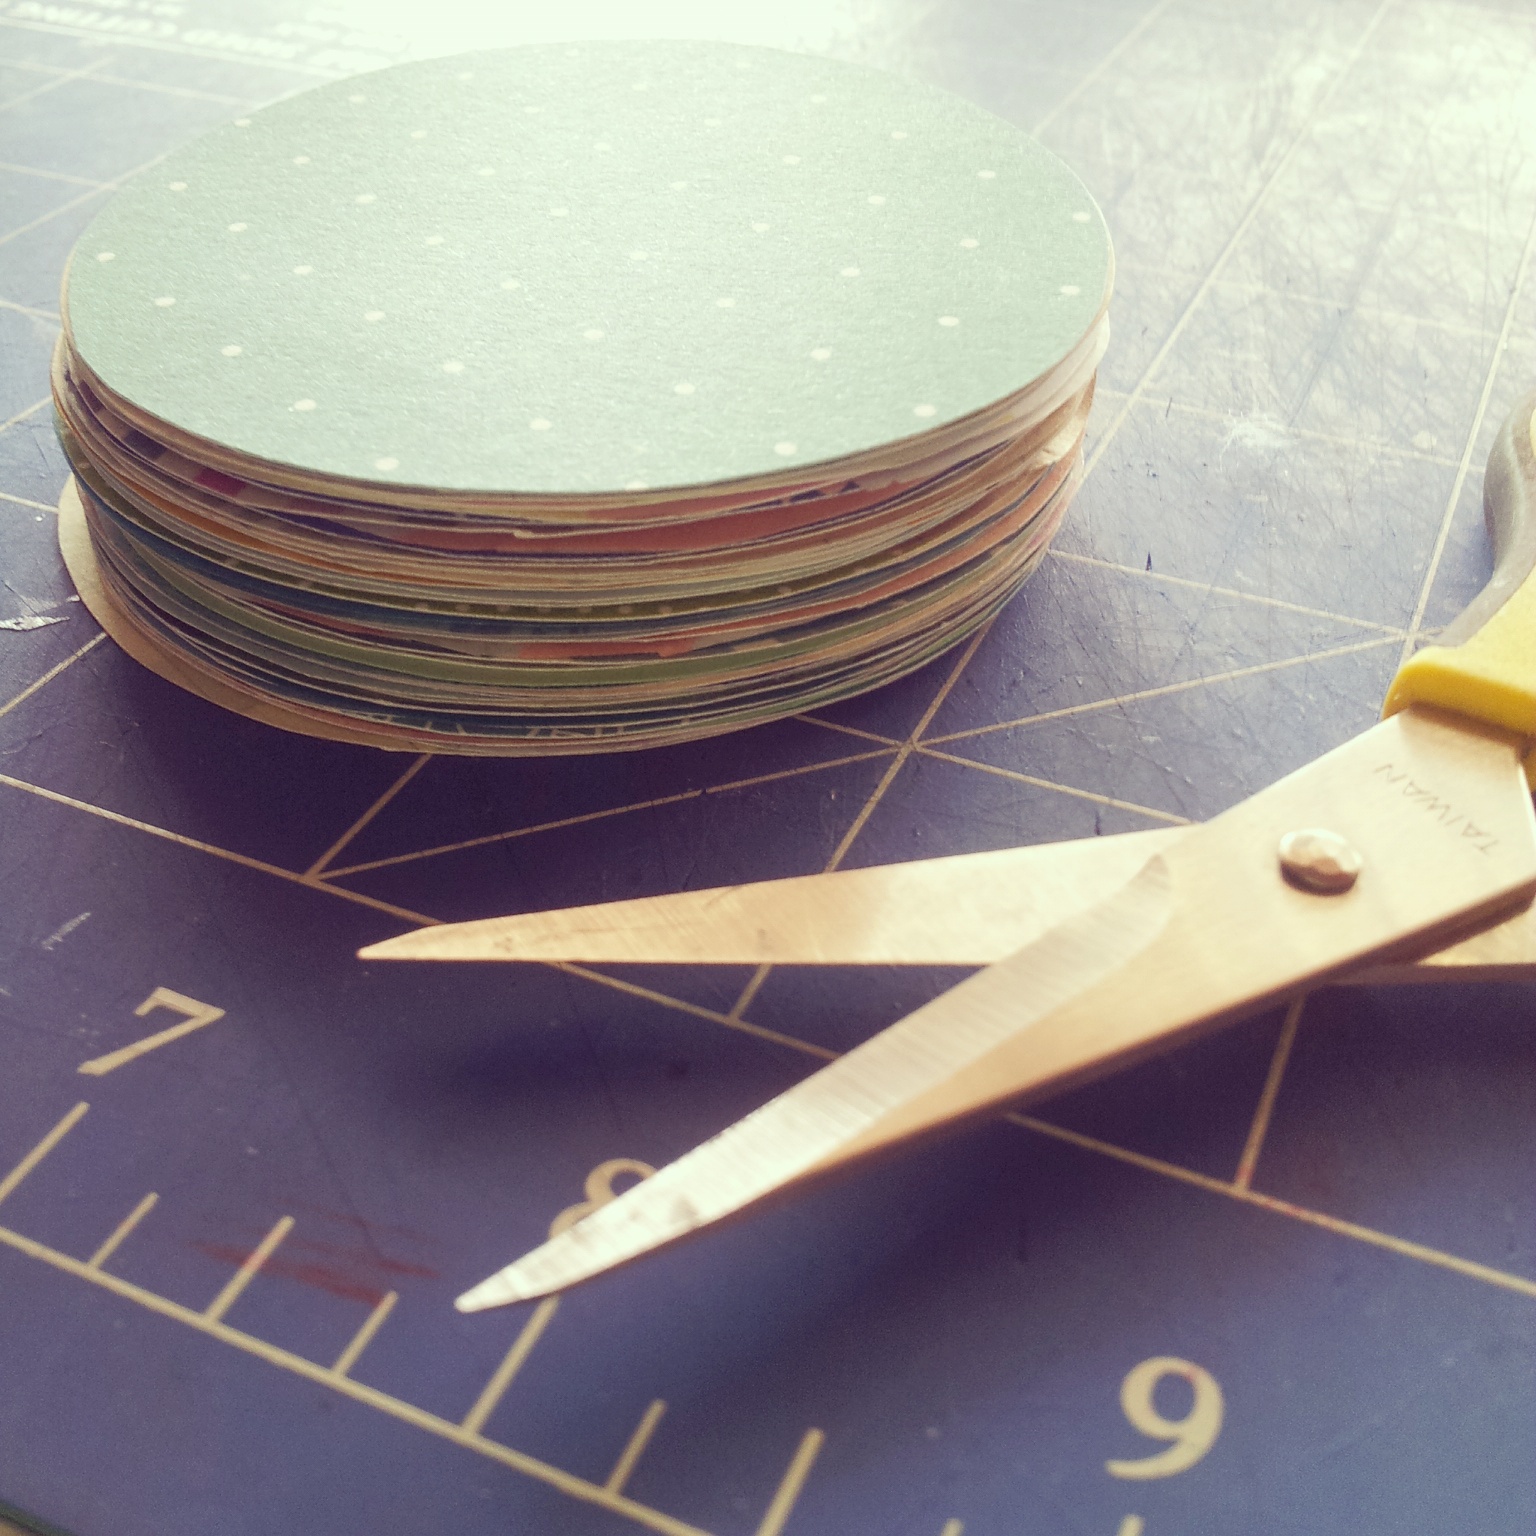
For my circle template I used a chipboard scrapbooking embellishment which I don't like and will therefore never use. Except as a template ~___^ The diameter of the circle template is 6.5cm. If you have a large circle punch, this would be the perfect time to use it; otherwise, you can do what I did which is to draw heaps of circles onto the back of your papers and then cut them all out. 
 

I used about 62 circles to cover my pendant, but I cut out more than that so I could play mix and match while I was laying them out. I have no idea what I'm going to do with the leftovers, but I'm sure I'll think of something!


 Use your glue to start sticking down the circles, starting at the bottom and moving your way up. Try to place the circles so that they are about halfway down on the circles of the previous row, and just touching on the sides - I found this is the best way to get a scaly look.


Once you've covered your entire pendant with circles, trim off the edges of the overhanging circles; just follow the edges of the base pendant to do this but only do the top and the sides - leave the circles on the angled edges as they are.
 

I folded a remaining bit of card in half, glued it together, and then glued it onto the back of the pendant to make a tube that holds the hanging string. To thread the string though, tie it onto something like a pen and then drop it through the tube. Then you can tie a knot in the ends of the string and pull it through the tube so that the knot is hidden.
 

I stuck an extra circle over the hole in the base of the pendant, just to tidy it up a bit. Plus, I like to have dates on things I make!
 

I used my tiny alphabet stamps and black ink to add "let's be mermaids" to one of the scales - this really reminds me of childhood summers when we would play mermaids in the backyard pool. I don't have an apostrophe stamp, so I added that in with a felt-tip pen.


I've hung this in our lounge room, and I really feel like it's helping to bring a little bit of Summer back into our home (although, unfortunately, none of the warmth - brrrr!).
 

This project is fantastic for using up scraps of pretty papers, and I like how it creates a kind of eye-spy effect. 
 

I tried to stick to a primarily blue and green colour scheme, but I also added in some pink, silver, yellow, and brown to break up the shades and add interest. 
 

On most of the circles I only added glue to the top half, which has allowed the bottom and sides to lift up; I actually really like this effect and think it helps the circles look even more like scales.
 

So now I've done projects on unicorns, jackalopes, and mermaids ... perhaps next I should do something on the Loch Ness Monster? ~___^

I'm still going on my knitted hat - I'm honestly the slowest knitter, but hopefully the next couple of days of rest, cold medication, and soup will also give me some time to also do a couple more rows of colourwork. Only one more month of Winter to go! Hopefully I can finish it by then ~___^
 
- Lisa xx

Tuesday, 28 October 2014

Princess Bubblegum crochet crown


Hello! I don't know about you, but I spend a lot of my time thinking about costumes. They're just such fun! I love going to Oz ComicCon and Supanova and seeing all the creative ideas that people have come up with, but Halloween has a special place in my heart. I mean, it's a spooky day where you can dress up and dance with a zombie; is there anything better? ~___^


This year, since my hair is currently pink, I've decided to go as Princess Bubblegum from Adventure Time. Yay! I'm  going to do a closet cosplay and also go as a hipster version of PB; this is mostly because I don't really like wearing my contact lens and my glasses are so black and thick-rimmed that, well, they kinda suit the part!
 

So I've got a pink top, handkerchief scarf, skirt, and tights but to be truly PB-esque I needed a crown. I found lots of different ones, made out of all kinds of different materials, but I was most inspired by a crochet version I found and so decided to give that a go.


I also wrote down what I did to make this one so you can give it a go if you like! My crown is quite a bit bigger than others I've seen which I'm still kinda on the fence about. I like it because it stands out but ... I don't know, maybe it's too big? Either way, I guess you could just alter the pattern slightly so it suits you more. I will also mention that this hasn't been tested and so there are probably mistakes; if you find any, let me know and I'll add in corrections! ^___^
 

Princess Bubblegum Crochet Crown
Using a 4mm hook and yellow yarn (I used 100% wool in an 8ply), chain 120.
Row 1: Chain one (this is your turning stitch) and then do a single stitch in each chain stitch (120 stitches)
Row 2, 3, 4: Repeat row 1
Row 5: Chain one (turning stitch). Do a single stitch in the next 53 stitches. Chain 3, treble in the same stitch you just did a single stitch in (you will have a single and a treble in the same stitch). Treble in the next 13 stitches. Chain 3, do a single stitch in the same stitch you just did a treble in. Single stitch along the rest of the row. This will give you a segment in the middle of the crown which is slightly raised. Tie off your yarn.
Row 6: Tie your yarn onto the raised treble segment, four stitches in. Make one chain stitch and then do a single stitch in eight stitches; this will give you another slightly smaller raised section.
Row 7 - 22: Chain 1, single stitch in each stitch (8 stitches) 
Row 22 - 26: Chain 1, treble in each stitch (8 stitches). You could do these rows in single stitch as well if you wanted to, but they will be covered by the round part of the crown and I find trebles faster and easier to do. Tie off your yarn.

Crochet a flat circle using single stitch; I did 12 rows and my circle has a diameter of about 7.5 cm.
Cut out a circle slightly smaller than your crochet one from light blue felt. I painted my felt circle with glitter mod podge to make it sparkle!
Sew the felt circle to the crochet circle, and the crochet circle to the end of the uppy bit of the crown (yup, that's a technical term).
Sew the two rectangle ends of the crown together so that it forms a ring. 

Tie on your end at the back of the crown, where your sewn join is. Single stitch around the edges of your entire crown. This will smooth out the blocky edges of the uppy bit and just generally make everything look nicer ^___^
 

My crown was looking a bit droopy, so I sewed a thin craft stick to the back of the uppy bit. I was worried that this would make it really uncomfortable, but I was wearing my crown around the house last night (as you do) and it was fine. I may sew a little cushion over the end of it anyway, just to make sure I don't finish Halloween with a mark on my head ~___^ Other options to fix this would be to make it shorter, or maybe use fabric starch.
 

I, as usual, have grand plans for this costume which probably won't get done. I was planning on making a visit to the craft store today to pick up some orange wool to make this amazing Science the Rat but last night I broke my toe. Well, it may only be fractured but I enjoy being overly dramatic. Still, it's meant that a lot of my plans for the week have to be delayed since walking is rather painful.


On the bright side, I will be sitting down a lot over the next couple of days which will be the perfect reason to get ahead in my assignments. Yay? ~___^

Are you crafting anything for Halloween this year? I have two more Halloween crafts on my list, but it looks like they'll have to wait until next week. I've had this zombie project in my head for *ages* so even though Halloween will offically be over, I'm still going to make them! I can't wait to show you ^___^

- Lisa xx

P.S. Does the gem part of the crown remind anyone else of the Stargate?