Monday, 24 March 2014

A pillbox hat for a night at the theatre


Hello! Do you like dressing up? I do! I love to wear costumes and pretty dresses but sometimes it just feels like there aren't enough reasons to really get out the glad rags, you know? So I really try to seize any opportunity to overdress! ~___^ Rebecca and I decided to go and see A Murder Is Announced last week and since it's a stage show, and set in the '50s, we went all out! ^___^


I wore a gorgeous halter-neck dress with a sweetheart neckline and the most fluffy skirt ever - which I promptly made even fluffier by adding my petticoat underneath. There is no such thing as a skirt that is too fluffy. We had decided we wanted to look like '50s ladies, so I added a set of vintage pearls, a vintage handbag, and a handmade pillbox hat and gloves. I also had a lot of fun trying out victory rolls! Rebecca did credit to the motto of "make do and mend" by making her skirt, and thrifting her top and clutch purse. I wish I had a better photo of her hairstyle too! She did a great job working her shorter hairstyle into victory rolls and twists ^___^ Since it was an evening show, Rebecca also wore a gorgeous vintage fur stole while I favoured vintage black velvet.


My pillbox hat was a lot easier to make than I thought it would be and really adds that little something something to the outfit, but unfortunately I didn't take any photos while I was making it! I did take some additional photos in better lighting though, as it is a little hard to see the full hat in the outfit photos above.
 

I made it from the lid from a plastic container, black satin, a big black and white ribbon (it's reversable), some black tulle, and a lot of hot glue!


Here is how to do it!
1. Cover the outside of the lid in black satin
2. Add a circle of black satin to the inside of the lid
3. Glue one end of the ribbon to the inside of the lid, wrap it around the lid in a nice-looking way, adding glue to twists to prevent movement
4. Secure the other end of the ribbon to the inside of the lid
5. Arrange the tulle over the lid, wrapping the gathered end into the inside of the lid
6. Fasten the tulle by adding glue to scraps of ribbon and pressing them over the tulle
7. Make a big bow with the rest of the ribbon and glue it to the back of the lid. I made this bow by making two circles with the ribbon, one smaller than the other, then wrapping a smaller length of ribbon around them both and gluing everything into position. I also glued the ties to the underside of the bow.
8. Glue on a small hair comb of the inside of the lid, underneath the bow.
 

The inside isn't very pretty looking,but it gives you more of an idea of what's going on under there ~___^ The hair comb I used doesn't secure the hat to my head perfectly, but it does add stability while I add in bobby pins and means that I don't need to hold it on my head while I'm fastening it on.


We were definitely the most overdressed people at the theatre, but it was so much fun! I think I've also overcome my fear of victory rolls now, which is very good since as I looked at so many photos of actual vintage hats in preparation for making this one I've got many many millinery plans, so I'll need to be getting better at the hairstyles to match! ~___^

- Lisa xx

Tuesday, 18 March 2014

Nerd Love


Hello! I have finished Scott's Valentine gift with plenty of time to spare, so I thought I'd show it to you in case you'd like to make one too! ^___^ I was inspired by this project on making a motivational mobile, but decided to mix it up a bit. I used the supplies that I already had on hand, and made it a bit more "us"; i.e. nerdy. ~___^


I've had a set of magnet letters sitting in the craft room for a while now, since they were displaced by my washi taped magnet alphabet but, like a true crafter, I kept them knowing they'd come in handy one day (that's kinda our motto, huh? ~___^). I spray painted them with Super Chrome (the best metallic spray paint!) and then used baker's twin to hang them.


The glasses were ones that we originally got from a 3D movie; we stashed them in our costume box and used them approximately zero times since I already have glasses and Scott didn't really have any costumes that needed them. So I popped out the lenses, pulled off the arms, and they became the perfect detail for this nerdy bit of wall art ^___^


If you look closely you may be able to see some faint lines between the letters. They didn't hang very well because they were weighted unevenly (due to the magnets) so I used some thin plastic (from a piece of packaging I took from the recycling) to join them together and ensure they wouldn't keep flipping around. I used hot glue to attach everything, and it worked a treat! ^___^


And here it is in action on the lounge room wall - I think it fits in quite nicely ^___^ Since the whole thing is made from light plastic and string, washi tape is strong enough to hold it up. And it looks pretty too ~___^


I've still got most of the set of magnetic letters left, so I'll have to think of another project to use some of them up. Unfortunately, I only have two of each letter to work with so I'm slightly limited for phrases I can make ... perhaps I'll just put them back on the fridge! ~___^

- Lisa xx

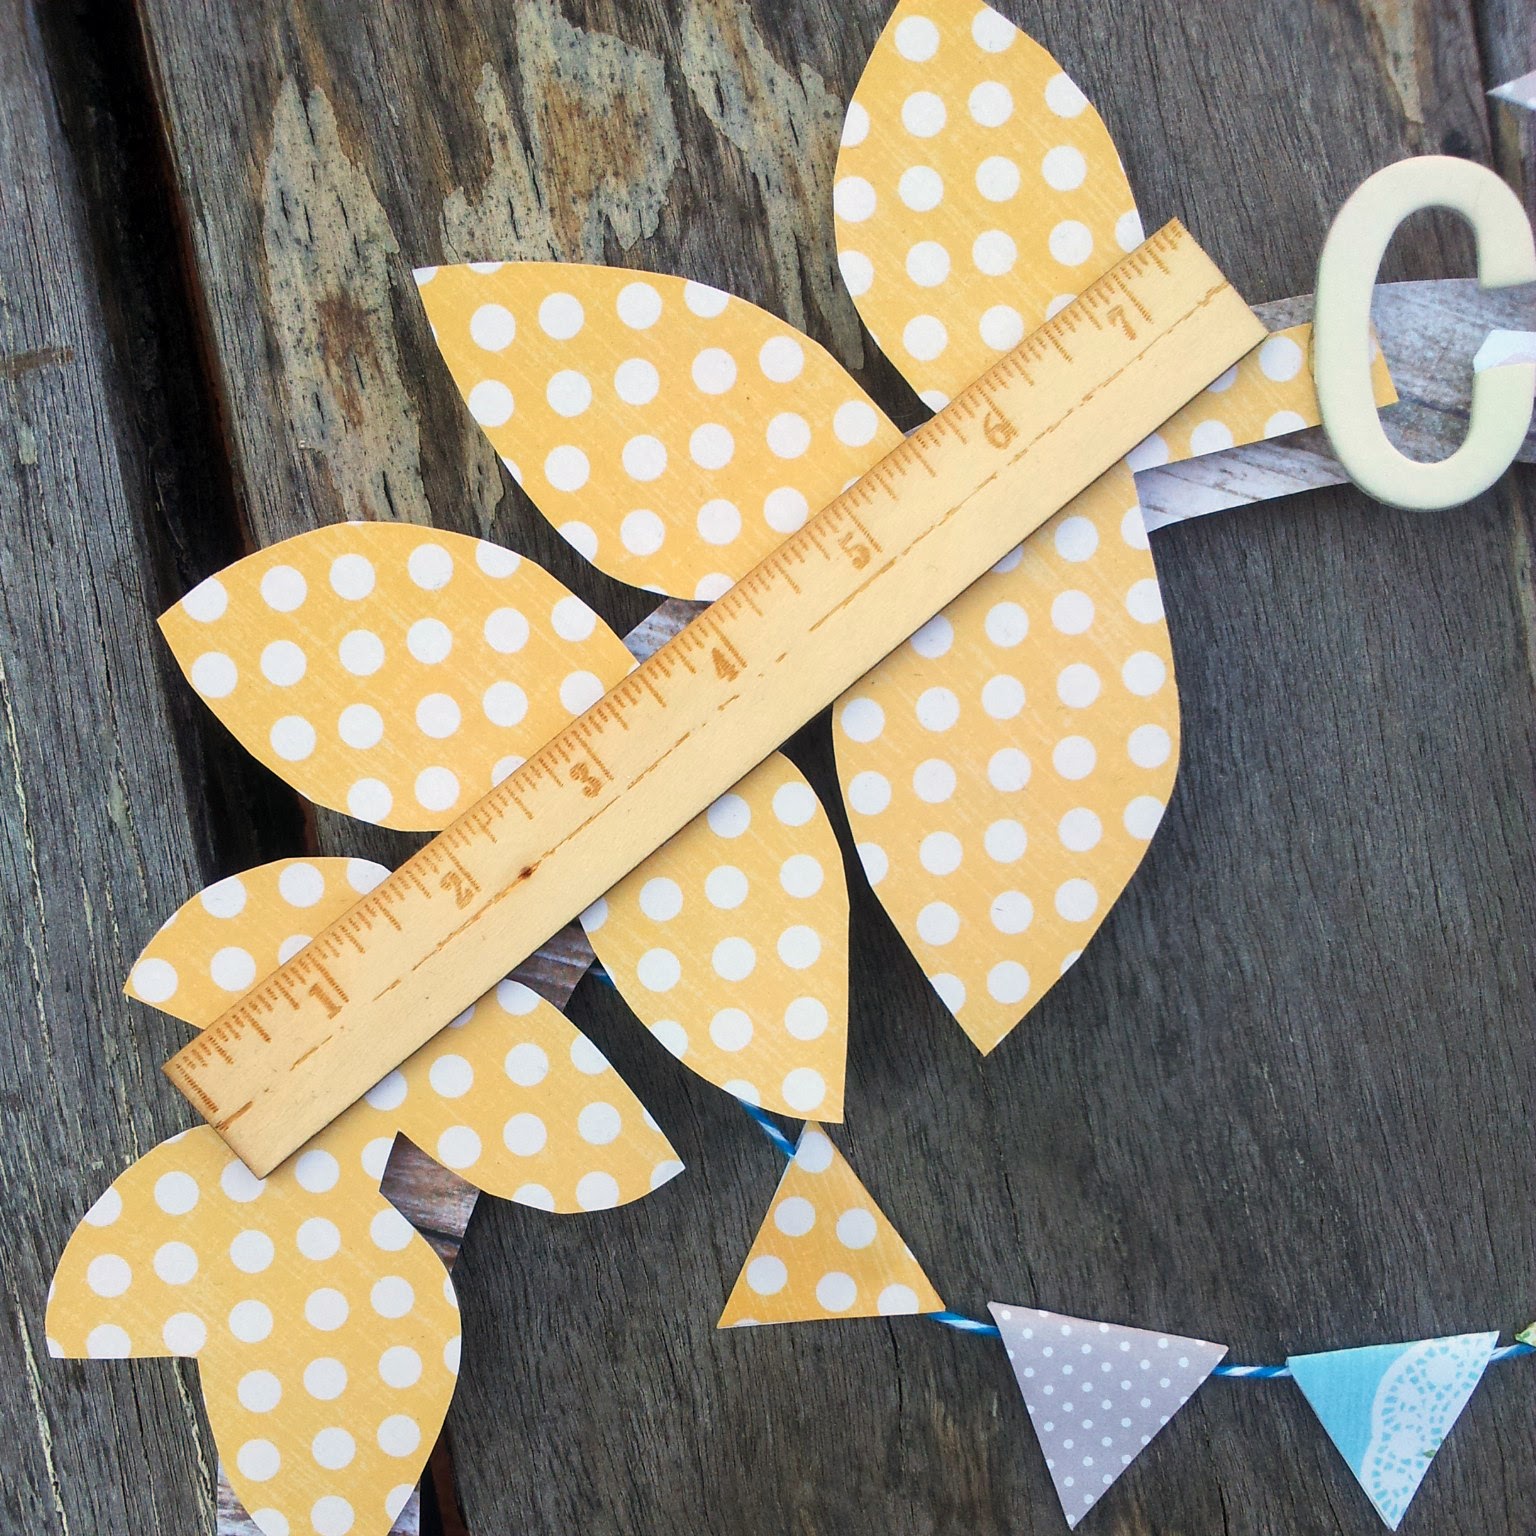
Crafty Forever wood + paper wreath


Hello! How are you today? This week is my third week of uni, and it's already been so busy! I'm glad that I'm only working one job this year, although it does mean that my crafting budget is a wee bit tight. Luckily, I've had many years in which I hoarded craft supplies to my little heart's content, so I have a lot of stash busting to do! ^___^
 

This wooden wreath is a Kaisercraft kit; the so-called Funky Wreath. Personally, I'm a little suspicious of anything that contains the word "funky", but it was pretty cute, so I made an exception ~___^
 

I started off by covering all the wooden pieces in scrapbooking paper, but when I put it together I felt that it looked way too busy. So I removed nine leaf pieces, and one large bird, to make a much more toned down wreath.
 

 I decided to make this a craft-themed wreath, because I'm incredibly predictable and have only, like, three real interests ~___^ The manequin flourish is another Kaisercraft product, as is the little ruler below; I wish that I had of had more crafty things to add to the wreath but my other embellishments didn't really work with the wooden ones. At least it has stopped me from going too OTT with flourishes though (this has definitely happened before!).


The letters are cardboard, and ones that I've had for a very long time so I have no idea where I got them from. They were originally green and blue striped and pink and purple argyle, and didn't go at all with the colours I was using so I spray painted them white instead.
 

The tiny bunting is probably my favourite part of the wreath; it's just so cute and little! ^___^ Bunting is super easy to make too - I just cut out diamond shapes from some scraps of paper and then glued them over a piece of bakers' string that I got from Riot.


I used hot glue to stick everything together, and that was that! I'm really glad my craftyness has come back, but of course it's during university when I can't craft as much! Well, absence makes the heart grow fonder, and all that, I guess ~___^
 

I've got a few more projects in the pipeline, so I will have something pretty to show you next week, but for now, it's back to the ol' study desk for me!

- Lisa xx

Monday, 10 March 2014

Fruit brooches and an eggplant outfit


Hello! I feel like I've had fruit on the brain lately! I have been craving smoothies constantly, plus I've been seeing so many awesome fruity crafts around the place!


Case in point, I used a pattern from Repeat Crafter Me to make these adorable little crochet fruit coasters. Although, since I already have a set of coasters I am making these into brooches instead. I can never have enough brooches! ^___^
 

I think the strawberry is probably my favourite, but I'm looking forward to wearing all of these! I can also highly recommend the patterns; they are very easy to follow and very cute! ^___^
 

Another thing that caused me to have fruit on the brain was an invite to a "fruit salad" party. Apparently aubergines are technically a fruit, so I decided to to go as an eggplant, because, you know, why not? ~___^ 
 

I didn't have to buy a single thing for this outfit, which is a definite plus! I didn't have a purple bag to bring though, so I used this vintage green bag, which was possibly crocheted by my grandmother. It's definitely handmade, but I'm just not sure by whom! ^___^
 

Of course, just dressing in purple does not an aubergine make, so I also made myself a little fascinator and also an eggplant buddy in case people didn't know what I was meant to be.
 

They were both very easy to make and I used felt for both. For the fascinator, I cut out two shapes from felt, plus a slightly smaller piece from thin cardboard. I stiched the felt around the cardboard with a running stitch. For the stem, I rolled up a piece of felt, added a few stitches across the bottom so it wouldn't unravel and then sewed it to the main hat piece. I didn't add any stitches to the top or sides because I liked the way it looked when slightly open.
 

For my aubergine brooch, I just cut the three shapes from felt and then stitched them together. I used a running stitch here too as I thought it would complement the fascinator nicely ^___^
 

And I gave him a little face because, well, everything is cuter with a wide-eyed smile! ^___^


I loosely stitched a hair comb to the underside of the fascinator so that it would stay on my head which, I am pleased to report, worked wonderfully. Giving the stitches a bit of flex is a good way to ensure your fascinator will be able to adjust around the comb without it breaking! I have ruined many a haircomb with handmade fascinators, but I am apparently starting to learn my lesson now ~___^


I'm not over the fruit craze yet though; I'm just getting started! I think I'll do something with pineapples next ...

- Lisa xx 

Friday, 28 February 2014

Cat, Rabbit, and Bear recycled planters


Cheap crafts are the best, right? I really love it when I see or think of a project and I don't have to make a list of things to buy for it, so when I saw these kitty planters made from plastic bottles, I knew I was going to have to give it a go!


To make these I used three 2-litre soft drink bottles, scissors, chalk-board spray paint, and chalk. I also made templates for the designs using A4 paper and a pen, which I then transferred onto the bottles using a permanent marker.


The templates are very easy to make - just draw a horizontal line across your piece of paper and then add ear shapes! For the cat I drew triangles, for the rabbit I traced around the handles of my scissors, and for the bear I went around the bottom of a jar of nail polish.


https://drive.google.com/file/d/0B_MO0cK8Qg7mZGFGUEJubzgyazA/edit?usp=sharing


 But if you don't want to do that, you don't have to! I've made a copy of the templates I used and uploaded it to Google Drive for you ^___^ Just click on the picture above to go and download the template and, as always, let me know if you have any troubles!


Once you've got your templates, sticky tape them to your bottles and trace around them with a marker. Don't worry if you make any mistakes because they will be covered up by the spray paint ^___^ I used scissors to cut the bottles into the right shapes; I did try to use a scalpel but found that I had much better control with the scissors. If you're going to use these for planters, make sure you add some little holes in the base for drainage.


Then give your bottles a coat of chalk-board spray paint, wait for them to dry, prime them with chalk (that's just rubbing chalk all over it, and then wiping it off again), and then you can draw on the faces! Yay! ^___^
 

I love using chalk-board paint, because I adore the old school look it has, and it also makes adding the faces so much less stressful! Oh, it's not perfect? Rub it off and try again! ^___^
 

Chalk-board gives you a lot of possibilites; you could write on labels if you wanted to remember what you'd planted in each one, for example, or add names if you were giving these as gifts.


You could also change up what animals your planters are - the cat could also be a dog, and the bear could also be a mouse ... but I must admit I'm stumped on what else the rabbit could be! ^___^
 

My little bear has a terrible skin condition; poor bear! This is because when I first sprayed the chalk-board paint, a lot of gunk came out! I'd recommend spraying a bit of the paint on a scrap piece of paper or something first, so your animals can be bump-free! ~___^
 

I hope you like him anyway, I still think he's rather cute! ^___^
 

I think these would be perfect for a little kitchen window sill herb garden. What would you use them for?

- Lisa xx

P.S. I'm back to uni on Monday, so I'll be going back to a weekly posting schedule to leave more time for my studies. But you can always follow me on Instagram to see what I'm up to day by day ^___^

Friday, 21 February 2014

the crochet black rose flower crown


Hello! How are you going? I've only got a week until I go back to uni (for my final year! Eeek!) and unfortunately I've fallen into a little bit of a crafting rut! You know when you want to craft, but nothing really seems right? Usually when this hits, I try to tidy up my craft storage room, but since it's still extremely summery here, that room is boiling hot and therefore entirely unpleasant to be in. Yuck! So I went to Plan B: browsing Pinterest. This can be a dangerous plan as it often doesn't actually lead to any crafting, but this time I was lucky! I found a link to this tutorial for crocheting roses and, remembering my vague, unfulfilled desire for a black flower crown, got to hooking!


I actually totally love how it turned out, and the pattern for the roses was a very simple one to follow so it was easy to make as well ^___^


I made five roses, and I tied them onto an old black headband that I already had. Since I also already had the wool (and it is actually 100% wool this time, which is a departure from my regular acrylic!), this project cost me absolutely nothing to make. Huzzah!

I've also been paying close attention to fashion blogs lately, in an attempt to imitate their effortless posing. I think I've still got a long way to go! But it is good to have some ideas of what to do with one's arms instead of getting in front of the camera and having no clue of what to do. It's certainly a lot easier with a photographer as well; one can only do so much with selfies! ~___^


Also, having a photographer makes it a lot easier to get close up shots of things on one's head without having to be a contortionist! ~___^ You can see more of the rose detail in the photo below; although using a lighter colour would show up the details even more, I'm pleased with how they look in black.


And that's that project done, so I guess it's back to the drawing board for me! I do have a big pile of mending to do ... but what do you think the odds are of that happening? ~___^
- Lisa xx