Sunday, 16 June 2013

Circle skirt from a vintage tablecloth and a chunky crochet cowl


Hey! Since I have been trying to be a good student all semester (i.e. more study, less crafting and thrifting) I was having major cravings for a good op-shop trip, so the other weekend I dragged Bec with me to a suburb full of both thrifting opportunities and people with a high socioeconomic status. Good combo! There I found an awesome vintage, oval tablecloth with an acorn and oak leaf motif. There was really no question that it was coming home with me, especially since it was only $4, but I wasn't sure what I would do with it because all my tables are squares.


Isn't it pretty? ^_^
 

So, with the forced assistance of Rebecca, I cut a circle out of the middle of it. Gasp! ~_^ I think you can guess where this is going ... we used the cut out circle to make material for a waistband, and added an exposed vintage metal zip and now ...

Circle skirt! Yay! ^_^
 

I adore how it turned out, it's so lovely and soft and since it's homemade it fits perfectly ^_^


And, it's got a lot of spinning potential! When spring comes along, I think this skirt will be getting *a lot* of wear. But in the cold, rainy meantime, some stockings and some cute crochet accessories will make it suitable for winter.


Speaking of which, check out my new favourite cowl (also, my first and only cowl) ~_^

I made this using Moda Vera Bold, which is a very chunky acrylic yarn, and an 11.5mm crochet hook. Since both the yarn and the hook were fairly large, I made this in a couple of hours; and a fair bit of that time was spent frogging as I changed my mind to how wide I wanted it to be and which stitch to use ~_^

I ended up going for a basic treble repeat pattern and made an effort to crochet rather loosely so that the yarn could show off its squishiness and awesome colours ^_^
 

It has been *so cold* here lately, so I think more scarves and cowls are required! Watch this space! ~_^

What have you been making? Is it lovely and sunny where you are?

- Lisa x

Friday, 7 June 2013

OH MY GLOB: Lumpy Space Princess plushie with free pattern


I have wanted to make a Lumpy Space Princess plushie for ages - and now I finally have! Yay!!


I made her from some purple fleece that I had leftover from Scott's baneling plushie, and also some yellow and black felt.
 

She was very easy to make, and she has floppy little arms that you can pose! 


 And I made a pattern so you can make a LSP too! It's a really, really basic pattern, but it did turn out really well so I hope you like it anyway ^_^ The .pdf is hosted on Google docs and so if you click the image above, it should take you there! (Let me know in the comments if it doesn't work!)


I don't really like turning plushie pieces inside out because I find that I never get the crisp lines I'm after, so I made LSP in what I *think* is called gingerbread style? It is quite possible that I'm just making that up, but I seem to remember my mum making some dolls this way when I was a child. Basically it just means that you sew your plushie together with the wrong sides in, and then trim the seam allowance afterwards. If anyone knows the actual term for this, I'd love to hear it!

Anyway, here's how to make your own Lumpy Space Princess plushie:

1. Print out the pattern on to A4 paper - it should take up the entire page.
2. Cut out your fabric shapes, and remember to add a pretty wide seam allowance to the purple fleece. With her arms, I folded the fabric over and placed one of the arm edges along the fold.
3. Sew on LSP's facial features.
4. Pin the arms together, wrong sides in. Sew around the edges that aren't on the fold.
4. Trim off the excess seam allowance, and then sew them on to LSP's front. Remember not to stuff them! This makes them floppy enough so that she can cross them ^_^
5. Pin LSP's front and back together wrong sides in and sew her up - remembering to leave a small gap so that you can stuff her!
6. Stuff, stuff, stuff.
7. Sew up the gap, and trim the seam allowance all around the edge.
8. She's done! Now give her a hug, take a selfie, and prepare to become best buds ~_^


We're friends now. We're having soft tacos later.

Do you like her? I hope you do! 

- Lisa x

Saturday, 1 June 2013

Ninja Time hoop, a flamingo WIP, and a birthday gift for Pip


Hey! Oh my gosh - how is it possible for a week to go by this fast?! I have my three final assignments due for uni next week! Eek!

But, let's procrastinate for a while and I'll show you what's been happening craftwise ... ~_^


Ninja Time embroidery hoop! Yay! This is another project for the Summer Nerd Games, inspired by Adventure Time. Bec made an awesome Pirate Time hoop, which you can also see on the thread ^_^


She's made almost entirely out of felt, but I did use metallic thread to make her shuriken since they are so tiny!
 

You may remember that a while ago I made a skirt out of the background fabric - I love it when I find a use for offcuts! And even though it's quite busy, I think it's perfect for some ninja-style hijinks! ~_^
 

I also changed the original Adventure Time sword into a katana ^_^
I wanted this project to be quick and easy, so while it's not my best work (I find making felt look polished and neat very tricky!) I am happy with how it turned out ^_^ And now I have another hoop for my wall!


I've also been working on this flamingo cross-stitch. It's slow going - I am *not* a skilled cross-stitcher, but I hope that I'll get it finished sometime this month.

I can't wait to show you the entire thing though; I think it's going to turn out rather sweet! ^_^


Now, this project is actually from the start of May (!) but I couldn't share it with you until it arrived safely at Pip's house for her birthday! And then I got lazy and just didn't do anything for an entire month ... ~_^

Bec and I conspired to make Pip a '50s style dress, using a fabric that she had mentioned liking; the fabric is of fancy French ladies and it's really lovely ^_^ I've got to confess - I was so pleased with how sneaky we were. Pip had no idea! Yay! Birthday surprises are the best! ^_^

Since Bec is the best at making dresses, I didn't do much apart from cut things out and follow her instructions ~_^ So I also made a little poodle brooch to go with the dress ^_^ I just used shrinky-dinks and a brooch baking, and it turned out really cute! I used some Eiffel tower washi tape to attach it to, and decorate, a little piece of card-stock.

Here's the whole gift, ready to be sent off! I also made the swing tag for the dress - which is possibly the biggest swing tag ever ~_^ The hair bow is also made with French-inspired fabric; I picked this up at a little market, but unfortunately forgot to note down the name of the lady who made it. Oops! >_<


And here's Pip in her dress! Yay! Doesn't she look wonderful?


  And that's it for me today! Back to the books ... I can't wait until study week; I'm going to craft my little heart out! ^_^

- Lisa xx

Sunday, 26 May 2013

Girls just wanna have crafts


Hello! I have something to show you ^_^


Now, I have no idea why it's insisting on being side-ways (>_<) but *anyway* this is proof that I finally learnt how to follow a charted crochet pattern. Huzzah! As you can tell (hopefully), it's the Wonder Woman logo. Since WW is awesome and nerdy it was perfect to enter as my first project for the Summer Nerd Games ^_^
 

Once I was done with the charted section, I added on a few plain rows so that I could make it into a case for my iPad. Now I can take it to uni without worrying about it getting scratched up in my handbag ^_^
 

I've got a couple more projects planned, but I haven't made much progress on them as today Bec, Catherine, and I went to the Quilt and Craft Fair ^_^

I didn't make many photos, but I had to share with you these awesome Weasley-esque tea cozies - aren't they great? ^_^

We also saw some great quilts but since my phone isn't great for really wide shots, I stayed up close and personal ~_^
 

I love the colours on this one ...
 

... we suspect this one is made from clothing off-cuts (clever *and* thrifty!) ...
 

... and this one was a great mix of all kinds of vintage fabrics! ^_^

And, of course, I picked up a couple of things for myself as well ^_^


Six new washi tapes (nooo, I don't have a problem; why do you ask?), a cute vintage sewing machine brooch, a maneki-neko fabric badge, a book on needle-felting, and a heap of business card sized pictures. I got ten different vintage ladies in one set, and the other two sets are steam-punk style illustrations. There were really too many to photograph all of them though, so I just included three of my favourites ^_^


I can't wait to start creating with my new things! Any suggestions on what I should make? ^_^
What did you do this weekend? I hope you had fun!

- Lisa x

Saturday, 18 May 2013

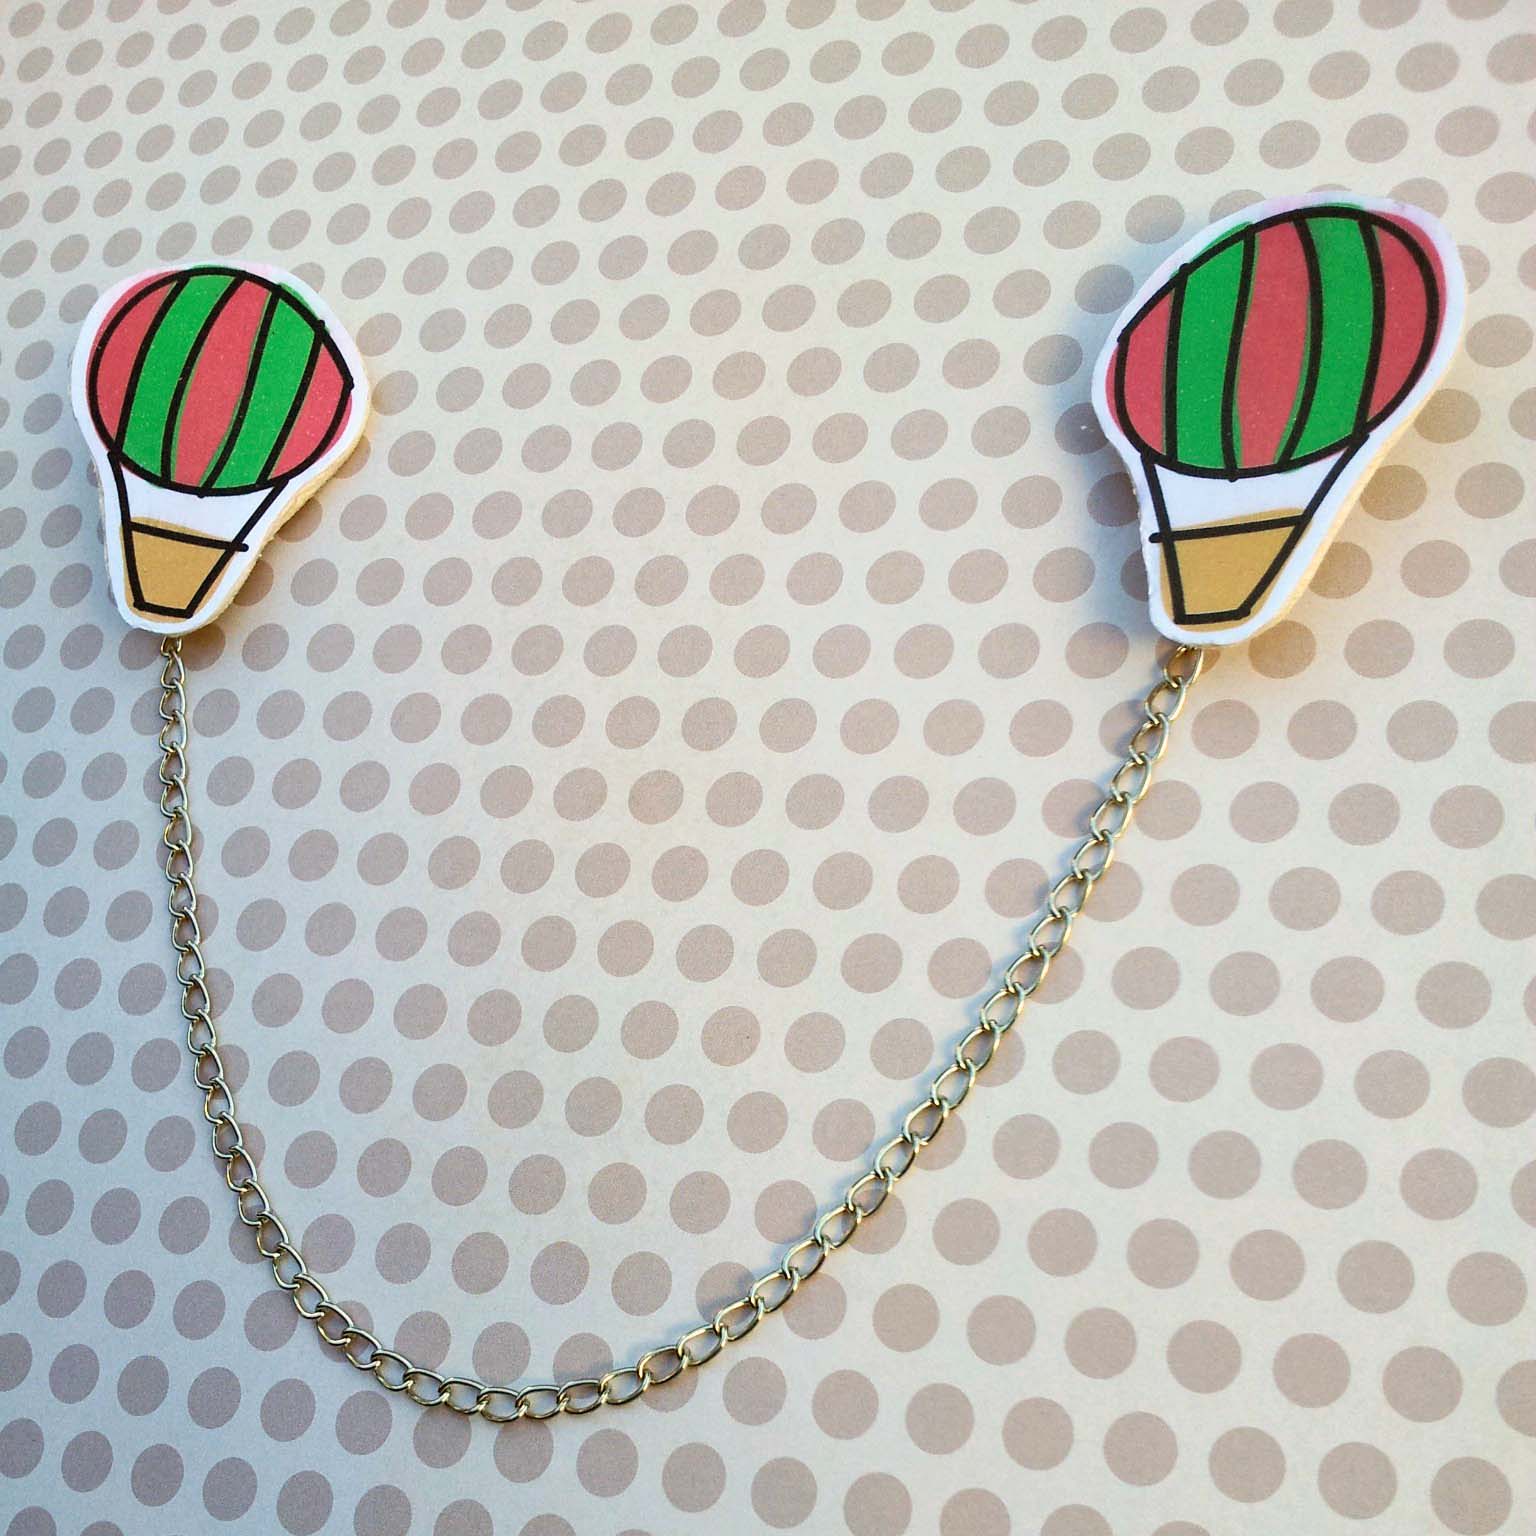
Hot air balloon sweater clips


I can't even tell you how happy I am it's the weekend! I've got a lot of sleeping in and crafting planned - yay! Are you having a great day? I hope you are ^_^ 


I really like the look of sweater clips, but haven't had much luck finding any around here. Luckily, they're really easy to make! I made this pair with things from my stash, and they were really easy ^_^
 

 If you'd like to make your own, you can download the files with the large and smaller sizes of these hot air balloon designs here and here.

I've provided three sizes of this hot air balloon design, in three colourways. For the sweater clips I used the smallest size. The medium size is perfect for badges, and I'm thinking of making some bunting with the largest size ^_^

Once you've printed out the designs, cut them out, and then glue them onto a sheet of thin balsa wood. I tried using mod podge first up, but it didn't work that well, so I recommend PVA or some other type of craft glue instead.
 

Cut around your balsa wood with a pair of scissors, or a scalpel. I personally found the scissors easier, but Scott thinks scalpels are superior. Then sand down the edges with some fine sandpaper. If you don't have any, you can use an old nail file ^_^ Then add another coat of glue around the edges to ensure everything stays well stuck down, and a coat of mod podge on top for protection.


Then you can glue on a badge back. To make sweater clips, I made two of the smallest size hot air balloon, and then just threaded some chain onto the badge back. If you glue your badge back on so that the hinge is at the bottom, your chain will stay in place nicely ^_^

And that's it! Easy peasy huh? I hope you like them!

Next week, I'll show you some things I'm making for the Summer Nerd Games on Craftster. Bec, Pip, and I have made a team dedicated to crafting things inspired by our favourite ladies in geekdom; it's going to be heaps of fun! ^_^ Do you have a favourite nerdy lady? Scott thinks Black Widow is the best, but I don't think Hermione can be surpassed ~_^

- Lisa x

Monday, 13 May 2013

Instgram Photo Canvases


It is very cold and cloudy here. It's kinda nice because I can wear layers and stockings (which I love!) and use all my crochet blankets, but it kinda sucks for taking photos. First world blogger problems, right? ~_^


Anyway, here's what I made as Mother's Day gifts ^_^ I'm only showing you the ones I made for my Nana Alma and Scott's Nana Mary though because our mums wanted photos of us and I figure you get enough photos of my face on here without taking photos of photos of my face ~_^
 

I made these using some photos I had taken using Instagram, and they were both quick and easy to make. My favourite kind of craft ^_^

(And also the images have more definition in real life. I blame the clouds for this. I don't know how, but somehow it was them ~_^)

I resized my photos to 6 inches square, and then printed them off onto light card. Then, I cut them out, making them just an teeny bit smaller than exactly 6x6. That way, when I glued them onto my 6x6 inch canvas, the card wasn't larger than the front of the canvas. 

When the glue was dry, I used a sponge brush to paint the sides of the canvas. I also painted on the front a bit, to make a messy kinda border.
 

I think maybe if I try this again (which I probably will as I tend to buy cheap canvases in bulk) I will mod-podge the whole thing as that tends to make the image a little darker and the colours slightly more vibrant, which I like ^_^

Possibly if I really like how it looks, I will secretly bring mod-podge next time I go visiting and sneakily paint the canvases that I assume will be hanging in pride of place in my mother's/nana's/mother-in-law's/nana-in-law's home. ~_^

Did you have a nice Mother's Day? Are you addicted to Instragram? Are you procrastinating on your university assignments?

That last one may be just me ... ~_^

- Lisa x

Saturday, 4 May 2013

Baneling plushie


Today is Scott's birthday and, unlike other years, this time he actually told me what he wanted! o_0 He was looking through some StarCraft forums when he saw a picture of a plushie baneling - since Zerg is his favourite team to play *and* a pattern was available, it was really a no-brainer!


The pattern is very good - I can recommend buying it, especially if you're like me and don't really have a head for making soft toys. My brain just kinda shorts out when it's trying to figure how to make things 3D. There was a slight issue with a claw pattern, as the purple shape didn't really fit onto the brown shape, but since it was bigger, it was easy enough to cut down to the correct size.
 

It was also pretty quick to make - I started Friday night after dinner, and finished it off this morning. The basic shapes were sewn using my machine, and then I handstitched the shapes together and the purple detail that covers up the neck joins and the facial details.


Awww, look at that face! Who could resist making this little fella?
 

I'm now hoping that the same designer will make patterns available for some of the other Zerg units - since Scott owns pretty much everything that could possibly be related to Star Wars now, it might be good to start on a new geekdom!


And, just for fun, here's the baneling wearing a fancy hat. Spiffing!


We haven't decided on a name yet; Scott wants something simple like Bob or Squishy where I fancy the more, let's say, eleborate names like Balthazar McBlastybutt. The pattern's name is Mr. Doomsfield. What do you think, any name suggestions for the newest member of our family?

- Lisa x