Showing posts with label felt. Show all posts

Saturday, 27 February 2016

Felt and clay cacti


Hello! I have mostly been working on granny squares lately (in light grey, dark grey, and black; Death Stars do not have the most inspiring colour scheme!) but I did finally take some photos of the cacti that I made at the last crafternoon my friends and I had. Huzzah!


 We used a tutorial from A Beautiful Mess for the felt cacti and a tutorial from Darby Smart for the clay.


Both tutorials were very simple to follow, although unfortunately A Beautiful Mess didn't include any patterns for their cacti. We drew our own, but patterns would have been nice to have!


Gemma, Catherine, Miriam, and I made clay cacti as well as felt but we all ended up taking our projects home to finish them! I gave mine two coats of Americana Multi-Surface Satin paint (which I am quite impressed with so far!) and then added the spikes by dipping a rectangular brush in white paint and gently pressing it to the surface of the cacti.
 

We did managed to finish quite a lovely contingent of felt cacti on the day, and Gemma, Boulder, and Miriam also sent me some pictures of their finished projects ^___^


Gemma ended up making not one, not two, but three pots of cacti! I love the purple flower on her little round clay cactus ^___^


Boulder (yes, I know her from Roller Derby, why do you ask? ~___^) went seriously hardcore and made a little companion to go with her tall cactus that has so. many. leaves. Look at them all! It looks so amazing though, so her hard work was obviously worth it.


And Miriam made these gorgeous little cacti gardens with pretty button flowers and lots of springy grass. I love how she made her tall cacti with different colours of felt; it gives such a cool effect!

I'm hoping to finish the Death Star blanket soon (#eternaloptimist), but my pals and I will be crafternooning again next week so I'll show you that results from that sooner! 

- Lisa xx

Tuesday, 30 December 2014

Needle felted Piranha Plant and other gifts


Hello! It's time to show you some more of the Christmas gifts I made! I have a couple more to go, but they haven't been gifted yet (I believe in a very extended holiday period) so I'll show you those next time ^___^


For Scott I made this needle-felted Piranha Plant, of Super Mario fame. To make this, I used a very similar technique from when I made Oscar the Grouch. I used my scalpel to cut out a wedge from a large styrofoam ball which was to become the ... head (???) of the plant and then covered the ball in sheets of red felt. I needed felted the felt together where it overlapped to create a tight casing of felt around the ball. 
 

I cut out small triangles of white felt and used my needle tool to attach them to the mouth area. I also used my needle tool to ensure the bottom of the mouth was more sharply defined.
 

I rolled wool fibre into loose sausage shapes and felted them onto the ball to become the lips. I didn't felt the tops of the lips much, but was sure to felt the edges to create a more rounded shape.
 

To create the spots, I rolled fibre into loose balls and then felted them on. The balls are slightly 3D because I really wanted them to have solid colour so they are made up of a few layers of fibre each.
 

For the stem I used regular sheets of felt. I cut out a long strip and wound it around a wooden chopstick, needle felting where the sheet overlapped itself. I used a scalpel to cut a hole in the bottom of the head of the plant and inserted the stem. I needle felted where the stem met the head so that the felt wouldn't come loose and expose the chopstick.


The leaves were cut from the same sheet of green felt and needle felted only at the bases onto the stem. This gives them a nice curved shape, which I think helps make them look more leafy.


Once the plant was done, I hot glued the bottom of the stem into a paper mache flower pot that I had painted green. Then I stuffed the pot with variegated green chunky wool; this stabilised the plant so it doesn't wobble around but it's also very light. Scott really liked it and my parents thought that I had brought it. Two lovely compliments for any crafter! ^___^


My dad, Kevin, is pretty difficult to craft for since he mostly likes trees (I really should just stick to buying him a new tree every year). However, he does also like camping and happened to mention that soap on a rope would be useful for washing in the desert.


I used the instructions in "A Little Bit Crafty" by Frankie Magazine for these but they didn't turn out as well as I had hoped; they are a little bit bumpy and a little bit cracked.
 

If I were to make them again, I would ensure that my soap was in much smaller pieces before attempting to shape them into balls. I think the chunky flakes that I started off with didn't assist with the making of smooth soaps.
 

I braided cotton string to use as the ropes, which worked out well because all other actual ropes that I had turned out to be way too big. So, another suggestion: either make bigger soaps, or buy smaller ropes! 
 

For my Nana Alma and my mum, Anne, I made some lavender sachets using vintage look (but not actual vintage) handkerchiefs, ribbon, and lavender (bet you guessed that last bit, huh).
 

To make these, I cut the handkerchiefs in half, folded them in half again, and then sewed around three of the edges. You could hand sew these, but I used a sewing machine because it is so much faster (and I'm pretty lazy!).
 

Then I filled them with lavender and tied them closed with a length of ribbon. Easy peasy!


I also made these ink smudging tools for Anne; they are apparently used in scrap booking. I started off with two lengths of pine, one wide and flat and the other not so wide and not so flat, which I glued together.


I used Kevin's bench press to cut them into smaller segments and then stained them with wood varnish. I originally tried to use a saw and failed miserably. Power tools, people! They rock. I used stick on velcro dots cut in half to attach lengths of felt on and around each segment. They were a little time consuming, but once I had a little production line going it wasn't too bad.


My next post won't be until next year ... which starts in one day! OMG! It's time to start thinking about a whole 'nother years worth of crafts to create ... but, until then, Happy New Year and thanks for sticking with this little blog of mine for another 12 months. I hope we can do it all again next year!

Catch you on the flip side!

- Lisa xx

Tuesday, 23 December 2014

Perler bead sushi magnets and a felt pug hoop


Hello! I know I said you probably wouldn't hear from me this week but, well, I guess I lied! I caught up with a couple of my friends to exchange early Christmas gifts, so I figured I could tell you about the presents I crafted for them now ^___^


For Philip I made these cute little sushi magnets! ^___^ I used a cross stitch pattern from weelittlestitches for these, but made them from perler beads instead of fabric and thread.


I wasn't going to put faces on these, but they really looked like they needed something so ... googly eyes to the rescue! I think it gives them a really funny expression ^___^
 

I used E6000 to attach the eyes and the magnets and they look good enough to eat ~___^ (Only, you know. Don't).
 

Using a pattern from Urban Threads, I made this felt pug hoop for Phillipa. I think it turned out really cute! Instead of stitching all of the lines, I cut out shapes from felt and stitched them down. I feel like this is a great way to add colour without having to spend an eternity doing fill stitches.
 

Everything is stitched down with running stitch, and the roses are 3D which I thought looked really cool ^___^


I feel like the roses could have done with a few more petals, but I didn't want to make them *too* bulky.
 

I think this pug's silly little face is my favourite part ^___^ The paws are attached with only one stitch so they can be lifted up; I did the same with the tail. I'm not sure why, but having movable parts to an embroidery hoop is so appealing to me. I added some little hearts to the banner because I wasn't sure about the phrase that the pattern suggested ("True Love") but also didn't want to leave it blank.
 

This photo shows the most accurate colour of the background fabric; it is definitely purple even though it looks blue in most of the pictures I took! The back is finished off with blue felt and the same technique I always use. Boring, yes, but also neat which is what I was going for.


Now, I must continue crafting as I have, once again, left my dad's gift until the last minute. Fingers crossed I get it done!

Best wishes to everyone for whichever holiday you celebrate! I hope you have a lovely one ^___^

- Lisa xx

Tuesday, 21 January 2014

Needle-felted Oscar the Grouch


Hello! A while ago on Instagram I mentioned that Scott and I have been married now for four years! Omg, right? The traditional gifts for the fourth anniversary include electricial appliances, fruit, flowers, and linen; nothing that really spoke to me.


And then I found this mug at Typo. First of all, it's adorable. Secondly, it reminded me of Scott's favourite Muppet.
 

Oscar the Grouch! Yay! ^___^


He was so much fun to make, and relatively easy too! He is 25cm tall (while in the mug) and his head is 33cm in circumference; it gives him a more cartoonish look to have a big head I think! ^___^

To make him I used one styrofoam ball, one styrofoam cone, felt in green, black, white, red, and brown, fiber in green and brown, one pipecleaner, a needle felting tool, scissors, a hot glue gun, a scalpel, and a plastic spoon.

The first thing I did was to use the scalpel to cut the mouth shape out of the styrofoam ball and to cut the bottom and top off the styrofoam cone so that the base was small enough to fit into the mug and the top was flat to rest the head on.


I did the head first, and made quite a few mistakes along the way. Primarily, I used hot glue to attach green felt to the ball as a base for the fiber. Don't do this! If I had have actually thought this through, I would have realised that hot glue sets hard enough to break needles! >___< Because I did that, I had to use hot glue to attach everything on the head. It still looks ok, but I would have liked to have needle felted his facial features and the hot glue meant I couldn't. Instead, I just cut everything out from felt and glued it onto the head. His monobrow is fiber glued to a piece of felt, as I thought by itself it would be slightly patchy. I'm sure that wouldn't have been a problem if I could have needle felted it though.

However, I'd learnt my lesson when it came to the body and arms! You can not needle felt fiber directly onto styrofoam, so I still needed a felt base. I wrapped felt around the cone and needle felted the fabric that overlapped. It's not actually attached to the styrofoam in any way, just tightly wrapped and felted around it. Then I needle felted on the fiber. Although local big box craft store had labelled this fiber as "for needle felting", I think it might actually be for wet felting. It doesn't have the same kind of fine consistancy that my other fibers have but, in this instance, it wasn't a problem. If you wanted to make something look really neat you'd be having trouble, but I thought it was good for Oscar to look a bit messy ^___^


As for the arms, I cut out long strips of felt, needle felted the fiber onto them, and then felted them closed with a small section of pipecleaner inside to make them slightly poseable. If you do this, keep in mind that the wire in the pipecleaner could break your needles, so ensure you only felt around it. I made sure the pipecleaners were shorter than the arms so that I could felt the tops of the arms to the body.
 

Lastly, I tried to use hot glue to attach the head to the body but it was much too wobbly, and I thought the weight of the head would pull off the fibers from the body. I cut the handle off a plastic spoon and, after using my scalpel to cut through the fiber and felt, inserted it into both the head and the body. It worked really well - that head isn't going anywhere! ~___^


And that's that! ^___^ I'm pleased with how he turned out, but now I want to give proper needle felting a go! Have you done any needle felting? What did you make? I think I better start with something easy, so I'd love your suggestions! ^___^

- Lisa xx

Saturday, 7 September 2013

Shrinky dink and felt brooches


Hello! I've been meaning to make a few new brooches for a while, as since I've been doing Novelty Brooch Friday on Instragram, I've been going through my collection at a rapid rate! I *may* have gone slightly overboard today though ... Really I just wanted to procrastinate on my homework for a bit longer! ~__^


First up is this little black poodle! It's the twin to the one I made for Pip a while ago, and I finally got around to finishing it off. It's made from shrinky dinks and turned out quite well. It does have a little lump on its chest area - I have difficulty getting shrinky drinks perfectly flat! Is there a trick to it? Or it is just luck?
 

Anyway, I think I'd like to make some other puppies as well. I'd love a little dachshund brooch! ^__^
 

I have a slightly weird love for ampersands. I can't explain it, I just think they're great ^__^
 

 I've wanted some puncuation jewellery for ages, so I'm really pleased with this! Like the poodle, this ampersand is also made from shrinky dinks ^__^ I think an interrobang will have to be on the to do list next ...


 This brooch is made from some of the leftover flowers from my Frida Kahlo head band. It turned out better than I thought it would! ^__^


 All I did to make this was glue the flowers onto a circle of green felt. I added a few little leaves to balance out all the warm colours and to fill up a couple of gaps ^__^


Anything anatomical is always my favourite, and I've wanted a heart brooch for ages ^__^
 

I used white shrink dinks for this brooch; the white sheets I have are slightly transparent when unbaked so I placed my reference image underneath and traced it. I'm not very good at drawing freehand, so that made it a lot easier! ^__^


I used the white shrinky dinks for this one too (I feel like I've written "shrinky dinks" in this post so much that it's beginning to lose meaning ...)
 

I used coloured permanent markers to colour this a semi geometric pattern. Up close, you can see what an awful colour-in-ier I am. If you look at that previous sentence up close, you can also see how badly I butcher the english language ~__^
 

It looks fine from a distance though! ^__^


Another ampersand, another shrinky dink project! Are you sensing a theme here?
 

I left this one plain as I don't have many white badges, and neutrals always come in handy ^__^


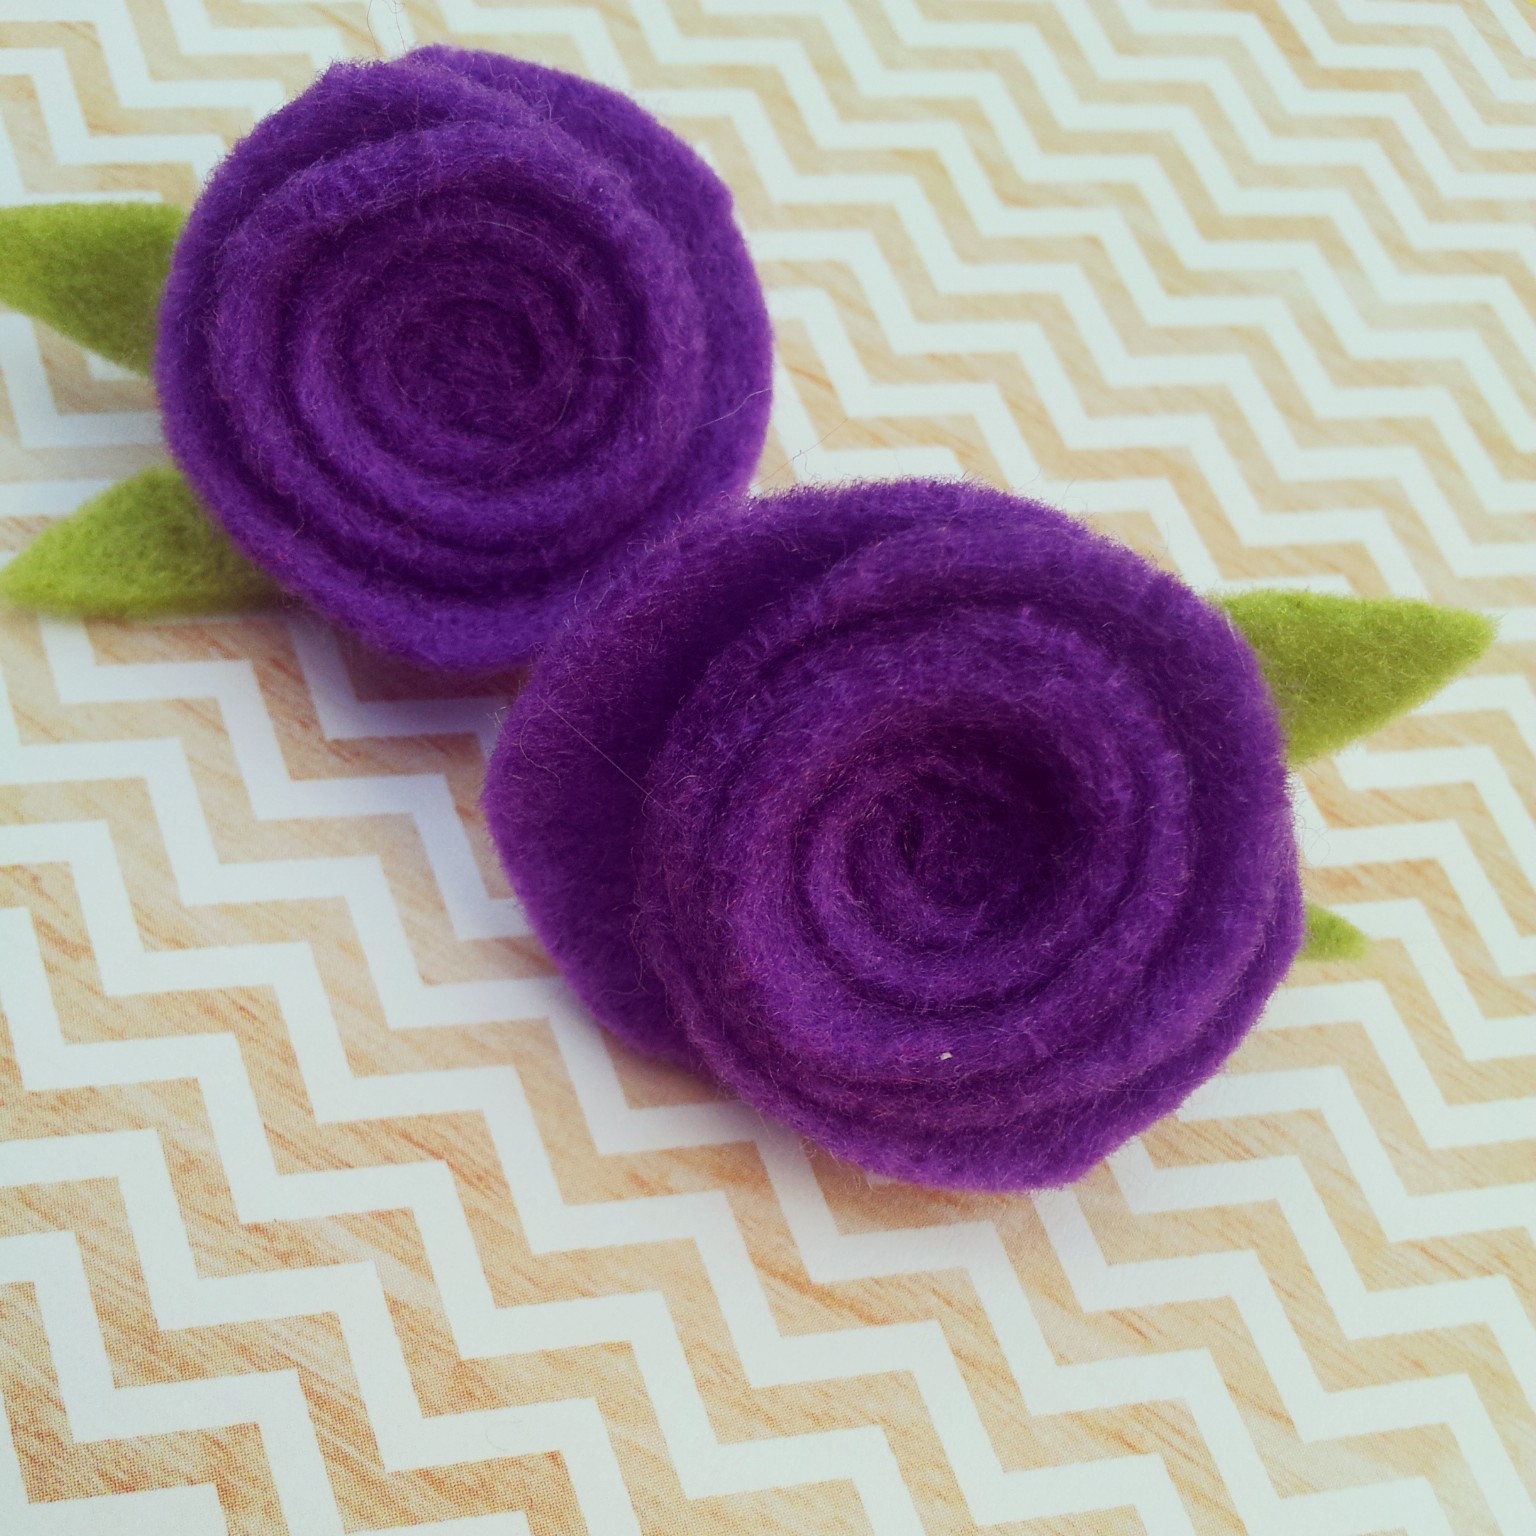
Lastly, these two purple flowers became two cute little brooches with the addition of some leaves. I was tempted to make these into earrings, but they really are a bit too large for that. But having two the same means that I am able to wear them as sweater clips should I wish to ^__^
 

And that's it! Omg, right? ^__^

Now, I best go and actually do some homework! Oh, who am I kidding ... I'm going to go and finish knitting my hat for the Foxy KAL! ~__^

- Lisa x