Showing posts with label anatomy. Show all posts

Tuesday, 11 November 2014

Easy skeleton hand hair clips


Hello! I just have a tiny little craft to show you today since I am in the final weeks of my degree now (!!!!) and have been making more essays than projects. I have just handed in the final assignment for my Cultural and Media studies class, and have two weeks to write two more research essays. And then I am done! I am really excited, but also very nervous as this means I will soon have to find myself a job. Eeek!


I brought these plastic skeleton hands from ebay, which are apparently meant as Halloween decorations. Like, I guess you just scatter them around? I am not sure. I brought them because I wanted the kind of jewellery that I see in the goth shops, but am too cheap to shell out for ~___^
 

I got ten hands, so I now have plenty to work with! These clips were very easy to make; I just glued the clips onto the underside of the palms, making sure that the length of the clip was hidden behind a finger. I used E6000, so they're staying fairly well, but I think a different style of hair clip would work better for this. I just used what I had in my stash, but I will be keeping an eye out for better alternatives.
 

My next task is to make myself a necklace, however, I think I also need to look into varnishing or sealing them somehow as the black on the hands rubs off very easily. I have some spray varnish, so I'm going to give that a go.


Looking at these pictures makes me feel a little sad as I think soon I will have to say goodbye to my pink hair! ; ___ ; At the end of this month my job search begins, and also my brother is getting married, so I was planning on dying my hair a very dark red to look a bit more "normal". But, that's apparently not normal enough and I have been told brown or black is what is required! I really am not looking forward to letting all the bleaching time I've been putting into my 'do go to waste.


I think I will try using Manic Panic black and hope that it will fade, in the same way that the blue, purple, red, and pink dyes that I've used from them have faded, so hopefully I can go back to brighter colours afterwards without having to rebleach. If anyone has any experience in this dilemma, I'd love your advice! Otherwise, perhaps I will just get myself a wig ~___^

- Lisa xx

Monday, 7 July 2014

Crochet BMO brooch, shrinky dinks, and a flower crown.


Hello! I had a different project planned to show you next, but it didn't end up working out how I wanted it to so I'm going to frog it, and then maybe try again with a different medium. But I really did want to crochet something, so I whipped up a little BMO brooch ^____^ Since I've been doing Novelty Brooch Friday on Instagram I've really been expanding my collection - after all, wearing the same brooch over and over would get a little boring, don't you think?


The brooch is about 6cm high by 4cm wide, and I used my tiny BMO action figure to figure out the placement of the buttons and screen. Don't they look cute together? ^___^


I used "Beetle" yarn to make the main part of the brooch, it's a cotton-acrylic mix and was luckily the perfect colour so I didn't have to buy anything ^____^ The rest of the colours only required small scraps of yarn; the green button and the grey line are done with cotton yarn, but I think the rest is probably acyclic. To make the brooch I crocheted two rectangles using a 4mm hook; I did ten chains, then did single stitch into nine of the stitches (the tenth chain becomes your turning stitch). I did single stitch for a total of 13 rows (with a turning stitch at the end of each row). The screen was done the same way, but I only did seven chain stitches to begin and a total of six rows. The buttons and face were too small to crochet so I embroidered them with wool, but I think that embroidery thread might have been better for the face. 
 

After I weaved in all the ends, sewed on the screen, and did the embroidery, I stitched a badge back onto the second large rectangle and then sewed the two pieces together. This gives everything a nice clean finish, and you don't have to worry about messy embroidery backs ~___^
 

I also made a couple of shrinky-dink brooches; shrinky-dinks are so satisfying because they are so quick and easy to make ^___^ The geometric anatomical heart was inspired by this string art project, and the hello by this wire wrapping project. The jackalope is all my own though! ~___^ 


Lastly, I made this flower crown which was so easy to do it can barely be called a craft ~___^ I found these great foam roses at Spotlight and since I hadn't seen red ones there before, I snapped them up quickly! I made a flower crown using some pink and white foam roses earlier this year, just by using some floral wire to shape them into a ring, but I decided for this one I wanted a more arch shape.
 

I've had this black headband for literally years, but I wasn't wearing it as much as I used to, so I decided some roses would spruce it up nicely ^___^ The band has small holes in it, so all I did was stick the stems of the roses through the holes, and then wrap the rest of the stem around the band.
 

They're attached quite solidly, but if I ever decide that flower crowns aren't for me (I hope this day never comes ...) then I can easily remove them without any damage to the headband.
 

I ducked out into the garden during a pause in the rain to snap a quick picture to show what it looks like on - it's big, but I like it that way! ^___^ Also, you get a peek at how my hair looks when it's not straightened; curly fringe, ahoy! If you follow me on Instagram, you will have already seen my new hair colour; I'm still getting used to it and missing my blue locks a little, but at least it still looks good with a flower crown, right? ~___^


The rain has started pouring down again, and it's getting cold in my little computer corner so I guess that's a good a reason as any to scurry back to the couch and get some more hooking done! What are you working on at the moment? And is it warm where you are? Regale me with your tales of sunny days and dry shoes! ~___^

- Lisa xx

Tuesday, 14 January 2014

Crochet eyeball beret with pattern


Hello! A while ago I saw a beret that looked like an eyeball and, as with so many things, I thought: "I could make that!". And, finally, I have actually done so! ^___^

My version is crocheted, because the only thing more impractical to wear during an Australian heatwave than a big floppy beret is one that is woolen. Yes, I am a highly practical person ~___^

This is what it looks like on; as you can see I have added some pleats in the back in order to make it extra slouchy and comfy. I think it worked! ^___^ (Also, thanks goes to Rebecca for taking this photo of the back of my head, as that is a rather difficult thing to accomplish by oneself.)


And here it is from the front! I like to wear my hats rather low on my head to cover up where my fringe part begins. Especially at the moment as I desperately need to touch up my roots - eek! ~___^

Would you like to make your own? Here's how!

You'll need four colours of yarn. I used charcol grey for the pupil, green for the iris, white for the sclera, and pastel pink for the veins and the rest of the hat.


I wanted the veins to be very subtle, so I chose a colour with a very similar tone to the white yarn; maybe too similar! The veins are tricky to see unless you are looking carefully. I also used a 3.75mm crochet hook (size F-5 for the Americans ^___^), scissors, and a thick tapestry needle.


To make this hat, you are basically making two shapes; the circle and the ring. Both are pretty easy to make and you could probably do it without a pattern. But, I wrote down what I did anyway so if you like you can follow that ^___^ Just please keep in mind that this pattern hasn't been tested! You will probably find a mistake (or ten!); if you do, please let me know and I will fix up the pattern! ^___^

Circle:
Row 1: Using your grey yarn, chain 6. Join with a slip stitch. 
Row 2: Crochet 12 trebles into the ring, join with a slip stitch. 
Row 3: Crochet two trebles into each stitch around, join with a slip stitch. 
Row 4: Treble twice into one stitch, then once in the next stitch; repeat this pattern all the way around and then join with a slip stitch.
Row 5 - 6: Repeat row four.
Row 7: Change to green yarn; treble once into each stitch around, join with a slip stitch.
Row 8: Treble twice into one stitch, then once in the next four stitches; repeat this pattern all the way around and then join with a slip stitch.
Row 9: Treble once into each stitch around, join with a slip stitch.
Row 10: Repeat row nine.
Row 11: Change to white yarn. Treble twice into one stitch, then once in the next four stitches; repeat this pattern all the way around and then join with a slip stitch.
Row 12: Repeat row eleven.
Row 13: Treble once into each stitch around, join with a slip stitch.
Row 14: Repeat row thirteen.
Row 15: Treble twice into one stitch, then once in the next four stitches; repeat this pattern all the way around and then join with a slip stitch.
Row 16 - 17: Treble once into each stitch around, join with a slip stitch.

My circle was 28cm in diameter.
 

 Ring:
Row 1: Using your pink yarn, chain 118 and join with a slip stitch. Make sure you don't twist the chain while you join in.
Row 2: Treble once into each stitch around, join with a slip stitch.
Row 3: Treble twice into one stitch, then once in the next four stitches; repeat this pattern all the way around and then join with a slip stitch.
Row 4: Repeat row three.
Row 5: Treble once into each stitch around, join with a slip stitch.
Row 6: Repeat row five.
Row 7: Treble twice into one stitch, then once in the next four stitches; repeat this pattern all the way around and then join with a slip stitch.
Row 8 - 11: Treble once into each stitch around, join with a slip stitch.

The inner diameter of the ring that I made was 17cm, after pleating.


Then pin the ring to the circle, right sides in, adding four pleats to the bottom of the ring. Using slip stitch, crochet all the way around the pinned edge, joining the two pieces together.

  
Use surface crochet to add the veins to the sclera and then, after weaving in all the ends (groan!), it's finished! ^___^


My head circumference is 55cm, but the hat does have a bit of stretch in it so it'll probably still fit if your head is a little bigger than that. Also, please keep in mind that I crochet very tightly. If you crochet with less tension, your hat will end up bigger and you probably won't need to do as many rows.


Anyway, I hope you like it! If you make one for yourself I'd love to see it, and if you can advise me what one should wear with a pastel eyeball hat, I'd love to hear your outfit ideas!  I'm thinking a white lace dress with pale blue stockings ... but that'll have to wait until winter!
^___^

- Lisa xx

Saturday, 7 September 2013

Shrinky dink and felt brooches


Hello! I've been meaning to make a few new brooches for a while, as since I've been doing Novelty Brooch Friday on Instragram, I've been going through my collection at a rapid rate! I *may* have gone slightly overboard today though ... Really I just wanted to procrastinate on my homework for a bit longer! ~__^


First up is this little black poodle! It's the twin to the one I made for Pip a while ago, and I finally got around to finishing it off. It's made from shrinky dinks and turned out quite well. It does have a little lump on its chest area - I have difficulty getting shrinky drinks perfectly flat! Is there a trick to it? Or it is just luck?
 

Anyway, I think I'd like to make some other puppies as well. I'd love a little dachshund brooch! ^__^
 

I have a slightly weird love for ampersands. I can't explain it, I just think they're great ^__^
 

 I've wanted some puncuation jewellery for ages, so I'm really pleased with this! Like the poodle, this ampersand is also made from shrinky dinks ^__^ I think an interrobang will have to be on the to do list next ...


 This brooch is made from some of the leftover flowers from my Frida Kahlo head band. It turned out better than I thought it would! ^__^


 All I did to make this was glue the flowers onto a circle of green felt. I added a few little leaves to balance out all the warm colours and to fill up a couple of gaps ^__^


Anything anatomical is always my favourite, and I've wanted a heart brooch for ages ^__^
 

I used white shrink dinks for this brooch; the white sheets I have are slightly transparent when unbaked so I placed my reference image underneath and traced it. I'm not very good at drawing freehand, so that made it a lot easier! ^__^


I used the white shrinky dinks for this one too (I feel like I've written "shrinky dinks" in this post so much that it's beginning to lose meaning ...)
 

I used coloured permanent markers to colour this a semi geometric pattern. Up close, you can see what an awful colour-in-ier I am. If you look at that previous sentence up close, you can also see how badly I butcher the english language ~__^
 

It looks fine from a distance though! ^__^


Another ampersand, another shrinky dink project! Are you sensing a theme here?
 

I left this one plain as I don't have many white badges, and neutrals always come in handy ^__^


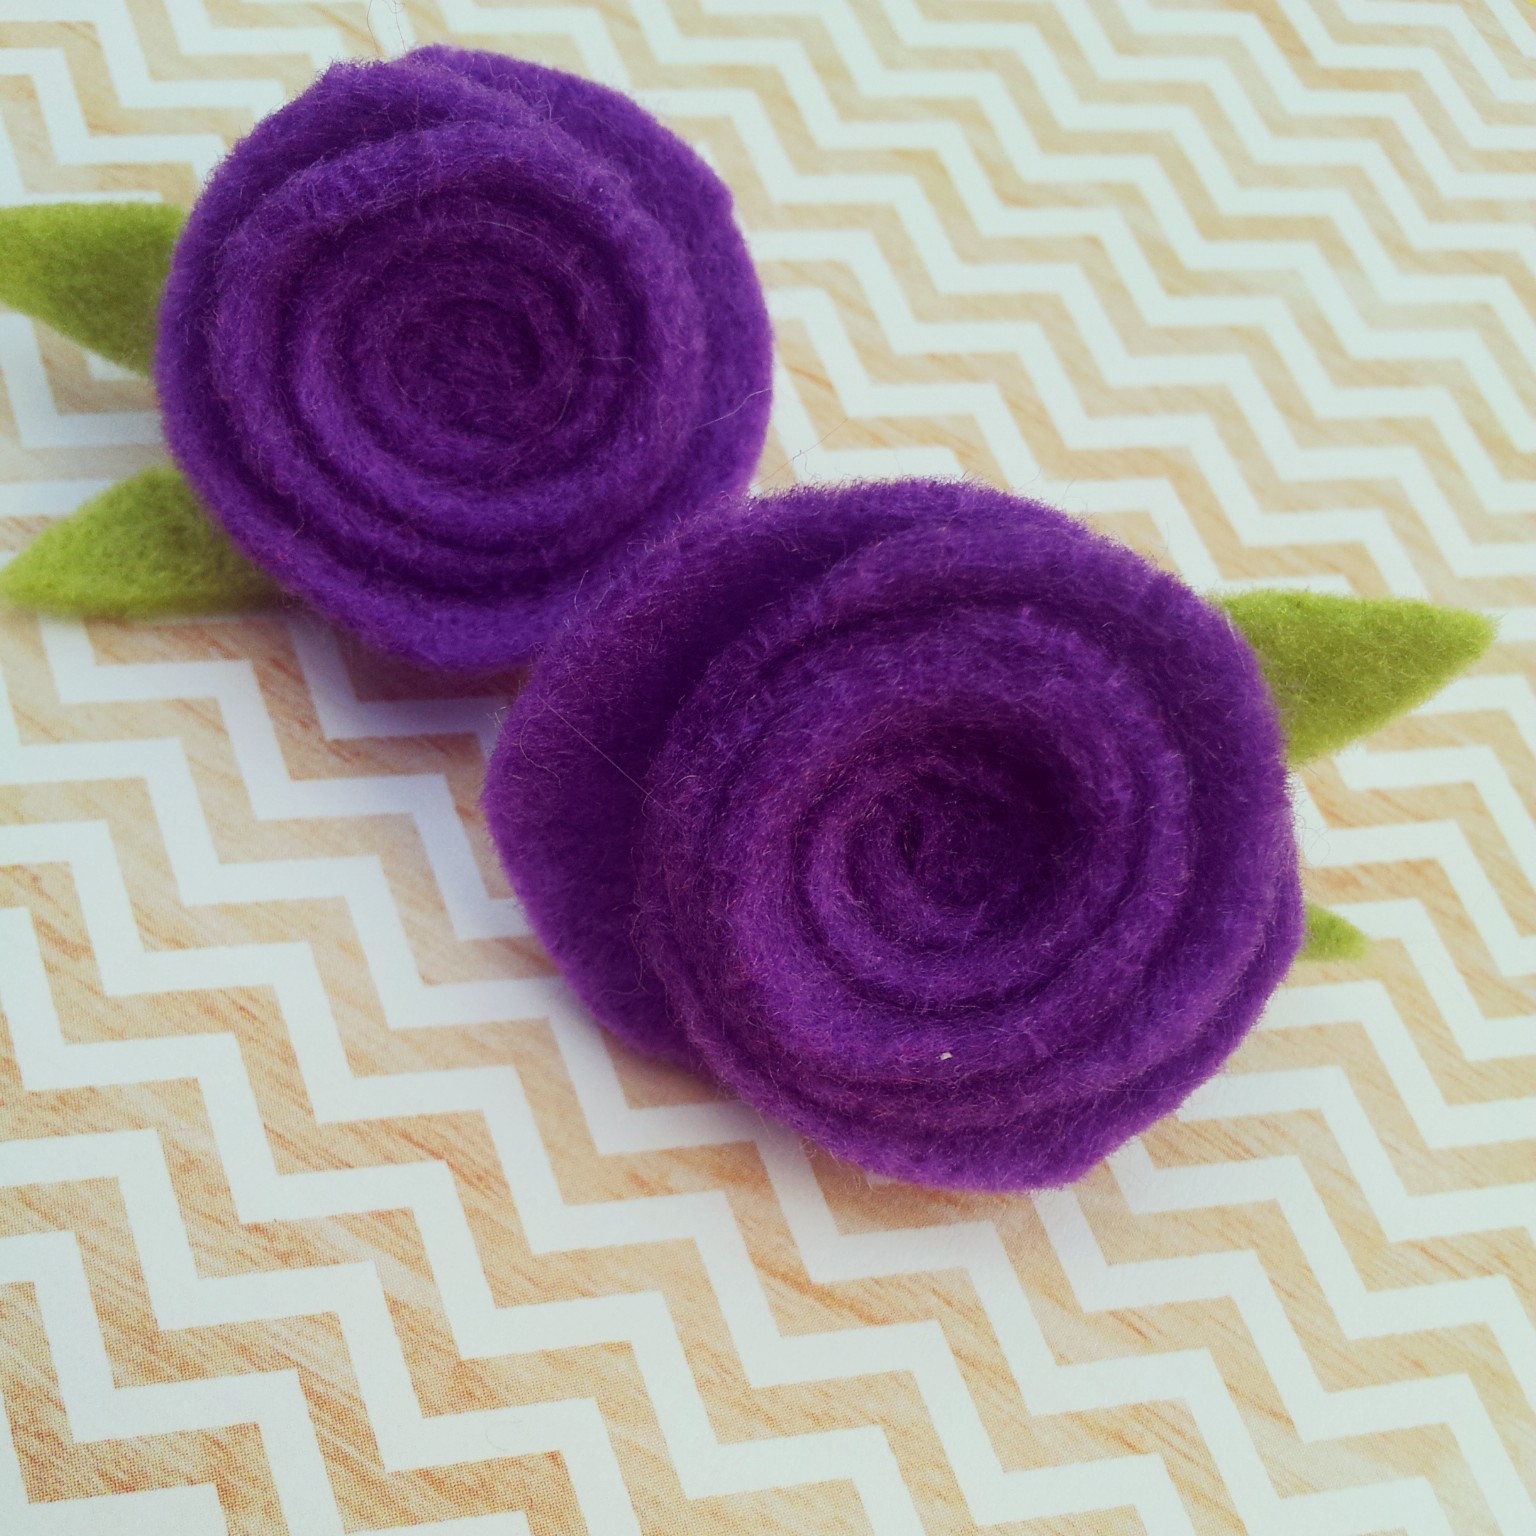
Lastly, these two purple flowers became two cute little brooches with the addition of some leaves. I was tempted to make these into earrings, but they really are a bit too large for that. But having two the same means that I am able to wear them as sweater clips should I wish to ^__^
 

And that's it! Omg, right? ^__^

Now, I best go and actually do some homework! Oh, who am I kidding ... I'm going to go and finish knitting my hat for the Foxy KAL! ~__^

- Lisa x