Tuesday 28 July 2015

"Let's be mermaids" papercraft pendant


Hello! Next time Summer comes around and I'm complaining about how hot it is, will you remind me of this Winter? I have been stuck in Struggletown, folks; my immune system is caving to the pressure and I have been sick soooo much. Happily, I have two days off work and I plan to rest up and hopefully be well enough to do some skating later this week! To help pull myself out of the Winter doldrums, I decided to make something to remind me of warmer weather ... and mermaids, because why not? ~____^


Here's what you'll need to make your own:
- lots of paper (I used a combination of scrapbooking paper, glittery card, card that I had practiced my watercolours on, and crumpled brown paper bags)
- a circle template
- scissors
- a pen or pencil
- a large piece of thick paper or cardboard
- glue (I used a glue stick)
- a ruler
- some string
- alphabet stamps and ink and/or a felt tip pen
 

The first thing I did was cut out my base banner shape; it's 30cm wide across the top, 31cm long down to the top of the pointy bit, and the edges of the pointy bit are 22cm. I used a quilting ruler to help measure out my pendant shape which was really helpful because it's big and see through. The card I used was recycled from a massive envelope which Rebecca once gifted me a hoop in; as you can see, it has folds and a hole in it but this won't matter because it will all be covered up ^___^
 

For my circle template I used a chipboard scrapbooking embellishment which I don't like and will therefore never use. Except as a template ~___^ The diameter of the circle template is 6.5cm. If you have a large circle punch, this would be the perfect time to use it; otherwise, you can do what I did which is to draw heaps of circles onto the back of your papers and then cut them all out. 
 

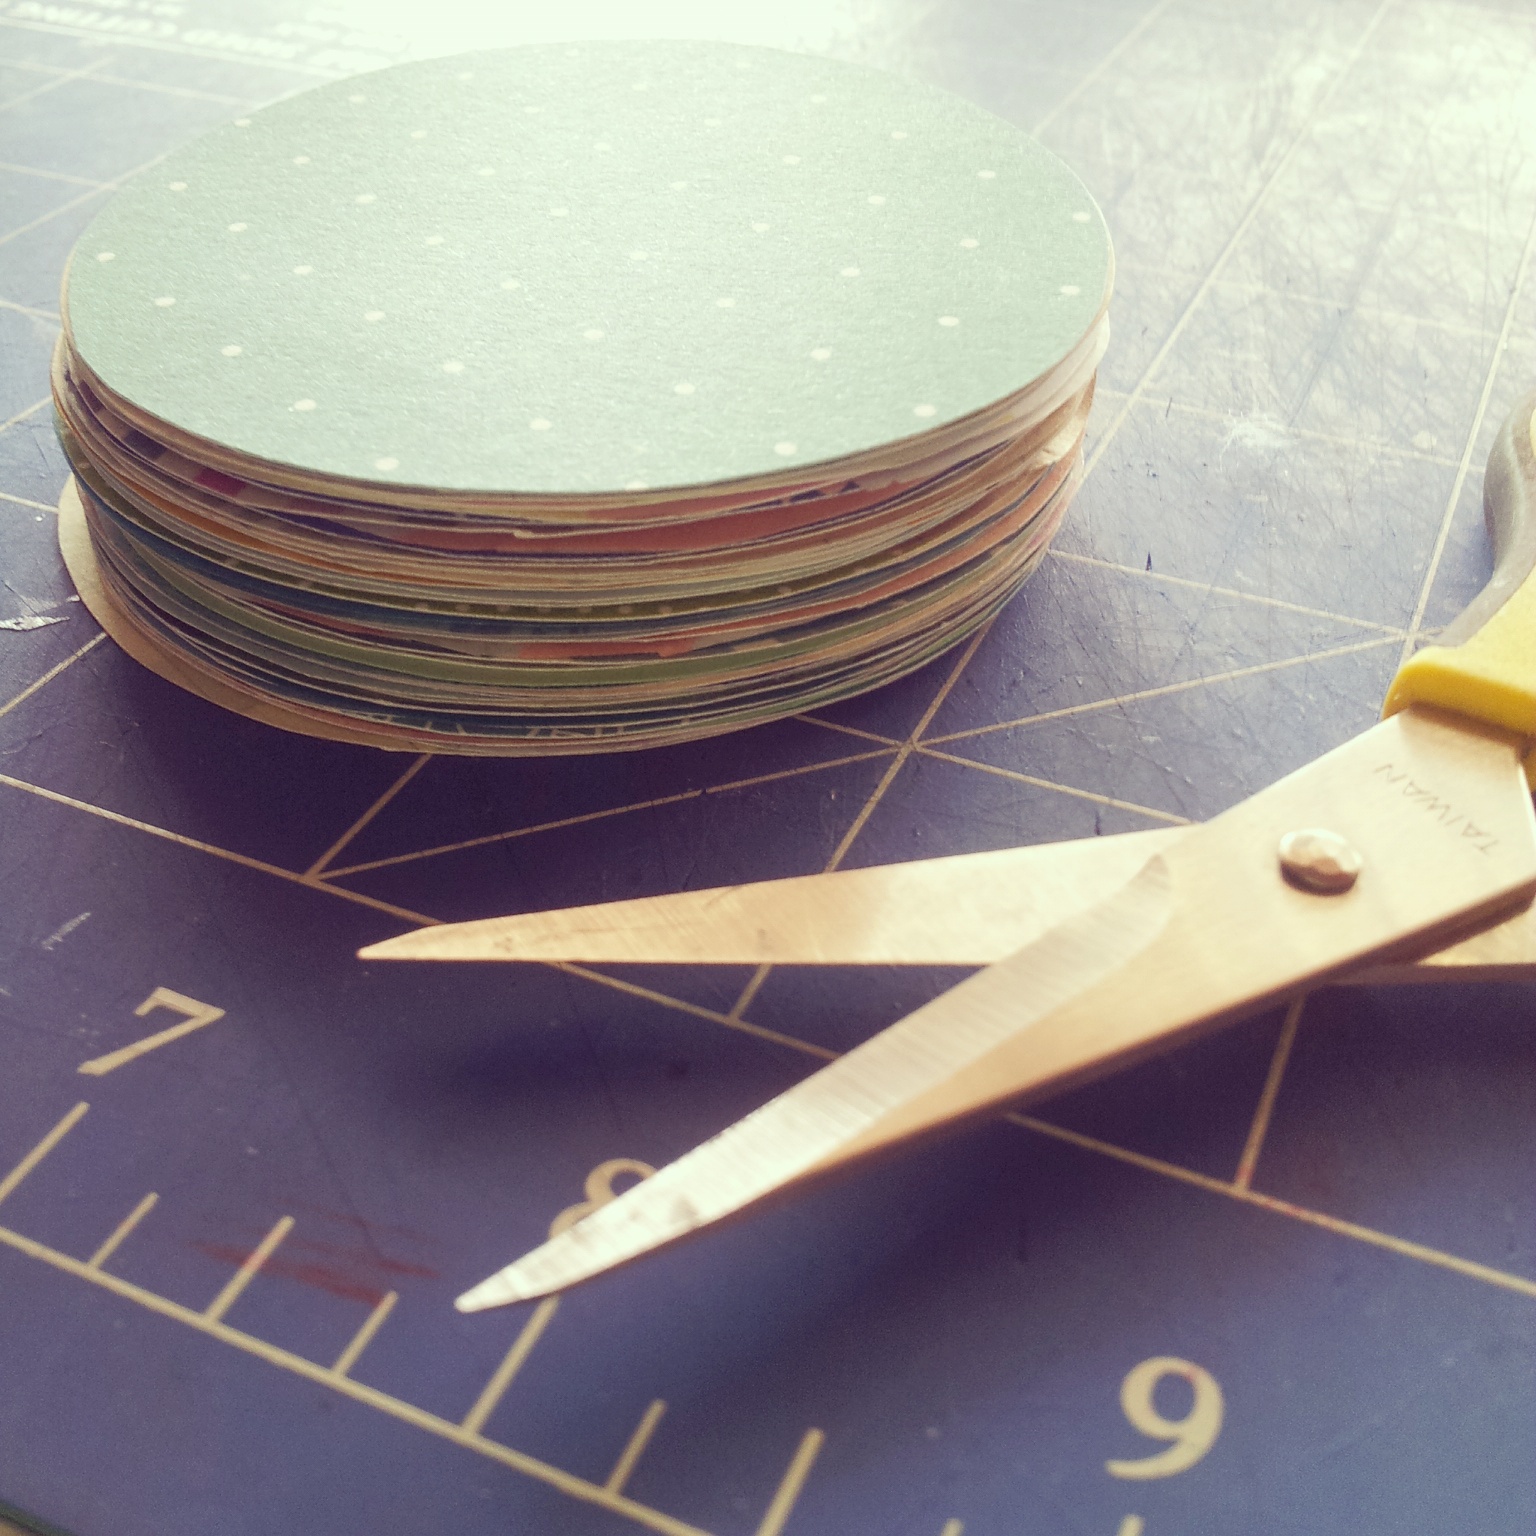
I used about 62 circles to cover my pendant, but I cut out more than that so I could play mix and match while I was laying them out. I have no idea what I'm going to do with the leftovers, but I'm sure I'll think of something!


 Use your glue to start sticking down the circles, starting at the bottom and moving your way up. Try to place the circles so that they are about halfway down on the circles of the previous row, and just touching on the sides - I found this is the best way to get a scaly look.


Once you've covered your entire pendant with circles, trim off the edges of the overhanging circles; just follow the edges of the base pendant to do this but only do the top and the sides - leave the circles on the angled edges as they are.
 

I folded a remaining bit of card in half, glued it together, and then glued it onto the back of the pendant to make a tube that holds the hanging string. To thread the string though, tie it onto something like a pen and then drop it through the tube. Then you can tie a knot in the ends of the string and pull it through the tube so that the knot is hidden.
 

I stuck an extra circle over the hole in the base of the pendant, just to tidy it up a bit. Plus, I like to have dates on things I make!
 

I used my tiny alphabet stamps and black ink to add "let's be mermaids" to one of the scales - this really reminds me of childhood summers when we would play mermaids in the backyard pool. I don't have an apostrophe stamp, so I added that in with a felt-tip pen.


I've hung this in our lounge room, and I really feel like it's helping to bring a little bit of Summer back into our home (although, unfortunately, none of the warmth - brrrr!).
 

This project is fantastic for using up scraps of pretty papers, and I like how it creates a kind of eye-spy effect. 
 

I tried to stick to a primarily blue and green colour scheme, but I also added in some pink, silver, yellow, and brown to break up the shades and add interest. 
 

On most of the circles I only added glue to the top half, which has allowed the bottom and sides to lift up; I actually really like this effect and think it helps the circles look even more like scales.
 

So now I've done projects on unicorns, jackalopes, and mermaids ... perhaps next I should do something on the Loch Ness Monster? ~___^

I'm still going on my knitted hat - I'm honestly the slowest knitter, but hopefully the next couple of days of rest, cold medication, and soup will also give me some time to also do a couple more rows of colourwork. Only one more month of Winter to go! Hopefully I can finish it by then ~___^
 
- Lisa xx

Tuesday 21 July 2015

Dragon's Loyalty Award & Creative Blogger Tag


Hello! The most wonderful Pops de Milk has nominated me for the Dragon's Loyalty and Creative Blogger awards - isn't she lovely?! As with most blogging awards, there are facts to share and rules to follow; here's the rules ...


Dragon’s Loyalty Award Rules:
Visit and thank the blogger who nominated you.
Acknowledge that blogger on your blog and a link back.
You must share 7 things other bloggers may not know about you.
Nominate up to 15 bloggers for Dragon’s Loyalty Award, provide a link to their blogs in your post, and notify them on their blogs.
Copy and paste the award somewhere on your blog

 
Creative Blogger Tag Rules:
Nominate 10-20 blogs and notify all nominees through their social media/blogs.
Thank and post the link of the blog that nominated you.
Share five facts about yourself to your readers.
Pass these rules onto them.


And so, here are my facts (and some vaguely related photos so this post isn't too boring!) ...

I collect Agatha Christie novels; I have a bookcase in my house that is 100% Agatha and Pyrex. My favourite novel of hers is "The ABC Murders" and I have a soft spot for Tommy and Tuppence.


I started off studying advertising at uni, but didn't enjoy it. I did an elective course in which I wrote an essay on vampire myths and decided that something more in the cultural studies area would be much more me! I then went on to study sociology, which I loved.


I have been rollerskating for about a year and a half now and sometimes I feel like I'm not making any improvement. And then I remember that the first time I put on my quads I had Rebecca and Scott on either side of me struggling just to keep me upright!


I'm terrified of horses. They are huge and scary and when they bite you it really hurts. 

As a child, I collected dalmatian toys; I had heaps and my favourite was a big plushie that I saved up a whole $20 to buy (that was a lot when I was eight!)

Scott and I have been dating/married for a total of eleven years - omg, right? 


When I was about eleven, I cut my leg open with an axe. For reals. I got many stitches and I still have a scar on my right ankle that kinda looks like a smiley face. I wasn't smiling at the time though!

In high school I once won the "Religious Living Award"; which I thought was highly ironic because I was, and still am, an atheist.

I am a Type 1 diabetic, but I wasn't diagnosed until I was 24. It was really tough to get used to doing multiple daily finger-prick blood tests and injections, but a lot of my other random health issues went away after I started taking insulin so I guess there's a silver lining to everything! I do have a new pet peeve now though, which is people tagging photos of delicious looking food with #diabetes. I feel like it adds to the misinformation about diabetes which causes people not to take it very seriously and/or blame diabetics for their illness, which is seriously uncool.


The first time someone asked me if I read Harry Potter, I pictured a bald man in a bowler hat riding a bicycle, and said no. Later I saw the first book at the school library and decided to give it a go. I'm very glad my first impression was incorrect! ~___^


I don't have any tattoos or exciting piercings, other than the four in my ears. I'm planning on getting myself a tattoo as a reward when I turn 30. 


I still dream about having a house with a secret bookcase door. One day!

And now for my nominations!

Deadly with Scissors (I have not yet given up hope that Bec will one day resume blogging!! ~___^)
Little Moon Dragon

... and for the last one - YOU! If you're reading this blog, then I'd like to read yours ^____^

- Lisa xx


Tuesday 14 July 2015

Brooches, leather stamping, and glass painting


Hello! I wasn't sure what to show you today, as I haven't finished any new projects this week. However, I do have some little projects that I haven't shown you before so now I figured you could see all of them! ^____^


 I made this brooch for my friend Clare as a "leaving Perth" gift. I designed the image using Illustrator, printed it out, glued it to balsa wood, cut it out, coated it with mod podge, and attached a badge backing. Unfortunately, since I'm such a procrastinator, I didn't have time to take any photos of it before getting to the pub and giving it to Clare!


Luckily, she didn't mind me stealing it back for a few quick snaps ~____^ The tiny banner says "home is where the heart is", but Scott said I should have made it say "they can break a man's arm you know!" (you'll have to watch Hot Fuzz for that reference!) The brooch image is of a black swan on the Swan River (yup, that's what we called it! Clever and original, huh?), in front of the Perth skyline. I drive around and over the river on my way to work and the city, and I always love seeing the swans. I hope they will remind Clare of some fond Perth memories while she makes her new life in Melbourne ^___^


I used basically the same technique to make myself this Glow Cloud brooch. I used scrapbooking paper for the background, and a pen to write on the letters, and then mod podged it onto the balsa wood. I also coloured in the edges of the brooch with a black sharpie, which I really like the look of.
 

I made these little key ring charms for my brothers using leather, metal stamps (courtesy of Bek who knits), a black felt-tip pen, rivets (courtesy of Bec), and some large jump ring type things. As you can see, the red leather has more texture which made the stamping a little less visible; the black pen helps with that a bit, but overall the green leather worked out the best. I haven't actually given Brett his gift yet, but he doesn't read my blog so I think we're safe ~____^ Craig liked his, which was a pleasant surprise as they don't often appreciate handmade gifts.


I also made a key ring charm for Scott; this one is done on black leather but the stamping actually showed up quite well! Perhaps by this time I was actually using enough pressure when hitting the stamps ~____^


Emma from A Beautiful Mess painted some gorgeous cactus bottles, and I decided I simply had to give it a go myself! I don't have many colours of glass paint, but I had the primary colours so I mixed up some green and got painting. I've been using them as water bottles, which I think is much nicer looking than constantly reusing old plastic bottles. When I'm not using them, they also make a pretty little garden on my kitchen windowsill ^___^


And since I had my paints out, I decided to decorate the jars I use for making chia puddings and overnight oats in. I did some gems and an ice-cream cone, but my favourite is Space Kitty! They certainly brighten up my mornings ^____^

I've got skating tonight, and I'm sincerely hoping it's not as cold as last week - we were all breathing out fog and steam actually came off our limbs when we took off our knee and elbow guards! Brrr - think warm thoughts for me, please!

- Lisa xx

Tuesday 7 July 2015

Derby Name necklace


Hello! My roller derby league (WARD, for those of you following along at home!) recently had this year's grand final - and it was totally awesome! Watching the bouting skaters do their thing is always incredible and inspiring, but it was also fantastic because I got to hang out with my derby friends and celebrate fellow freshie Electra Fire's birthday - huzzah!


I wanted to make her a little gift so I pulled out some sculpey, mini alphabet stamps, and gold paint and whipped up a little name plate necklace ^___^


You could use any colour sculpey to make this necklace, but I decided on black. After conditioning the clay, I rolled it out using a small glass bottle as a rolling pin and then used my scalpel to cut it into shape. I used a pin to add the holes at the top and stamped on Electra's name with my mini stamps.


I baked the sculpey for about 15 minutes and then let it cool. Then I put a small amount of gold paint onto my finger and rubbed it across the clay. I used a tissue to rub off the excess, leaving only the gold paint in the letter indents.


To finish it off I threaded some large jump-rings through the name plate, and then strung it all onto a gold chain.


Electra liked her necklace - which was a huge relief to me! It was really simple to make, but I like the impact of the simplistic design. I think I will make one for myself as well - but I haven't yet decided if I want red clay and gold paint or pink clay and silver paint ^____^

I'm still working on my larger version of the pink and blue heart hat, but for some reason I just can't get the ribbing to work this time! It's so frustrating because I'm not sure what I'm doing wrong. I think I will have to wait until I can get some clever knitter friends to check it out. So next week's post will be a surprise for both of us! ^___^

- Lisa xx