Hello! How are you? I feel like somehow my life has actually been busier since uni finished which really does seem improbable! Maybe it's just been going by quicker since I've been having such fun! ^___^ If you follow me on Instagram you'll already know some of this, but since my last blog post I have dyed my hair blue (well, bluey green with sections of black ... ~___^), crocheted enough granny squares to now have over 100, had a flower crown making party to celebrate my birthday, completed an epic thrifting roadtrip with Rebecca (photos of which I will share with you soon!) and I've also been making myself a scarf (highly practical in this Australian summer heat!), sewing a few Christmas presents, and I even finished a project to share with you today! Omg, right? ^___^
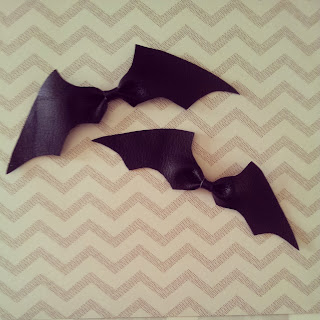
I saw a photo of cute bat-esque bows on pinterest, but unfortunately the image was uncredited (don't you hate it when that happens?). I still wanted to make some though, so I drew up a quick pattern and got to crafting!
If you'd like to make some too, you can click on the image above to download the pattern from Google Drive! ^___^
Here's what you'll need to make your own batty hairclips ^___^
1. Some leather or pleather scraps
2. Fabric and paper scissors
3. The pattern
4. A needle and thread
5. Bobby pins
Firstly, cut out the pattern. I have a special pair of scissors that I use only for cutting paper, because I don't want to dull my lovely fabric scissors ^___^
Then use the pattern to cut out the shape from your fabric. If you can, do this without pins because they will often leave marks on leather/pleather. If you find this step tricky though, you can draw the outline on the back of the fabric and use that as your cutting guideline.
You'll also need to cut out a small rectangle of fabric to serve as the middle of your bow. Mine was about 1cm x 2cm, but this doesn't have to be exact.
Then fold the middle of your bat shape like the letter 'm' and use your needle and thread to secure the fold.
This is what it looks like from the back ^___^
Wrap your small rectangle of fabric around the bow and sew it together to make a small tube around the middle of your bow.
Tie off your thread, and then slip a bobby pin through the fabric tube.
The tube should be rather snug so your bobby pin will stay in place without the need for glue or stitches.
And then that's it! You're done and now you can make more! ~___^
Yay! I think I'll make an extra big one to wear as a headband too! ^___^
I hope you like it; if you make one then I'd love to see it! ^___^
Now I'm off to refresh my university emails repeatedly until my end of year results come in! Eeek! Wish me luck?
I hope you like it; if you make one then I'd love to see it! ^___^
Now I'm off to refresh my university emails repeatedly until my end of year results come in! Eeek! Wish me luck?
- Lisa x


No comments:
Post a Comment