Tuesday, 27 October 2015

Captain America and The Winter Soldier crochet mismatched fingerless mitts


Hello! True to my word I have been taking a short break from blogging to work on some slightly more involved projects. I've also been fitting in a lot of extra hours at work, 2-3 skating sessions a week, and a heck ton of gardening! ~___^ So here's one of the projects I've finished: mismatched Captain America and Winter Soldier fingerless mitts. Yay!


I made these for Rebecca, as it was her birthday recently, and we share all the feels about Cap and Bucky. I have seen versions of this around before, but they were all knitted and since I'm still not a very confident knitter I decided to crochet them instead.


I used Twinkie Chan's instructions for a basic mitt pattern to determine the size these should be (as this varies depending on hand size) and used a 4mm hook and some 100% DK weight wool to make them.


For the Winter Soldier mitt I crocheted in the back loops every second row to create a kind of ridged pattern to mimic the segments of his metal arm. The star was extremely frustrating to make because most applique patterns were way too big. I ended up making it up as I went along, but I'm still not totally happy with it. If I ever discover a way to make a nice small star, I'm going to steal this mitt from Rebecca and replace the star ~____^
 

For the Captain America mitt I just did a plain treble repeat and I used Handy Knitty's pattern to make the "A".


The little wings on either side of the A were a little tricky to do, because again most patterns were much too large. I ended up using a similar technique to how Handy Knitty forms their letters. I chain stitched nine, slip stitched in three, chained two, slip stitched in three, chained two, slip stitched in five. The extra chain stitches form the two lower wing protrusions, and if you're trying to imagine how it is worked up, please enjoy this extremely high-tech Paint drawing, in which the red arrows indicate the direction you are working in.

 
The two sides are made exactly the same way, and I just flipped one over once I was finished crocheting. They need to be sewed down to really look like Captain America's helmet wings, but once they are attached I think they look pretty neat.


Can you believe it's less than a week until Halloween?? I haven't done many spooky projects this year, but I will have a costume to show you which I am pretty darn happy with. What are you going as this year? Are you making your costume? ^___^

- Lisa xx

Monday, 28 September 2015

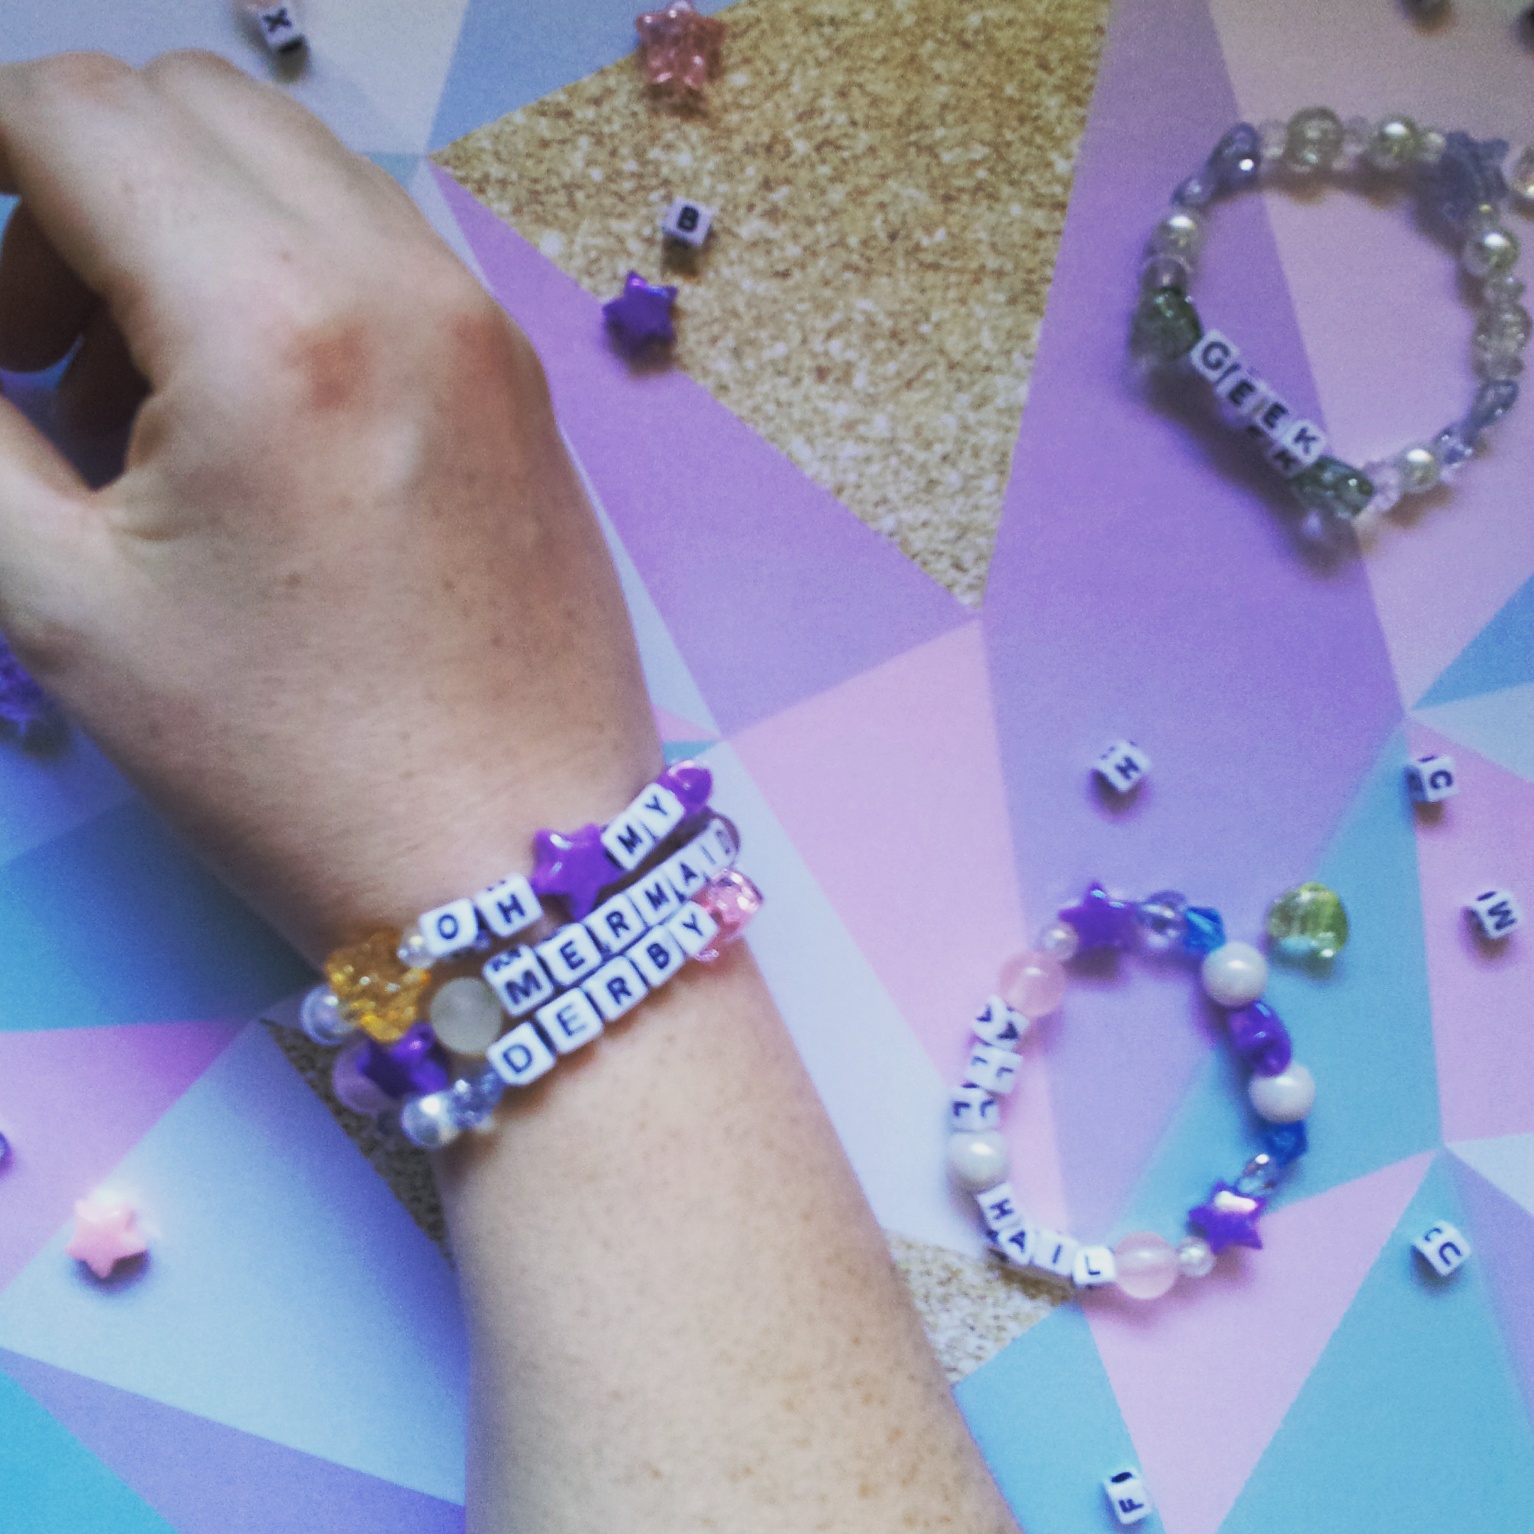
Pastel alphabet bead bracelets


Hello! The other day I was going through my beading stash and I found some glittery heart and star beads and some alphabet beads in a little kit which I am 90% sure I've had since I was a child. I didn't actually have enough alphabet beads to make many words or phrases, but I made one bracelet, decided I needed to make more, and went out and brought more alphabet beads. What I've learnt: there are never enough "e"s.
 

Nonetheless, I made quite a few little bracelets and I'm quite pleased with how they turned out.

 
In my stash I also found some cute plastic heart beads with small shiny gems in them, faux pearls, and some random coloured plastic beads. I used stretch elastic for threading the beads onto, and found it a complete and utter pain to work with. There was one bracelet in particular that broke four times! I've found the best way to preserve your bracelets, and your sanity, is to do two double knots, and then coat the knots in glue; I used E6000 and found it worked well. The other tip is to roll your bracelets on, rather than stretch them out too much.


I made five bracelets in what I think of as the pastel colourway, and then decided to try out some black alphabet beads and make some Halloween jewellery ^___^


When making these, I found that cutting the elastic to ten inches, and then beading to cover six inches was a good way to get enough bracelet to go around my wrist and enough ends to make tying the knots not totally painful. If you have more dexterous fingers than me though, you may be able to get away with shorter ends.
 

Lastly, I mixed together the black and pastel beads to make myself a "muggleborn" bracelet. I don't know if I have a favourite out of these bracelets ... but this one is definitely up near the top!
 

Although I love making quick projects like these, I've found lately that I haven't been making many big projects. I think this is partially because I've been trying to post a new project every week, so I've decided to relax my posting schedule. I'll still be posting, but only when I've finished a project. Hopefully this will actually make for more interesting, involved projects, and more tutorials too! And, of course, if you feel like you're just not hearing enough from me, feel free to check out my Instagram ~___^

- Lisa xx 

Tuesday, 15 September 2015

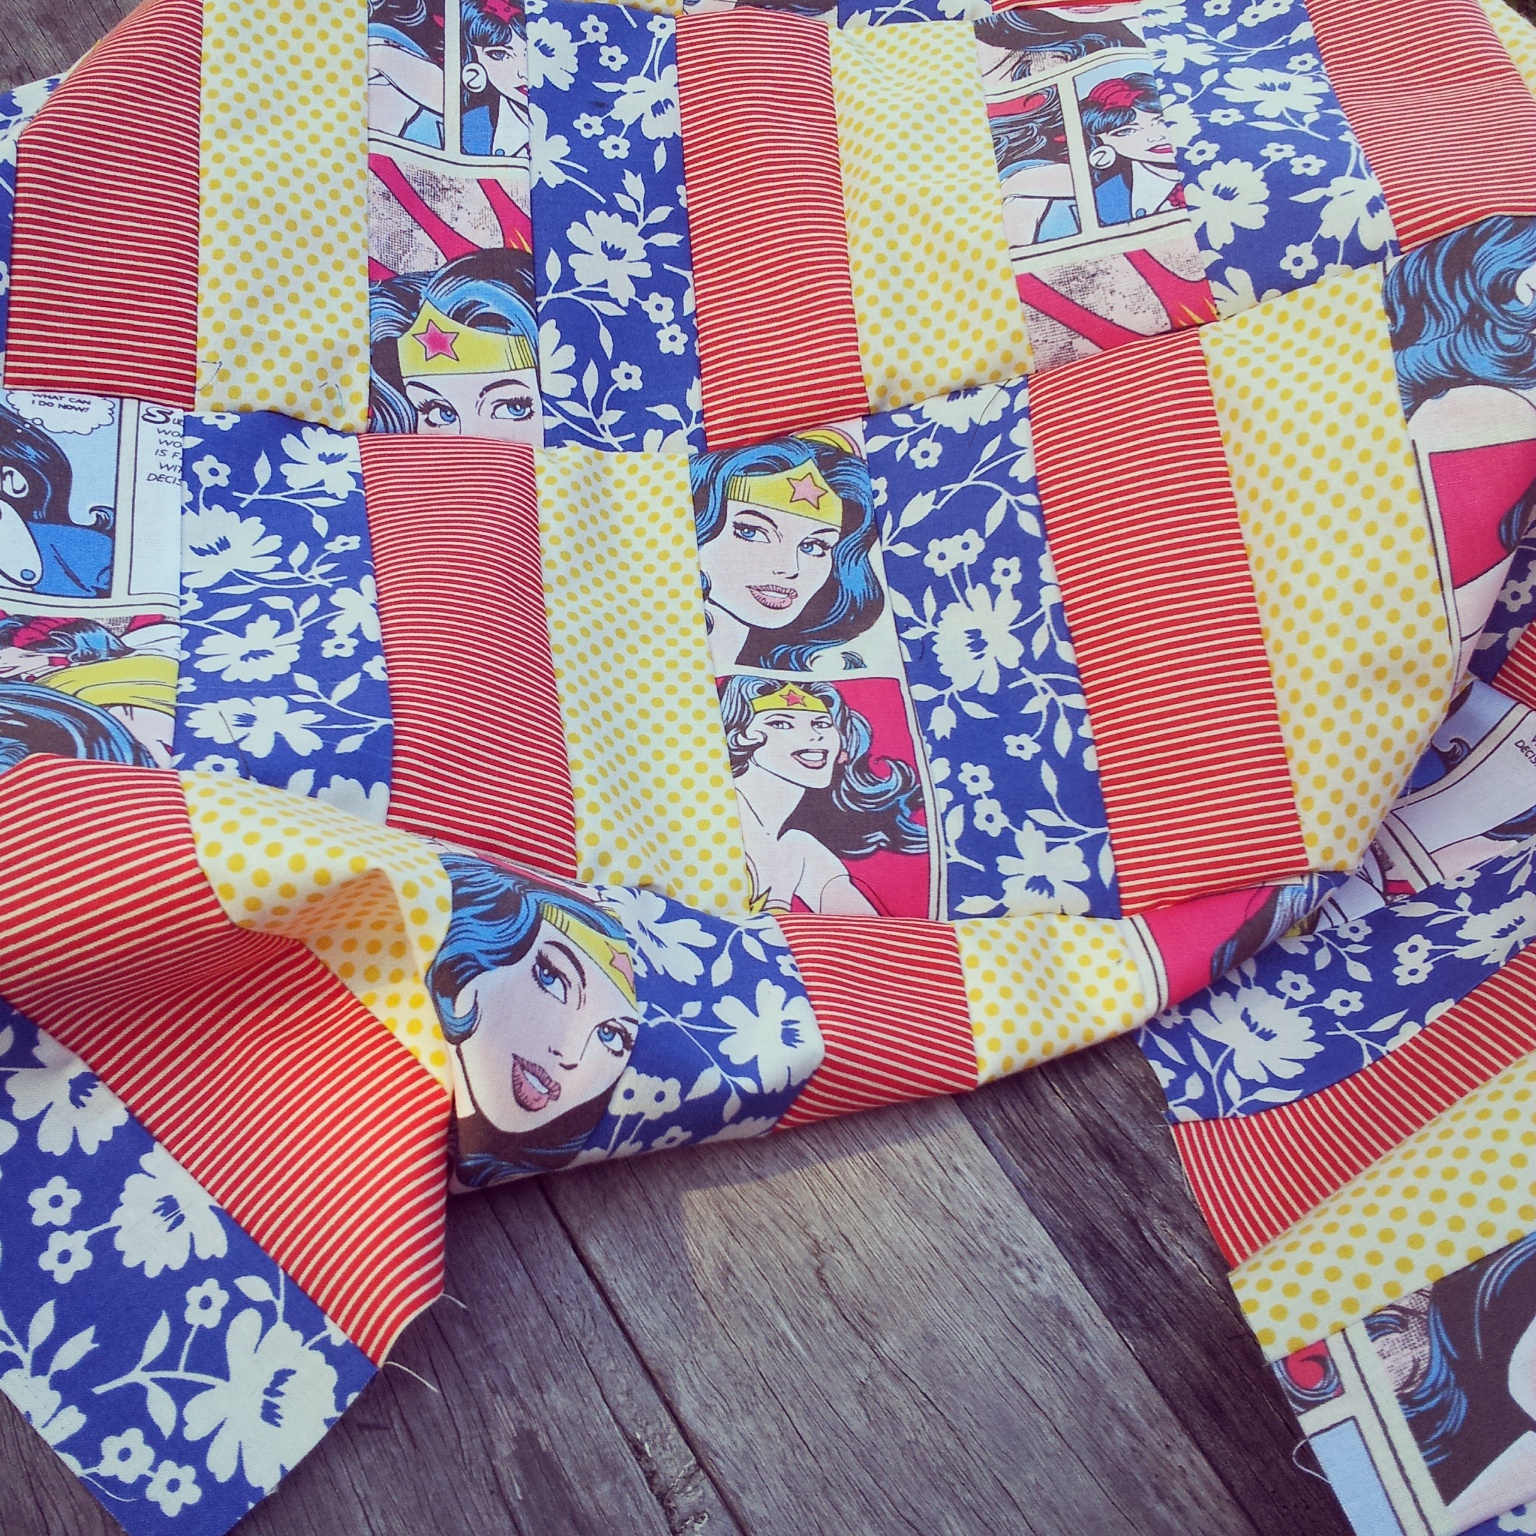
WIP: Wonder Woman quilt


Hello! So, recently I decided that I should make a quilt. The ideal quilt maker would probably be someone mathematically minded, precise, meticulous, patient, and good at sticking to a plan ... I am none of those things. Nonetheless I'm giving it a red hot crack!

I've only done part of the quilt top at the moment; I'm planning on adding a border and then, of course, I will need to add a back and squishy middle and binding and then actually quilt it ... yeah, I've got a bit to go! It's currently 77cm by 72cm (about 30.5 inches x 28.5 inch), but hopefully the border will help it more more lap blanket size, rather than it's currently baby quilt size! ^___^


I started off with a jelly roll pack and some Wonder Woman fabric, both that I got from Spotlight. Unfortunately the strips that came in the jelly roll were not all the same size, so I had to cut each of them down >____< I cut all of my strips so that they were 2 inches wide, and about 25 inches long. 


After sewing four differently patterned strips together, I cut the resulting fabric into 7 inch lengths. Now, here is where my maths failed me slightly. I was planning on making 7 inch squares, but actually ended up with 6 inch by 7 inch rectangles. Oops!


But I decided to carry on anyway, and change my original idea for the pattern into a brick repeat instead. To do a brick repeat you slightly offset your pattern, which means that your edges won't line up properly. To fix this, you make four halves of your pattern squares and use them to fill in the gaps.


Then I sewed all the blocks together! And now I have a mostly finished quilt top - yay! The seams don't all line up probably and I have no idea why (probably something to do with the aforementioned lacking skills) but I'm not really concerned about it enough to unpick it all and start again. 


Maybe this can just be my test quilt; I'll make all the mistakes on this one and then my next one will be amazing! ~___^


Of course, this quilt does have Wonder Woman on it, which means it's still at least a little amazing ^____^

- Lisa xx

Tuesday, 8 September 2015

Many hairbows


Hello! I know it's only just gotten into September, but for some reason I am so excited for Halloween this year! I was tidying my craft room (again! This has to happen fairly regularly, in order to try and curb my hoarding tendencies ...) when I came across a pack of "flat fats" (basically 50cm squares of fabric that Spotlight sells) in Halloween prints. I'd been thinking for a while that I might try to make a patchwork cushion but since I'd been thinking (and not doing) that for a couple of years I decided that the cushion idea was going out the window and instead I was going to make hair bows. And since I can't stop at one, I made ten.


Unfortunately I don't own enough Halloween fabric to make ten different spooky hair bows (something I obviously need to rectify fairly quickly!) but I did manage to make four.


These three are from the aforementioned Spotlight pack. I think my favourite is the stripey one, because those little purple gravestones are just so cute! Also in the pack was some awesome purple bat fabric, but as I used some of that for the background of Rebecca's witchcraft hoop I didn't have enough for a full sized bow. I may have to make some mini ones soon!


I also finally used this silky skull fabric that someone once gave me. The piece was kinda too small to do much with, so I put it in my stash and promptly forgot about it. I'm so glad I found it again because it was the perfect size for a bow!
 

Since one can never have too many hair bows (please, no one tell me otherwise ...), I then used up some more fabric remnants making these six pretties. I can't decide on my favourite here; I think the black and white stripe is going to be really versatile, but I love the dark grey floral pattern as well.
 

If you'd like to make some of your own, you can check out my tutorial for them on Cut Out + Keep
 

In other news, my workplace just finished a 100 day fitness challenge - huzzah! Of course this meant it was time for a party (nope, we learnt nothing) and so I baked a raspberry oat cake to help us celebrate. I used writing icing to draw a shoe on the top which was a bit tricky. You can see where I had some trouble with finishing off lines! Nonetheless, it looks like a shoe (big plus!) and the cake tasted really good - yay! ^___^
 

Currently I'm working on some crochet, but I think it's going to be a while before it's finished as it's pretty huge. The first row involved 364 stitches - yikes! I'm experimenting with broom stick crochet for this as well, which is a first for me. I'm quite liking how it looks so far, so I'm hopeful it will turn out well.

It's becoming sunnier and warmer here, so perhaps a largish crochet project wasn't the greatest idea though! I'll have to start thinking of warmer weather crafts ... perhaps this will be the year I finally make myself a Wonder Woman bikini? Only time will tell ~___^

- Lisa xx


Tuesday, 1 September 2015

Pizza weaving


Hello! Ok, so, this project is totally awesome and totally difficult to photograph. If you have a house that isn't 90% brown brick (mmmmm, so seventies!) it may be easier to take photographs that look pretty. BUT - pizza weaving! Yum!


I used my 6.5 x 9.5 inch loom and although when I started I wanted to make it bigger, after weaving all the pizza toppings I think this size was just right ~___^ I also took the rest of these photos with the pizza weaving laying on my coffee table which I have only just realised is really quite an orange coloured wood. Perhaps a darker stain is in order?


Anyway, back to the pizza. Before I started, I drew a pizza slice on a sheet of A4 paper which I kept under my loom as I wove. I didn't follow it exactly, but it was good to have a guideline regarding where I should be putting toppings and how much to angle in the actual pizza slice.
 

All of the yarn that I used for the actual pizza is random acrylics that my Nanna Tess left to me, and I think the white yarn is Shiver, which is a chunky acrylic. I find that the fluffy yarns are best for filling in large spaces because they don't leave as many little gaps between the rows.
 

 Shiver is also fantastic for making tassels - look at those fluffy babies! 


I didn't make a tutorial for this project as I was really just making it up as I went along, but here are some tips if you want to make your own. 1. Start from the crust and work down; I found it easier to judge how much to angle in my pizza when I was working from the top. 2. Weave a couple of rows of toppings, then fill in the rest of the pizza slice. Repeat, repeat, repeat. 3. Add in the background last and draw your yarn under the weaving you've already done if you don't want a border of empty space around your pizza.
 

I'm really happy with how my pizza weaving came out and I'm kinda tossing up on deciding if I want a larger loom now; although I do love my little loom, I feel like maybe it's time to expand. What do you think? Have you tried weaving before? Should I weave a donut next? ~___^

- Lisa xx

Wednesday, 19 August 2015

Three Addams Family crafts


Hello! Do you like the Addams Family? I really hope you said yes, because today I've got three easy and quick crafts inspired by our favourite creepy family to show you! I didn't watch heaps of TV or movies growing up, but the Addams Family is one that definitely sticks out in my mind; I wanted to be a cross between Morticia and Wednesday when I grew up, and spent a good portion of my teenage years dressing entirely in black to achieve such a look ~___^


This first project is one that I have been meaning to do for ages! I don't know why I put it off for so long as it wasn't difficult to do and I really love how it turned out ^___^ I prefer having black pillowcases since otherwise they do tend to end up stained by my hair dye, but if you wanted to make your own you could really use any colour. I do feel like black is apropos though!


To make them, I ironed the pillowcases to get most of the wrinkles out and wrote out "mon cher" and "cara mia" onto them with white chalk.


Then I used a paintbrush to go over the letters with white fabric paint. I did about three layers of paint to try and get the lines a relatively even weight; they're still not perfect but the extra layers also helped the white letters pop more against the black fabric.


I left them to dry overnight and then gave them a quick iron, with a cloth over the letters to protect my iron. Depending on what type of fabric paint you use, you may not need to iron your project but it makes me feel a bit more confident that it will survive the wash!


I think these would be perfect for a housewarming gift for a couple, or maybe even a wedding present! Depends how kooky they are, I guess ~___^


Next up is the craft that inspired this whole post: a Morticia quote canvas. This is seriously the easiest craft ever!


I was feeling a bit uninspired one day so I was digging around in my craft room and came out with a blank square canvas and some black glittery letter stickers. I decided that there really isn't any other colour best suited to black than more black, so I painted the canvas with a mixture of black paint and glitter mod-podge. I slopped it on nice and thick to give it some texture and then when it had dried, I just glued on the letter stickers.


I know gluing stickers may seem a bit strange, but they're made for attaching to paper and so weren't sticking as well as I wanted them to. I've put this canvas in our lounge room, and when the sun hits it it really does sparkle! Which is great because, after all, black *is* such a happy colour! ^___^


My last project was going to be something different to this family motto necklace, but I had a total craft fail and couldn't rescue it in time! I'm sure it's still salvageable, but it's going to take a bit longer than I had hoped.


So, instead, I got out the sculpey and whipped up this necklace. I used the same technique as the derby name necklace I made for Electra Fire, but made it bigger as the Addams' Family have got quite a long creed! In case you can't read it, the motto is "Sic Gorgiamus Allos Subjectatos Nunc" or, "We Gladly Feast on Those Who Would Subdue Us".


I made the pendant from black clay, stamped it with my tiny alphabet stamps, added holes with a thick needle, and baked it for 20 minutes at about 150oC. I wanted a tarnished metal look, so when the pendant was done baking, I covered it with silver acrylic paint and, while it was still damp, rubbed at it with a tissue to show some of the blackness underneath.


I used a fine felt tip pen to add some black in the indentations of the words and then I added the chain by threading jump rings through the holes. And that's it! A pretty necklace, but not just pretty words ~___^


Until next time, do do do do *snap snap*

- Lisa xx