Showing posts with label paper craft. Show all posts

Monday, 25 January 2016

Baking, succulents, and parties


Hello! I realised recently that I have an awful lot of photos of little things I have made/ baked, but I haven't shared them with you! You may have seen some of these on Instagram, but here we can talk about them a little more without having to make those huuugggeeee comments that end up looking like a really dense wall of text ~___^

First up: ugly cake! Scott and I recently celebrated our sixth wedding anniversary for which the traditional gift is salt. I thought that sounded a little boring so instead I decided to make a salted caramel cake. I wanted to make a layered cake, but I also didn't want it to be huge so I made a rectangle shaped upside down cake, and cut it into smaller circles. The caramel part of the upside down cake means that I didn't have to put anything between the layers.


However, cutting nice looking circles from cake is actually a lot harder than I expected it to be! When I layered them up, I realised how wonky my cake was! >___<


I thought about covering the entire thing in buttercream icing to try and make it look nicer, but ultimately decided that salted caramel layers and a salted caramel sauce poured over the entire thing was probably enough forms of sugar for one small cake so I left it naked and ugly ~___^ We ate it anyway, and it tasted pretty good!

I also made a simple card for Scott. I used a black and white chevron paper to cover a blank card, glued on a square of gold heart patterned paper, and stuck a black and gold embellishment in the middle. I messily scribbled a border around the heart paper with my silver metallic pen and it was done!


Bunnings had a heap of tiny succulents for sale recently, so I brought, ummm, way too many of them. I put one in a tiny teacup to give to a friend for her housewarming, and put two more in two empty tins I kept because they're cute. I added dinosaurs because dinosaurs are awesome.


I put the rest in a bigger pot, and added more dinosaurs and some pretty little rocks. I'm not sure how well that one in the middle is going; I brought it because I thought it was a cool colour, but I'm now thinking that perhaps I brought a dying succulent. Hmm.

I designed a badge to give to some of my derby pals, and recently two of my buddies from skating star classes had their birthday so I used two of the leftover pins to decorate some hair bows. The fabric I used is the same design as the badges, which I got printed from my Spoonflower store.

For my birthday I had an Adventure Time themed party - I didn't take many photos but I did remember to photograph some of the food (the most important part, right! ~___^)

I made Lumpy Space Crackles with using this recipe ... except I didn't put in any cocoa and I used honey instead of maple syrup. I also added some blue and red food colouring which didn't mix in that well. I was hoping for it to make purple, but it mostly didn't. I also put on some star shaped sprinkles to make them more space like ^___^


I brought some Adventure Time cookies, but they didn't taste that great so I made them into chocolate bark, with the addition of salted pretzels and pop rocks. They were a big hit!

I also made a Tree Trunks apple pie; the fancy lattice top was trickier to make then I expected it to be! It tasted really great and even though it was huge, it got demolished really quickly.

These sunglasses were made for my friend Clare for Christmas. Clare has an adorable style and is a big fan of daisies, so I wanted to make her something to suit her look.


All I did to make these was glue little daisy cabochons around the frame of some round sunglasses. It was really easy, but they turned out really cute!

I also made these Wookiee cookies after seeing these super cute biscuits by Sugared Nerd.

I used a mini gingerbread person cutter, and melted chocolate for the details. I adore how they turned out!


I made this chocolate bark for my dad for Christmas - I added almonds, pepitas, pistachios, dried cranberries, and white chocolate chips to melted dark chocolate. I also made Dad some coconut ice using this recipe (except I used Stevia instead of rice malt syrup), a trail mix, and more gingerbread. I added twice the amount of ginger into Dad's batch than I used for the Wookiee cookies because both of us like our gingerbread really spicy (not that he wanted to share! ~___^)


Inspired by Messy Nessy Chic, I made this cheese platter Christmas Tree for after our family lunch. Honestly, we were all a bit too full for this, but we did our best anyway! ^___^


Lastly, I've been working on the Death Star blanket. If you've been a long time reader of this blog, you may remember that I started this project in, oh, 2011. It's been in the WIP box for a long time, but the new movie inspired me to get it back out. I've started joining the squares, which makes the whole project a little more inspiring - I've almost finished the rows with the laser! (Baby steps!) ^___^

- Lisa xx

Tuesday, 28 July 2015

"Let's be mermaids" papercraft pendant


Hello! Next time Summer comes around and I'm complaining about how hot it is, will you remind me of this Winter? I have been stuck in Struggletown, folks; my immune system is caving to the pressure and I have been sick soooo much. Happily, I have two days off work and I plan to rest up and hopefully be well enough to do some skating later this week! To help pull myself out of the Winter doldrums, I decided to make something to remind me of warmer weather ... and mermaids, because why not? ~____^


Here's what you'll need to make your own:
- lots of paper (I used a combination of scrapbooking paper, glittery card, card that I had practiced my watercolours on, and crumpled brown paper bags)
- a circle template
- scissors
- a pen or pencil
- a large piece of thick paper or cardboard
- glue (I used a glue stick)
- a ruler
- some string
- alphabet stamps and ink and/or a felt tip pen
 

The first thing I did was cut out my base banner shape; it's 30cm wide across the top, 31cm long down to the top of the pointy bit, and the edges of the pointy bit are 22cm. I used a quilting ruler to help measure out my pendant shape which was really helpful because it's big and see through. The card I used was recycled from a massive envelope which Rebecca once gifted me a hoop in; as you can see, it has folds and a hole in it but this won't matter because it will all be covered up ^___^
 

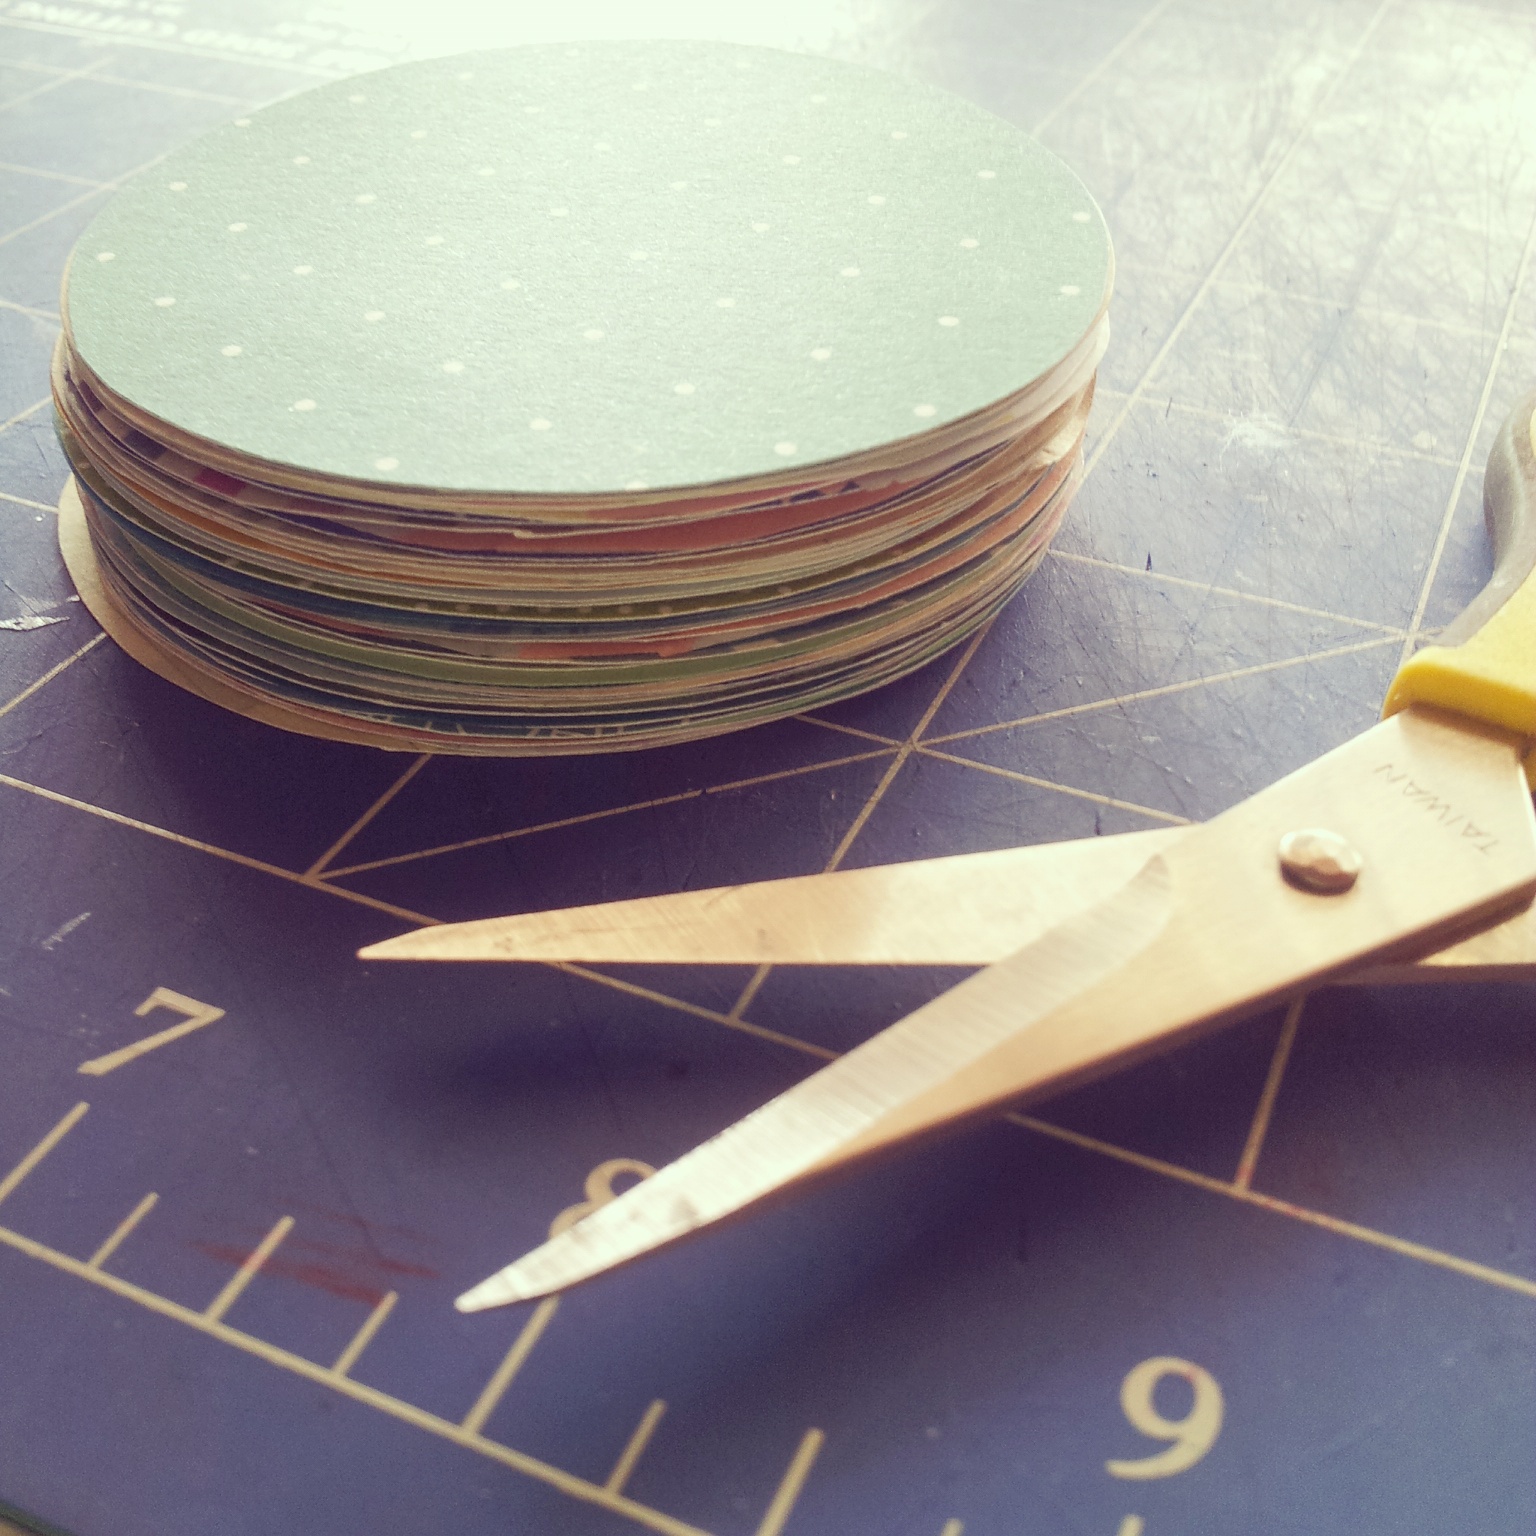
For my circle template I used a chipboard scrapbooking embellishment which I don't like and will therefore never use. Except as a template ~___^ The diameter of the circle template is 6.5cm. If you have a large circle punch, this would be the perfect time to use it; otherwise, you can do what I did which is to draw heaps of circles onto the back of your papers and then cut them all out. 
 

I used about 62 circles to cover my pendant, but I cut out more than that so I could play mix and match while I was laying them out. I have no idea what I'm going to do with the leftovers, but I'm sure I'll think of something!


 Use your glue to start sticking down the circles, starting at the bottom and moving your way up. Try to place the circles so that they are about halfway down on the circles of the previous row, and just touching on the sides - I found this is the best way to get a scaly look.


Once you've covered your entire pendant with circles, trim off the edges of the overhanging circles; just follow the edges of the base pendant to do this but only do the top and the sides - leave the circles on the angled edges as they are.
 

I folded a remaining bit of card in half, glued it together, and then glued it onto the back of the pendant to make a tube that holds the hanging string. To thread the string though, tie it onto something like a pen and then drop it through the tube. Then you can tie a knot in the ends of the string and pull it through the tube so that the knot is hidden.
 

I stuck an extra circle over the hole in the base of the pendant, just to tidy it up a bit. Plus, I like to have dates on things I make!
 

I used my tiny alphabet stamps and black ink to add "let's be mermaids" to one of the scales - this really reminds me of childhood summers when we would play mermaids in the backyard pool. I don't have an apostrophe stamp, so I added that in with a felt-tip pen.


I've hung this in our lounge room, and I really feel like it's helping to bring a little bit of Summer back into our home (although, unfortunately, none of the warmth - brrrr!).
 

This project is fantastic for using up scraps of pretty papers, and I like how it creates a kind of eye-spy effect. 
 

I tried to stick to a primarily blue and green colour scheme, but I also added in some pink, silver, yellow, and brown to break up the shades and add interest. 
 

On most of the circles I only added glue to the top half, which has allowed the bottom and sides to lift up; I actually really like this effect and think it helps the circles look even more like scales.
 

So now I've done projects on unicorns, jackalopes, and mermaids ... perhaps next I should do something on the Loch Ness Monster? ~___^

I'm still going on my knitted hat - I'm honestly the slowest knitter, but hopefully the next couple of days of rest, cold medication, and soup will also give me some time to also do a couple more rows of colourwork. Only one more month of Winter to go! Hopefully I can finish it by then ~___^
 
- Lisa xx

Tuesday, 18 November 2014

Recovered recipe box


Hello! Scott is currently taking some off work and he's been cleaning up a storm. I don't think our house has ever looked this neat, plus we've donated a heap of stuff to the op shop so our karma levels are at a peak ~___^ I've been feeling a bit bad for not contributing since I mostly sit at my computer all day. I mean, I'm doing homework, but it doesn't really feel very productive when you're reading articles all day and then all you have to show for it is a couple of pages of notes! So over the weekend I thought I'd go through our recipe collection and make it so it didn't consist of post-it notes and ripped out magazine pages shoved in an old plastic sleeve.


I've had this paper mache box in the craft room for quite a while, and it's a good size for fitting postcards inside it so I decided to transfer the recipes onto my postcard collection and use the box to store them. However, it was pretty boring looking, so I first needed to make it look pretty! ^___^


I used mod podge to stick scrapbooking paper on to every side of the box and lid but the edges didn't look very neat, even after I had trimmed them down.

So I used washi tape to edge all of the ... edges ... (mmmm, word difficulties!) and trimmed the excess with a scalpel so the ends were nice and flush.


I didn't want to make this box too "this is a box for recipes!!!" in case I decide to use it for something else one day but I did use some tea pot and saucer patterned paper for two sides of the box, and added a "slice of the good life" sticker to the lid which I thought was a subtle reference to what is currently inside.

The "so very lovely" piece of paper on the lid is from another sheet of scrapbooking paper; the kind where the whole page is covered in these little quote like designs and you can just cut out the one you want to use. My kitchen has kind of a retro vibe, mostly because I insist on buying homewares from opshops, so I think the font will help the box fit in with the rest of the decor.
 

As you can see, I've still got a while to go before I get anywhere near filling up this box with recipes! And I must give a shout out to Rebecca for inspiring me to do this project by actually sending me postcards with recipes written on them; I've gotta admit, it's pretty fun to find a risotto recipe in your letterbox ^___^


My final assignment for my degree is due this Friday (gah!!) so after that I'll be trying to finish off this big (well, bigger) project that I've been doing for my brother's wedding. I hope I finish it on time! ^___^

- Lisa xx

Monday, 15 September 2014

"Don't let the muggles get you down" scrapbooking paper quote banner


Hello! Have you ever tried to write a analysis of your own fantasy story? That's what I'm doing for my homework right now, and I've gotta tell you, it's tough. Anyway, I took a break from research and writing today to finally finish and hang my Harry Potter inspired banner.
 

I have a lot of scrapbooking paper, but I don't do a ton of scrapbooking (full disclosure: I used to do heaps of scrapbooking and cardmaking in high school when it was cool ... or at least I thought it was. Was it really ever, or was that just me?). I keep on buying scrapbooking paper though because it's just *so pretty*! I have a real problem with buying pretty stationary products; I also have too many gel pens for any one person to own. Scrapbooking paper is great for backgrounds for small project photos, but that doesn't really use it up! So I decided to actually put some of this stuff to use, and make an oversized quote banner.


The first thing I did was to create some templates using Adobe Illustrator. I used the Bell Gothic font in 800 pt size, which made each letter fill up one A4 page. I wrote out the whole quote on a scrap piece of paper and counted up how many of each letter I would need, and then I cut out all the repeats at the same time.

 
After I had all the letters cut out, I layed them out on my dining table to make sure they looked good in the order I had them. I used a lot of patterns and colours to make a banner that kinda clashes ... in a good way, you know? I used regular sticky-tape to attach the letters onto blue and white baker's twine and then attached them above my big bedroom bookcase using washi tape. I used washi because it doesn't take off paint, but this wasn't the best idea. The banner hung up for a couple of hours ... and then it started to slip. I'm going to buy a couple of removable wall hooks and give them a go instead.


My only other tip for making a banner like this is to make the baker's twine much longer than you think it should be! I thought I would have heaps of string on the ends, but as you can see, the string next to the first letter is a tiny bit too short >___< Nonetheless, I'll take my banner's advice and not let the muggles get me down. Even if the aforementioned muggle is me ~___^

- Lisa xx

Wednesday, 10 July 2013

Two art canvases and a recovered faux book


I'm slowly getting through challenges for the Summer Nerd Games on Craftster but last night I had a burst of creativity and completed three projects! Omg, right? I also used up all my double-sided tape ... it was totally worth it though.


I brought a faux book from the Reject Shop ages ago to recover and use with my Steampunk Librarian costume but then I found a much nicer looking one at Typo and I used that instead. But now the first book has finally received its makeover! ^_^

It's quite simple, but I'm happy with how my new copy of "Hogwarts: A History" has turned out ^_^ I just recovered the book with scrapbooking paper, added a metal drawer label for the title, and then added details with my quill and gold paint pen. 

My drawing skills are a bit lacking, so I drew a simplified version of the Hogwarts crest on the cover and just added some details with the gold pen. I think it looks nice nonetheless ^_^
 

I think my favourite part of this project was using my quill - it feels so different to regular pens and it's so fun to use ^_^
 
Then I found a couple of 6x6 inch square canvases in my stash, so I made two more art canvases to add to my little collection ^_^ First up: the polka-dot owl canvas!


I covered the canvas with this blue spotty scrapbooking paper and then set about cutting out circles from several other papers.


Then I drew tiny owls on each one. You can tell they're owls right? (I hope so!)
 

I used my tiny alphabet stamps to add the proverb (courtesy of Albus Dumbledore) and then stuck the circles down with tape and then gave everything a coating of mod podge.

Yay! All done! ^_^ I had proverbs on the brain by this time so I started on another canvas. This one is the "silver linings" canvas ^_^ I love how colourful and happy it is! The little wooden clouds had been in my stash for a while, so it was great to use them up ^_^
 

For the front of this canvas I used a piece of scrapbooking paper from my 6x6 inch paper pad, and then used a complementary piece to cover the sides.
 

I used my silver paint pen to colour in the edges of the clouds as well as draw an edging line on the fronts of them.


Can you believe I used washi tape on only one of these projects? I used five different kinds on this canvas to make up for it ~_^
 

And then finished it off with the tiny alphabet stamps again ^_^
 

And that's it! I've still got two canvases in my stash, so as soon as I get some more tape I'll do something with them too ^_^ The best thing about these projects is that they were all 100% stash! It's great to use up some old supplies ^_^

Do you have a favourite? What's your opinion on scrapbooking style crafts? (I know they're not everyone's cup of tea)

- Lisa x