Showing posts with label tea cups. Show all posts

Monday, 25 January 2016

Baking, succulents, and parties


Hello! I realised recently that I have an awful lot of photos of little things I have made/ baked, but I haven't shared them with you! You may have seen some of these on Instagram, but here we can talk about them a little more without having to make those huuugggeeee comments that end up looking like a really dense wall of text ~___^

First up: ugly cake! Scott and I recently celebrated our sixth wedding anniversary for which the traditional gift is salt. I thought that sounded a little boring so instead I decided to make a salted caramel cake. I wanted to make a layered cake, but I also didn't want it to be huge so I made a rectangle shaped upside down cake, and cut it into smaller circles. The caramel part of the upside down cake means that I didn't have to put anything between the layers.


However, cutting nice looking circles from cake is actually a lot harder than I expected it to be! When I layered them up, I realised how wonky my cake was! >___<


I thought about covering the entire thing in buttercream icing to try and make it look nicer, but ultimately decided that salted caramel layers and a salted caramel sauce poured over the entire thing was probably enough forms of sugar for one small cake so I left it naked and ugly ~___^ We ate it anyway, and it tasted pretty good!

I also made a simple card for Scott. I used a black and white chevron paper to cover a blank card, glued on a square of gold heart patterned paper, and stuck a black and gold embellishment in the middle. I messily scribbled a border around the heart paper with my silver metallic pen and it was done!


Bunnings had a heap of tiny succulents for sale recently, so I brought, ummm, way too many of them. I put one in a tiny teacup to give to a friend for her housewarming, and put two more in two empty tins I kept because they're cute. I added dinosaurs because dinosaurs are awesome.


I put the rest in a bigger pot, and added more dinosaurs and some pretty little rocks. I'm not sure how well that one in the middle is going; I brought it because I thought it was a cool colour, but I'm now thinking that perhaps I brought a dying succulent. Hmm.

I designed a badge to give to some of my derby pals, and recently two of my buddies from skating star classes had their birthday so I used two of the leftover pins to decorate some hair bows. The fabric I used is the same design as the badges, which I got printed from my Spoonflower store.

For my birthday I had an Adventure Time themed party - I didn't take many photos but I did remember to photograph some of the food (the most important part, right! ~___^)

I made Lumpy Space Crackles with using this recipe ... except I didn't put in any cocoa and I used honey instead of maple syrup. I also added some blue and red food colouring which didn't mix in that well. I was hoping for it to make purple, but it mostly didn't. I also put on some star shaped sprinkles to make them more space like ^___^


I brought some Adventure Time cookies, but they didn't taste that great so I made them into chocolate bark, with the addition of salted pretzels and pop rocks. They were a big hit!

I also made a Tree Trunks apple pie; the fancy lattice top was trickier to make then I expected it to be! It tasted really great and even though it was huge, it got demolished really quickly.

These sunglasses were made for my friend Clare for Christmas. Clare has an adorable style and is a big fan of daisies, so I wanted to make her something to suit her look.


All I did to make these was glue little daisy cabochons around the frame of some round sunglasses. It was really easy, but they turned out really cute!

I also made these Wookiee cookies after seeing these super cute biscuits by Sugared Nerd.

I used a mini gingerbread person cutter, and melted chocolate for the details. I adore how they turned out!


I made this chocolate bark for my dad for Christmas - I added almonds, pepitas, pistachios, dried cranberries, and white chocolate chips to melted dark chocolate. I also made Dad some coconut ice using this recipe (except I used Stevia instead of rice malt syrup), a trail mix, and more gingerbread. I added twice the amount of ginger into Dad's batch than I used for the Wookiee cookies because both of us like our gingerbread really spicy (not that he wanted to share! ~___^)


Inspired by Messy Nessy Chic, I made this cheese platter Christmas Tree for after our family lunch. Honestly, we were all a bit too full for this, but we did our best anyway! ^___^


Lastly, I've been working on the Death Star blanket. If you've been a long time reader of this blog, you may remember that I started this project in, oh, 2011. It's been in the WIP box for a long time, but the new movie inspired me to get it back out. I've started joining the squares, which makes the whole project a little more inspiring - I've almost finished the rows with the laser! (Baby steps!) ^___^

- Lisa xx

Tuesday, 9 June 2015

Tattoo art inspired coffee cups


Hello! I think it's because I've been watching waayyy too much of those tattoo shop reality TV shows but I've had tattoo style designs on the brain lately. I designed a little skating badge and then when I was brainstorming present ideas for my friend Steve, who is a body art aficionado, I decided to tweak it a little and came up with these fun mugs!


I don't drink coffee, but I'm still kinda in love with this design! I want to make one for myself; I don't know if "but first, tea" has the same ring to it though ~___^
 

To make them, I used some plain coloured mugs and Pebeo porcelain pens. And of course a tattoo flash inspired design! After designing the image in Illustrator, I printed it out onto regular paper and cut it out to use as a stencil. I used a pencil to lightly stencil the basic shapes of the design onto the mug.


Then I went over the line work with a black porcelain pen. Getting the lines straight on a curved surface is a little tricky, but slow and steady does the job ^___^ Next I coloured in all the shapes - yay!


You can see that my colouring in isn't the best ... the Pebeo porcelain pens don't give the best coverage for large surface areas. That said, they are much much much better than the porcelain paint you get in pots - that stuff is so streaky! It's very strange since they are made by the same company.


 After I'd done the colours, I went back to the black pen to thicken some of the line art, write on the words (I copied the Cute Tattoo font for these btw), and add a little bit of vintage tattoo style shading. I won't be allowed to touch a tattoo machine any time soon, but I like the little touch of grunge the speckles added ^___^


I'd like to try some other brands, because I think being able to properly paint (as in, with brushes) would allow me to add more detail and get better colour coverage, but I do really like how the Pebeo paint pens look on the grey mug - they came up quite true to colour which I was pleased with as I was a bit worried they'd all look muddy!
 

 The Pebeo pens say that they are dishwasher safe after 72 hours of air drying, but my personal tests have shown that to be untrue. Well, I say personal ... one of my work colleagues put a kitty mug in the dishwasher. Not pretty! So, to hopefully keep these designs in place longer, I baked them in the oven on the lowest setting for a couple of hours. Even so, I included a little mug care sheet in the gift bag which suggested only light hand washing be applied to these babies!

I think birthdays are mostly over for the next couple of months, so until October I plan to only do selfish makes ~____^ I'm currently working on a hat, and then ... I don't know! I'm much more indecisive when it comes to making things for myself then I am with making presents for others. So, help me out: if you were me (and I was you!) and you were making me a present, what would you make? Reading your comments will be like my birthday! ^____^

- Lisa xx

Saturday, 20 April 2013

Op-shopping Overload


The title of this post is kinda misleading, because it implies that there is such as thing as too much op-shopping - which obviously not possible ~_^

Bec and I went on a relatively spontaneous road-trip yesterday for which we had three aims;
1. Get to our parents' houses' for dinner
2. Find a specific print of fabric for Pip
3. Op-shop our little hearts out.

We didn't have any luck on the fabric front (yet!) - sorry Pip - but we did achieve the other two things. Yay! We also managed to turn a two-hour drive to our home town into a six-and-a-half-hour drive o_0


I am usually not very good at finding second-hand clothes, but I managed to find three dresses yesterday - huzzah! This retro blue and white dress was made in Australia, which I thought was pretty cool ^_^ It's a bit big, so I'm going to take it in, raise the waist, and maybe replace the buttons. The shoes in this picture are genuine old lady shoes ~_^ I have to wear orthodic shoes and inserts because my feet are all kindas of messed up which means I have to pay waaayyy too much for shoes. It also means that I'll never be a fashion blogger ~_^ Anyway, I got these pretty shoes for $3 - a saving of approximately $197 o_0 They are a little scuffed, but I think after a clean they will be as good as new. ^_^


This dress is pretty new, and I just need to bring the sweetheart necklace up a bit - I think maybe the black mesh has stretched a little, so it's overall a bit low. I love the pretty pattern, and the black tulle underneath the skirt ^_^
 

Not a great photo of this dress - it's a black, strapless, and possibly silk. I couldn't find any tags on it, and the zip is broken, but it was only $5 so I'm going to take it in and add an exposed metal zipper which I think will look really cool ^_^


I also picked up a little bit of china - I was really rather restrained considering Bec and I saw a *lot* of very nice china sets. However, my collection is mostly mis-matched so I thought I'd continue on with that ^_^ The saucer is Paragon, the tea cup is Queen Anne, and they were both made in England.
 

I also got this cute little puppy teacup, which doesn't fit my fancy china collection, but it was too sweet to leave behind ^_^ I don't know the brand for this one, but it was made in Australia.


I finally found a cute set of vintage kitchen scales (for $1!), and I also picked up five balls of natural alpaca wool (I only photographed three though, because the balls are quite large and they took up too much of the photo!), and a tiny old jar with press studs in it. I think it's a baby food jar and I have no idea what I'm going to do with it, or the studs, but as it was also $1, I figured it was worth taking it home and finding out ^_^


I was really lucky yesterday with finding pretty vintage dishes ^_^ This one is pyrex, according to the mark on the base, but I don't know what the design is called or the manufacturer.
 

  This one with the cute strawberry design is pyrex too, and was made in Australia by Agee.


 I am not sure if this Nestle's dish is pyrex, although it does look like it. It has pretty little white flowers on it, and I really love the light blue colour ^_^


This is how this "set" came, but they are not actually meant to be together. The base is by Fire King and made in the USA while the lid is by Agee and made in Australia. Still, they go together relatively well, and maybe if I find more pyrex dishes, I can start matching up lids and bases properly ^_^

These two pieces also came together - but I'm not sure if they are both lids, both bases, or one of each! I *do* know that the green piece is more pyrex from Agee and the clear one is pyrex which was made in England.


Ok. Here is my favourite find of the day. Possibly the year. A Fujica 35 Automagic and a Six-20 Kodak (Model B)! Bec and I found this tiny antiques store which had no staff in it and most things were pretty overpriced. We found the owner in a cafe, two stores down, and I asked him about the cameras - as they didn't have a priced marked. I thought they were going to be way out of my price range but he said I could have both for $40. This was my face:


It was kinda hard to keep my "oh, well I guess that's a good price, *maybe* I'll buy them" face on, because over the guy's shoulder, I could see Rebecca doing this:


That's her "you fool! Buy them! Buy then NOW. Why aren't you buying them?!" face.

So, I paid the nice man, grabbed the cameras, and then Rebecca and I got out of there before he changed his mind. As soon as we were out of view of the window, we started doing this:

 
I don't know very much about vintage cameras, but after doing a little research on the internerds, it seems that I did indeed get a pretty good deal, especially on the Fujica ^_^


The Fujica is in it's original case, and actually has film in it too! It appears to be in good condition, nothing sticking or broken, and I am going to try it out later this weekend.
 

It can be removed from this leather case, but I like how it looks like this too ^_^
 

The other camera, the Kodak, I think is broken ; _ ;


It is meant to open to the left, with the lens then folding out, but I think it's stuck. I didn't want to pull it too hard, in case I really did ruin it, though so I'm going to try and take it to someone who knows about vintage cameras. Any suggestions, WA peeps?


Even if it is broken, it is still nice so I don't consider this too much of a failure ^_^
 

 I also picked up some novels (not shown), this Typo coffee cup (for $1), and my parents gave me this blanket which was my Nana Tess's. It has a couple of holes in it, so I'll have to research how to fix them up. I like the colours though (it's another one of her stash blankets) and it is very cosy.

And that's it! Wow! ^_^
I had so much fun and definitely want to do this again!

Do you op-shop? Do you have a favourite find? 

- Lisa x

Friday, 15 June 2012

Crafterweekend!


Hey, hey! I'm back! ^_^ I recently took six days off work and headed down south for a crafterweekend with Bec and Pip. It was really great! Aside from just not being at work (which I think everyone will agree is nice), we had great fun visiting markets, op-shopping, eating epic breakfasts, chatting a lot, and crafting a bit. I don't think I took a single photo the whole time (because I'm just that clever) but I did a bit of a photo shoot today with my creations and goodies so I can show them to you ^_^


First up: Mocha angels. Yup, they're a bit weird. I made them because I decided to start making tree decorations for the end of the year, and after brainstorming a few themes Scott and I decided on the broad category of "things we like". Scott really likes Mocha. Like, a lot. I'm not really sure how to convey just how much he likes this drink. I think he would have it for every meal if he could, and I'm not convinced that he didn't do just that while I was away.

Anyway, I think they are rather sweet ^_^ I made a template for a regular milk carton then scanned it into Photoshop (all I had access to over the crafterweekend) and added the front colours. Then I printed it out, put it together, and added wings cut from glittery silver card stock and a halo from a silver pipe cleaner.
 

With these expressions I feel like they should be constantly singing arias ~_^

Next: results from my op-shopping expedition. Isn't this little tablecloth cute? It's black gingham with purple and white embroidery and I think it will look great on my coffee table ^_^ 


I also found this sweet little cot blanket. The yarn is so soft and the colours are lovely and vibrant ^_^ This one's going to be saved for the distant future when Scott and I might have kids ...
 

I found this gorgeous teapot at the markets. Isn't it lovely? I am so darn pleased because although I have a stack of vintage cups, saucers, plates, bowls, and jugs, this is my first vintage teapot!


All my vintage china is mismatched, but I try to keep it to a broad theme of flowers and/ or gold trim. This teapot fits both! Yay! ^_^ I am going to have to have a tea party very soon!

Also from the markets; a headband featuring measuring tape ribbon, an awesome pen that looks like a giant pencil, and a plate of Italian biscotti (not shown because we ate them all!).

Going back to the crafting, I finally finished my last computer key cushion! This has been in my WIP box for a really long time! But now that the embroidery is done on this one, I can stuff it and add it to my day bed ^_^


 I also made some ridicuously simple earrings. All I did for these was put charms onto earring hooks. But they are really cute so I thought I'd show you anyway ^_^
 

If I wear one cup and saucer earring and one scissor earring, I can have a tea and craft earring set ~_^
 

These shrinky-dink Harry Potter characters are a little bit of a craft fail. They were meant to be ornaments for my tree but I didn't do the maths and they came out much too small. That's ok though! I'm going to add some badge backs to them and have a collection of wizarding pins ^_^


I've only made Harry, Dumbledore, Draco, and Voldemort so far because Ron's head snapped off (0_0) and I didn't have a brown permanent marker to colour in Hermione's/Neville's/Hagrid's hair. I'll do some more later and share with you the results ^_^

I also made a whole heap of wool and crochet hook baubles. They are really hard to photograph! This was the best image I had after taking about 20 photos >_< Still, you can see the basic guist of them, and I'm sure they'll look good on the tree.


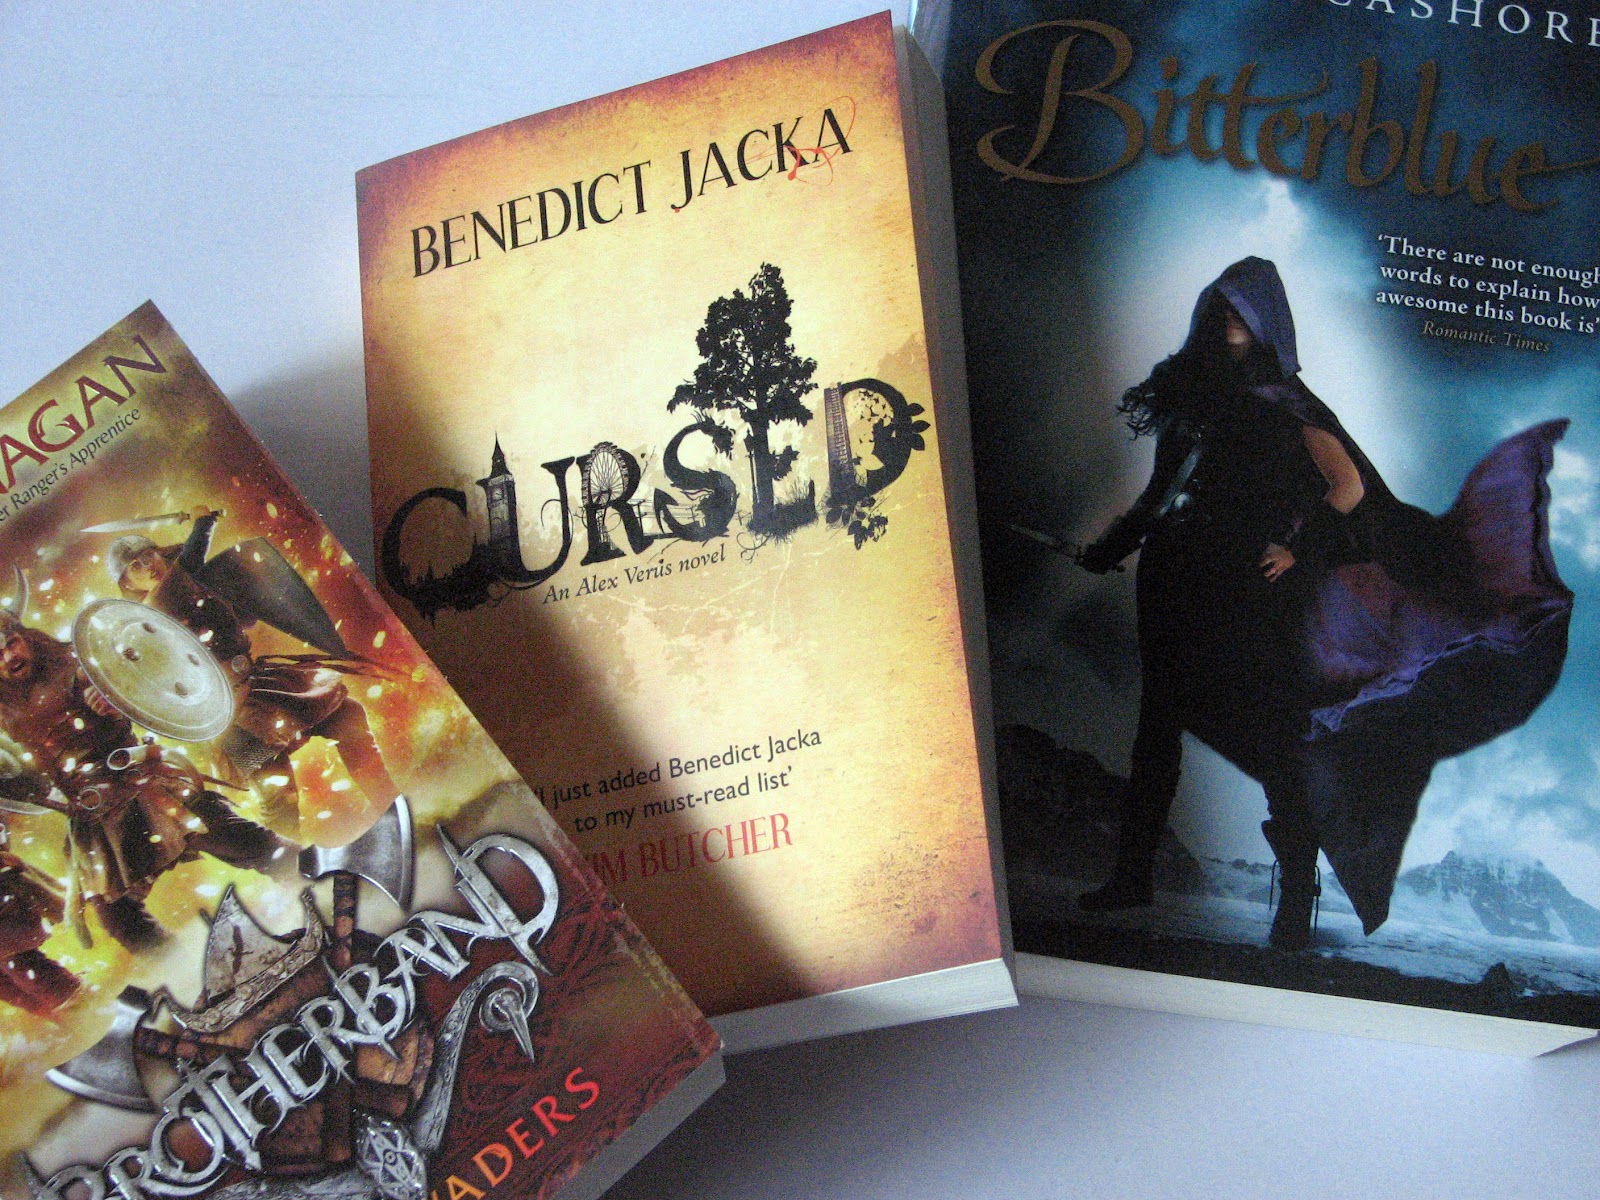
And, lastly, this is what I've been doing yesterday and today! ^_^ I read Bitterblue yesterday and totally loved it - I love it when sequels just make your favourite worlds more awesome and the characters even more fleshed-out. I finished Cursed today and thought it held up really well; I can't wait for the next book! And this afternoon (after I force myself to do some housework ~_^) I'm going to get stuck in to The Invaders. I'm sure it will be great - John Flanagan is a great author. ^_^

What are you up to this weekend?

- Lisa x