Showing posts with label zombie. Show all posts

Wednesday, 18 March 2015

Polymer clay foods


Hello! It seems that Autumn has arrived today in my city! I woke up this morning to find cloudy grey skies and plenty of rain! I'm sure I'll grow tired of it soon, but right now it's a lovely novelty ^___^ One thing I love about cooler weather is that is really makes me want to crochet and knit! I've got a few projects on my list that will be perfect for rainy days, but lately I've been messing around with polymer clay. 


I made these peas in a pod, which has been done many, many times before by other people ... but look at those little faces! Eeep, they're so cute! I only had one colour of green clay, so I mixed some green and white together to make the lighter colour for the peas. The peas are made simply by rolling clay into three balls of the same size (or, well, same-ish size). For the pod I made a rectangle and wrapped it around the peas. I pinched the ends together and cut off the excess, and then smoothed everything on the back down. You have to do this carefully, because otherwise you might squash your peas! Once it was baked, I painted on the faces with black paint and a very tiny brush. I have made this one into a brooch ^___^
 

I added brooch backings to these two pieces of fairy bread as well, but I'm planning on wearing them as collar clips ^___^ I don't know if people in other countries eat fairy bread so, for the uninitiated, fairy bread is buttered white bread covered in sprinkles. It's a staple at children's parties, and good for invoking nostalgia in older Australians ~___^ To make these, I made a square with beige clay and then sliced it in half to make triangles. After it was baked, I used brown paint dabbed along the outside edges to make the crust. The butter is cream coloured puffy paint, and the sprinkles are from thin clay "snakes" that I baked and then sliced with a razor. If you sprinkle on the, uh, ... sprinkles while the paint is still wet, they will stick in place ^___^
 

Pancakes!! I am so in love with these pancakes. I made them by making three disks of beige clay, all about the same size. Rebecca made me a little nub of butter by making a little square of yellow clay. I baked the pancakes and butter separately and then glued them together with a mixture of dimensional magic and brown paint. I glued this onto a ring base so now I have a pancake ring just like Annika! It's kinda an enormous ring, but I love it ^___^
 

I also made these two toasts and a jammy dodger, but I'm not sure what I will make them into yet. I dabbed them with brown paint, the same as the fairy bread, to make crusts and give them a just baked look. The jam on the toasts and inside the biscuit is acrylic paint. The jammy dodger was baked in two pieces and then glued together with the paint.


And lastly, I made this zombie brain! It glows in the dark, which I think is pretty cool, but it still needs a little something-something. Time for some experimenting! (insert mad scientist laugh here)

I'll see you next week, hopefully with some crochet! ^___^

- Lisa xx

Tuesday, 7 October 2014

Frankenkitty and Zombikitty Halloween banner


Hello! As promised, here is the first of my Halloween projects. Yay! ^___^ I've been meaning to make a banner to go above my TV for a while now, so I figured this was the perfect opportunity. I used some cute cross-stitch patterns to make the two perler bead cats; one is a Frankenstein's monster and the other is a zombie. They're more cute than creepy though!


I'm not sure what this type of fringing is called (all I know is that it reminds me of the kind of dresses flappers used to wear) but I've seen it used on a few banners before and since I had some in my stash I figured it would be the perfect thing to use ^___^


All in all, this was a really easy project to make. Creating the kitties took a bit of time, as perler bead projects normally do, but I made them while catching up on TV shows so it wasn't so bad ^____^ The cats are about the size of my hand, so the banner is eye-catching, but not massively huge.

My favourite parts are the glow-in-the-dark perler beads; can you tell I'm kinda obsessed with glowing things at the moment? ~___^ After I had finished ironing the cats (and leaving them to cool down) I used hot glue to attach them to the fringe banner, and I also attached a loop of wool on their backs to use for hanging.
 

I used some glittery silver "thickers" (yes, that's really what they are called!) to spell out the words; since they have sticky backs I just pressed them onto the fringing. I may need to reinforce them with glue later on, but they are doing fine at the moment! ^___^

I wish I had a fireplace to create a display above, but for now my TV will have to do! I've added the glittery skulls I made to the top to pretend that I have a mantelpiece ~___^

In other news, I've only got five more assignments to go this semester! They're all big ones, but I'm excited to be nearing the end of my degree ^___^ Now I'm just hopeful that I can find a job in my field! Fingers crossed, hey? 

- Lisa xx

Sunday, 5 January 2014

Perler bead Stormtroopers, zombie kitty, and Union Jack


Hello! Gosh, I haven't been posting nearly as much as I thought I would be! I have been reading a lot though; that's one really excellent thing about working in a library - I get to see all the new books! ^___^ Anyway, I *did* get out my perler beads again, and here is what I made! ^___^


I was so super excited for the new season of Sherlock to start that I decided to make myself a Union Jack brooch to wear while I watched it (I took these photos before I put backings on, by the way, as it's much easier to photograph them this way! ^___^) and then was horribly disappointed when I realised that Australia doesn't get to see it on the same day as America and England ; ___ ; Oh, well, it'll keep!


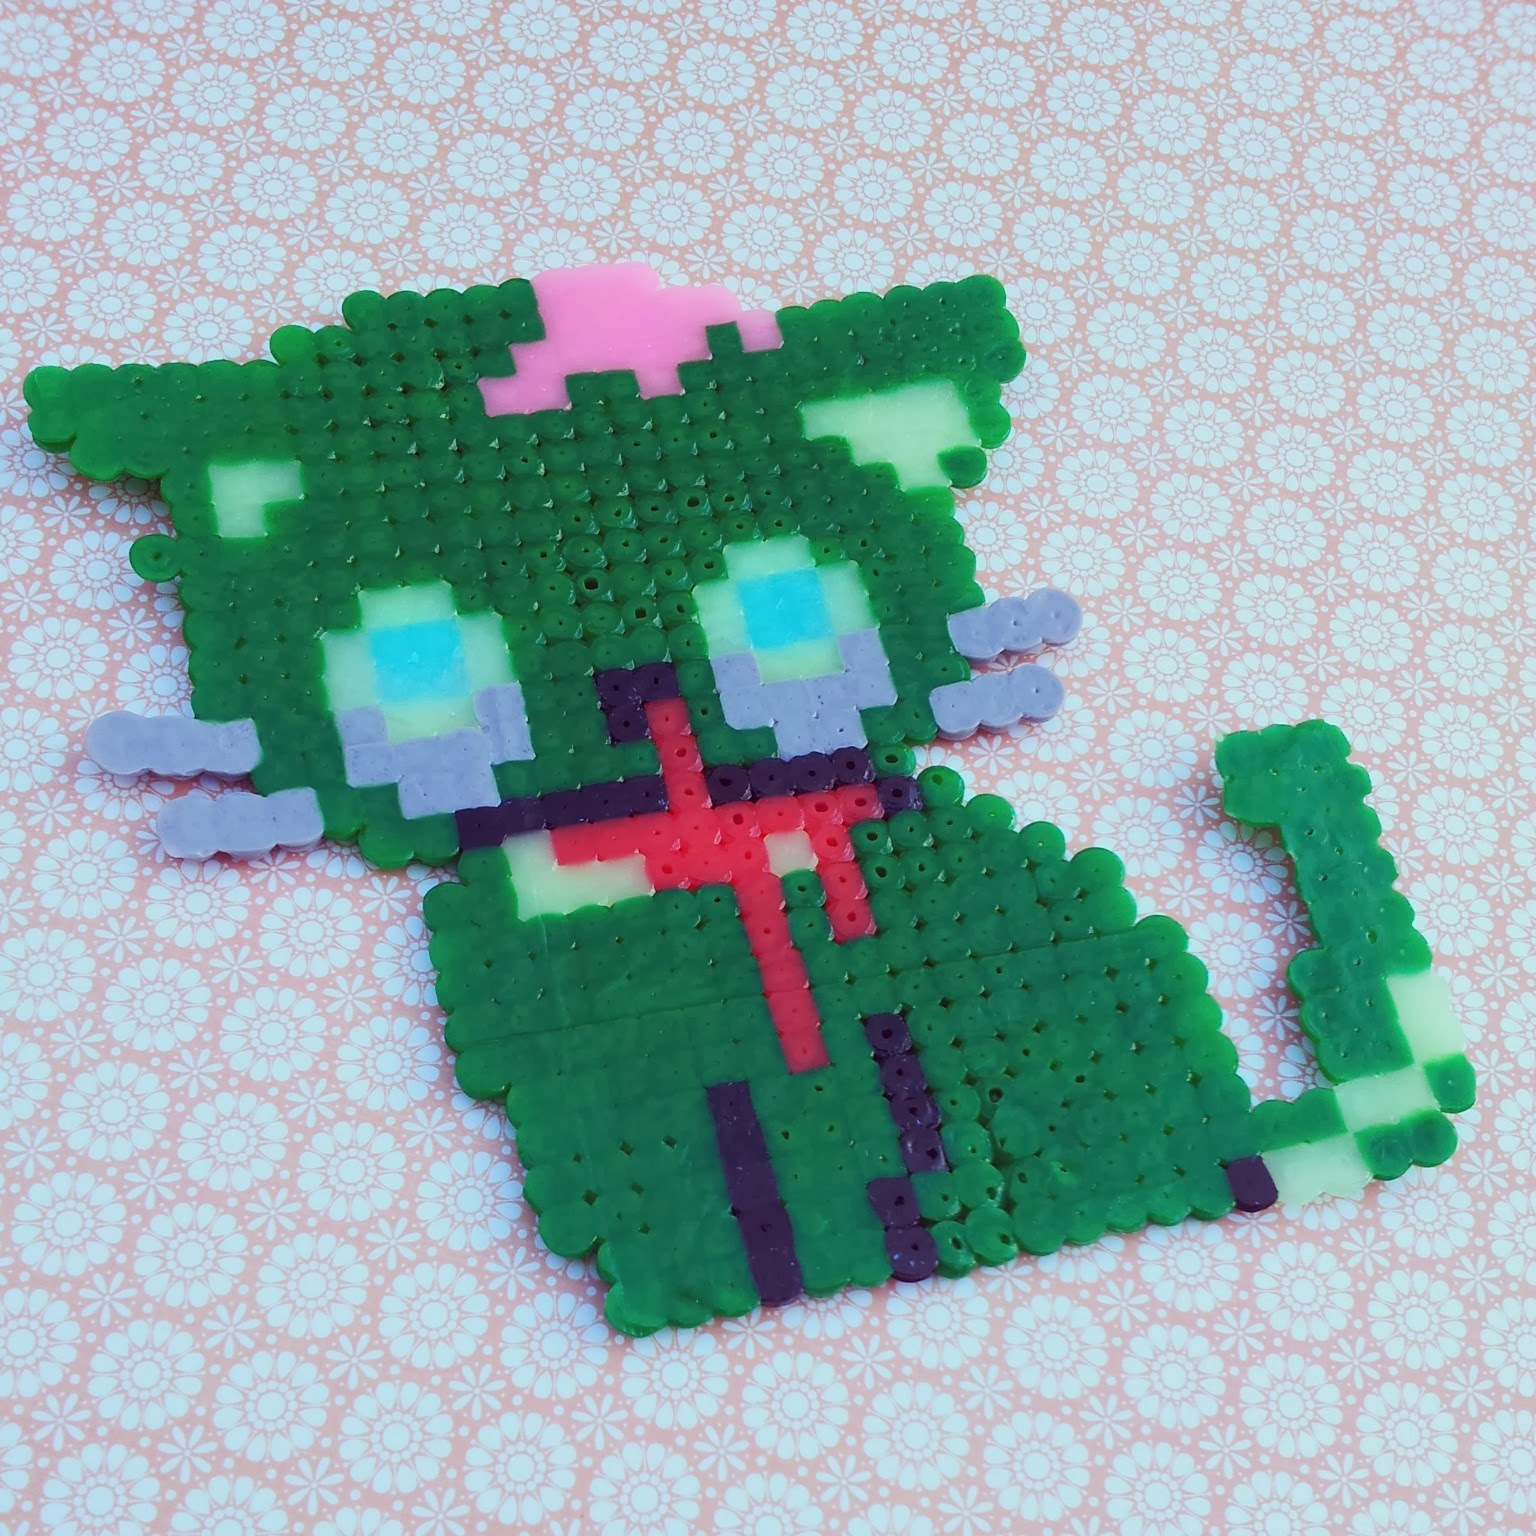
I also made this zombie kitty. Awwww, so cute! ^___^ The pink, blue, and light green beads are glow in the dark ones! The eyes are kinda scary at night time ... which is a very good thing for a zombie!
 

I tried to iron my beads for a bit longer this time, because my perler bead creations have a tendancy to fall apart after a while ; ___ ; My kitty's whiskers are kinda splodgy looking as a result, and the melting is not as even as I'd like it to be. Guess I'll just have to keep practicing!
 

And finally, I made this tiny army of Stormtroopers for Scott. He's not into brooches as much as me, so these will be magnets for the fridge.
 

I'm still working on cleaning all my vintage pyrex from my last op-shop trip so I can show it to you. I've been trying to find out all the names of the designs I have too, so it's going to be a interesting post (I hope!).

Until then!
- Lisa xx

Thursday, 18 October 2012

Beware Zombies sign


Braiiinnnsss

Ahem, I mean, hi! ~_^

I'm still making things for Halloween, and here's my latest project - a faux-aged warning sign. You never can be too careful around these dangerous suburbs!


Here's how I made it ...


I started with a pristine piece of wood ... and a not so pristine table. We use this old, mostly broken table for spraypainting, resin-work, and various other messy crafts.


I used my jigsaw to cut the wood roughly in half and then cut the edges so they were jagged and rustic looking. This isn't shown in the photo, but I clamped the wood to saw horses to prevent it moving, wore safety glasses, and followed all the safety instructions - this thing could cut you pretty bad so be careful if you're going to give this a go!
 

 As you can see, I didn't make it too neat! I didn't both sanding as I want this sign to look really old and weathered. I also beat up the wood a bit with my hammer, to make it less smooth and perfect.
 

Then I added a wood stain and then (after it had dried) a black wash made from acyclic paint. The picture above shows pretty much the exact wrong way to apply wood stain/ paint wash. If you do it this way, you'll end up with variations in shade and you'll be able to see the drips and splashes when it's dry. And that's exactly what I wanted ^_^
 
P.S. To make a black paint wash: add a little bit of water to an old jar, dip your paintbrush in black paint, and then mix the paint into the water like you would if you were cleaning your brush. Easy! ^_^

After the wood stain and the wash had dried, it was dark and so I didn't take any more in-progress photos. You can use your imagination for the next part ~_^ 

I loaded up my brush with red paint and painted on the letters, making sure the paint was really globbed on. The look I was going for was "OMG ZOMBIES ARE COMING" so the paint is definitely not even ~_^
 

When the letters were dry, I added another wash of black paint and then added a few splatters of a less diluted mix.


I used my staple gun to add some thin rope to hold the two peices together and also to create a hanging string. And that's it! I can't wait to put this out at Halloween with my next project ... it involves garden ornaments and more zombies ~_^

What do you think? Do you like it? I hope you do!

- Lisa x

Monday, 24 October 2011

How to survive ZOMBIES! Free poster!


Hi! How are you? 

I made this instructional poster in case of zombie invasion. Would you like one? You can! 
I hope you like it ... and that it isn't *too useful* ~___^ Click on the image below to download the poster from my Google Drive! ^___^


https://drive.google.com/file/d/0B_MO0cK8Qg7mSEJTMkgwN1dIbEE/view?usp=sharing

- Lisa x

Sunday, 23 October 2011

Zombie mitts!

Hello! How are you? I hope you are super. Today I finally finished part of my "work-appropriate" Halloween costume! Hooray! I made zombie mitts and I am so, so pleased with how they turned out. If you would like to make some too, these are based on the Mummy Mitts by Twinkie Chan; so read her tutorial, then read this post and you will know how!


First I crocheted two rectangles. Getting them the same size was the hardest part for me (sadly). I used this really nice green in acrylic, because wool is a little itchy for me, and also I know I will spill something on these at some stage.

Then I crocheted some blood spatter and some stitches. I made the stitches by chaining to the length I wanted, then single crocheting in each chain to make them nice and thick. 


The blood spatters started off with the first row of a circle (i.e. chain four, slip stitch into a ring, chain three, treble into the ring six times, join) then I did a mixture of trebles and single crochet. I made the sticky out parts by making two trebles, then chaining three and making another treble in between the first two trebles, and then slip stitching back down to the base row (i.e. where the first two trebles were made). Er, I hope that made sense.


I also made a long line of blood spatter by chaining to the right length, and then making the drips using trebles and single crochet in basically the same manner as the round blood spatters. For the parts where I didn't want any sticky out bits, I used single crochet.


Next I sewed on the blood spatter and the stitches with single thickness thread in the appropriate colours (red and black, respectively). I used wool and a tapestry needle to sew the lines across the stitches.

Once the embellishments were on, I sewed up the seams, leaving space for the thumb holes.

I can't wait to wear these on the 31st - I am thinking I will need to paint my nails to match ... maybe all in green? Or maybe white with red splatter? ^_^

Anyway, I hope you like them too - and if you do make some I would love to see them!
See you!

- Lisa x

Saturday, 15 October 2011

Castiel embroidered canvas


Hey folks! Where has the time gone? I am highly suspicious that my diary is lying to me about it being mid-October already. But not too suspicious, because today is Rebecca's birthday! Yay!

I made Bec a embroidery/ felt/ canvas ... picture. I am so great at descriptions! But that's ok, because we have photos!


This is a little tribute to Castiel - the Trench Coat-wearing, demon-slaying, awesome quotes-master from the TV show Supernatural.


Castiel is embroidered with one and two strands of black DMC - he is quite small due to his massive wings also having to fit into the picture.


The wings are black felt blanket-stitched onto the blue cotton.


The quote is written in fabric pen, because I am generally terrible at stitching letters.
 
The finished piece on cotton was stretched over a blank canvas (I left the canvas material on because it is much studier than the cotton and thus gives it a bit of extra reinforcement) and sewn into place using this tutorial.

 
This picture is a bit hard to see - but basically I hemmed a piece of black cotton and whip stitched it onto the back of the canvas, to cover up the messy looking threads from attaching the blue cotton to the canvas.

The black cotton back has a flat tube (also of black cotton) sewn to it which can be used for hanging by threading a dowel or ribbon through it.

I am about 95% happy with how it turned out (the third line of the quote is slightly wonky which bothers me) but Bec liked it - and that is the main thing!


In other news, I got this AMAZING Imperial typewriter from my parents and grandparents. It's in a little bit of rough condition, but after I cleaned it up it looked 100 times better - I love it!
 

I am *still* making zombies ... but very slowly.
 

I made these trinket dishes for a wedding present, but I'm not really happy with them. They're ok, but you can see the brush strokes (which I could deal with, because it does look kind of rustic and charming) and they are still sticky! Ugh! I think I will try spray painting them, to make them a bit more matt and less brush-strokey. Only two are pictured here (the other one had an accident with some black paint ... oops), but they say "we tied the knot", "we put a ring on it", and "we said I do" with co-ordinating images (string with knot, rings, and heat respectively).


- Lisa x

Thursday, 28 April 2011

Zombie Groom and Zombie Bride


I finished my entry for the "Wedding" themed Iron Craft challenge!

This cute, un-dead little couple were inspired by the zombie groom from Shaun of the Dead and are made of felt. They are finger puppets! 

Needless to say, I have been acting out zombie weddings a few times today ... and maybe a couple of zombie vs. Star Wars battles ~_^

- Lisa x