Tuesday, 7 January 2014

Pyrex is a girl's best friend


Hello! Oh my gosh, this post has been a long time coming! I finally took photos off all my vintage pyrex today, and you can see how long it took from how the light changes throughout the pictures ~___^ Not *all* of these are actually actual pyrex, but I've learnt that there are actually three brands of "offical" pyrex and then there are a ton of other brands as well ... anyway, here's what I've got and what I've learnt! ^___^


This is the first piece of pyrex I collected, and it's JAJ Pyrex which means it was made in England. This brand is also sometimes called Crown Pyrex, and the maker's mark can be the initals JAJ, a crown, or both. This pattern is called Indiana and is possibly from 1969.


This is also JAJ Pyrex. This pattern is called Chelsea and was apparently produced from 1968 into the 1980s


This is my first piece of American Pyrex! It's normally just called Pyrex, apparently the Pyrex company started in America and then licensed production to England (i.e. JAJ/Crown) and then to Australia (i.e. Agee - some examples of which are coming soon!). This pattern is called Daisy, or sometimes Sunflower, and is from about 1964 til about 1974.
 

It's also super dirty! I haven't had any luck getting these stains off, but I haven't been trying anything too chemically or abrasive in case I ruin it. Any suggestions for cleaning would be very welcome! ^___^


This design is called Cottage Rose and is another from JAJ Pyrex, produced from 1970 to 1971. I adore this pattern, it's so pretty yet still quite bold.
 

And I have two pieces in this design! ^___^

They are the same shape, but different sizes. I'd love to collect all the sizes in this design ^___^


This big dish is from France, which I thought was pretty cool! The company is called Arcopal, and the design is called Little Daisies. It's quite sweet, and I love it even though I'm not sure if it's "real" pyrex.


This is a piece of Agee Pyrex, and it's the only divided dish that I have (currently!). Agee Pyrex didn't have as many patterns as American or English pyrex, as far as I can tell, you could basically choose from clear, green, blue, or 'biscuit', although some ads do have 'coral' as well.
 

I found this awesome ad from the Australian Woman's Weekly which shows what the Agee Pyrex range was like in 1952 using Trove. They actually have a whole bunch of old magazines and newspapers digitized so it's well worth checking out ^___^


Back to America, and this design is called Friendship ... or the Pennsylvania Dutch Bird Scene, which is a bit more of a mouthful, or Birdie, or Friendship Bird, or Red Rooster (which is also the name of a fast-food chicken shop here in Australia) ~___^

I am so pleased that I got the matching lid for this piece, they look so lovely together ^___^
 

I brought this from a tiny op-shop where basically everything is two dollars (the best kind! ~___^) and they had a larger lid in the same design so I hunted around to see if there was another dish, but had no luck. I checked with the lady at the counter, just in case, and her response was to say "no, nothing goes with this one. Oh, and it's chipped." And then she threw it in the bin o ___ o I told her I'd pay .50c for it, she said I could have it for free if I fished out of the bin. The things I do for pyrex! ~___^

 This one is a Fire King piece, which is one of those brands which is similar to pyrex, but not actually made of the same thing. This design is called Primrose and was made from 1960 til 1962.


This is another English piece and the design has quite a few names! Apparently it can be called Woodland, Wildflowers, and/or Country Autumn. Take your pick, I guess! ^___^ It also had quite a short production run, being produced only between 1985 and 1988. I was born in '88, so I think it would be lovely if this dish was the same age as me ^___^


And speaking of short production runs, this one is called Rustic and was made by JAJ between 1980 and 1984.


Another short production run; this design is called Butterflies (ummm ... maybe?) and was made from 1983 - 1984 in England ... maybe. It's been really hard to find much information on this design! If anyone knows anything about this design (or any of the designs, really!) I'd love to hear from you ^___^


Although they don't match, I really like how Wildflowers and Butterflies look together. They're really both quite cute, aren't they? ^___^


This long dish (or lid, maybe?) is from Agee, yet, interestingly, is a different colour from my other piece of Agee. The little bowl is probably not any kind of pyrex, as it has no maker's marks, but it's the same colour and the little lip makes it a practical thing to have so *shrug*


This design is called either Tuscany Vegetables or Market Garden and is by JAJ Pyrex. It started being made in about 1971.


Although the timing is a bit out, I'm very tempted to make this Spagetti Casserole in my Tuscany Vegetables dish - yum! ~___^


This design is from 1972 and is called Carnaby Tempo. It's another one produced by JAJ Pyrex and always seems really familar to me for some reason. Perhaps one of my family members had something in this design once? I've no idea, really.


I love the contrast of the white lid against the blue dish in this design, which is American Pyrex Snowflake Blue, also called Winter, Snowflake Garland, or just Snowflake (although the latter is apparently incorrect).


This design was apprently produced during the '60s and '70s but it was obviously very well cared for as it looks almost new!


This dish is marked with "Pyrex 16" - and that's it! I haven't been able to find anything else about it at all. It's a mystery dish!


As is this one, maked "Pyrex 17". Curiouser and curiouser!


This one is marked only with the number 17. Very strange!
 

Also, it's kinda weird looking, don't you think? Like the designs printed on it don't really go together? It's interesting, nonetheless!


This isn't maked with anything! But, I did manage to find out that this is made by Hazel Atlas and this pattern is called Ivy. Awesome! Solving mysteries is the best! ~___^


This design is by Agee! This is the only printed piece of Agee that I have, and I don't know the "offical" name of it so I've just been calling it Strawberries. (Groundbreaking, Lisa!) ~___^
 

So, I've got kinda a little mismatched collection going of strawberries and ivy. Random, but I like it ^___^


This piece of Pyrex is really interesting; well, it is to me anyway! ~___^ It was produced in England, but is maked with the Nestle's logo. This is because you could get it by sending in labels of sweetened condensed milk to Nestle's - sounds like a pretty good deal to me! ^___^
 

I don't know how to work out how much money a 1959's housewife would have been expected to send in, but this dish was apparently worth one pound, which today is about $35. So, I've got the dish, now I just need to make the rice pudding to go in it. ~___^


Pyrex really likes their florals, huh? ~___^ This platter is made by JAJ and is called Autumn Glory. It was produced from 1969 but I don't know for how long.


And I have this design in a dish too ^___^


I've seen this design on teacups and saucers too, but I've never found any in real life. Pity!


This platter design is called June Rose and is another from JAJ Pyrex. This one was produced from either 1966 or 1967.


This little dish (which I have photographed rather poorly, as the flowers are actually a much lighter colour) is made by Termocrisa, which is a Mexican brand. It's like Fire-King in that it's not *really* pyrex, but many people advertise it as pyrex.

And that's it! Wow! I hope you enjoyed this post, even though it was a bit of a departure from my usual content! It's actually been really fun researching all these different pieces, although now I have a mile long list of all the other designs I'd like to collect! Well, I guess I'll take my advice from this 1949 ad ...

 
Thanks, vintage housewife lady!

- Lisa x

Sunday, 5 January 2014

Perler bead Stormtroopers, zombie kitty, and Union Jack


Hello! Gosh, I haven't been posting nearly as much as I thought I would be! I have been reading a lot though; that's one really excellent thing about working in a library - I get to see all the new books! ^___^ Anyway, I *did* get out my perler beads again, and here is what I made! ^___^


I was so super excited for the new season of Sherlock to start that I decided to make myself a Union Jack brooch to wear while I watched it (I took these photos before I put backings on, by the way, as it's much easier to photograph them this way! ^___^) and then was horribly disappointed when I realised that Australia doesn't get to see it on the same day as America and England ; ___ ; Oh, well, it'll keep!


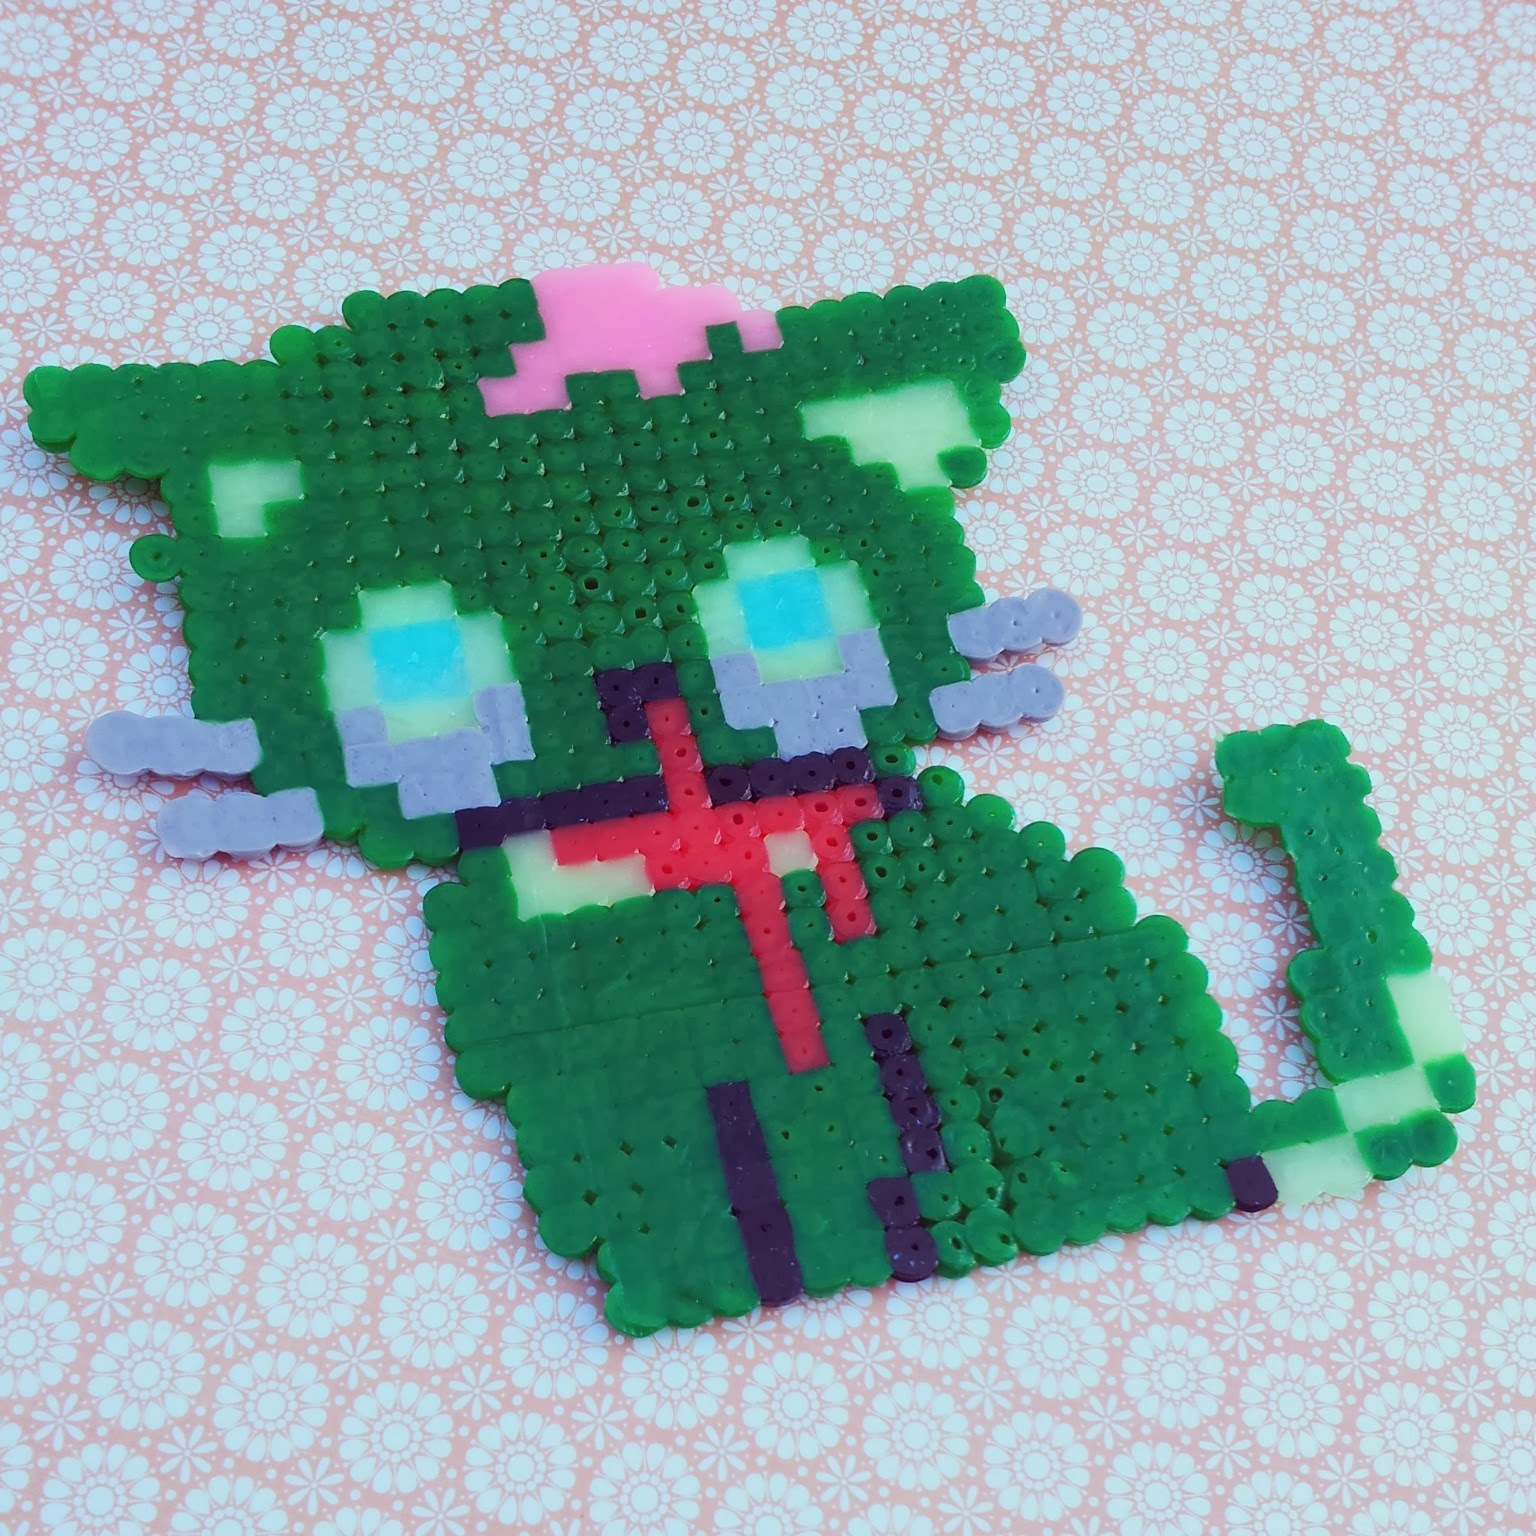
I also made this zombie kitty. Awwww, so cute! ^___^ The pink, blue, and light green beads are glow in the dark ones! The eyes are kinda scary at night time ... which is a very good thing for a zombie!
 

I tried to iron my beads for a bit longer this time, because my perler bead creations have a tendancy to fall apart after a while ; ___ ; My kitty's whiskers are kinda splodgy looking as a result, and the melting is not as even as I'd like it to be. Guess I'll just have to keep practicing!
 

And finally, I made this tiny army of Stormtroopers for Scott. He's not into brooches as much as me, so these will be magnets for the fridge.
 

I'm still working on cleaning all my vintage pyrex from my last op-shop trip so I can show it to you. I've been trying to find out all the names of the designs I have too, so it's going to be a interesting post (I hope!).

Until then!
- Lisa xx

Saturday, 28 December 2013

Spawn more Overlord (plushie)!


Hello! Gosh, only a day between posts? What's happening?! I figured that since now I don't have uni *or* Christmas to spend time on, I'll upload additional posts whenever I have them ready! So, the posting schedule is going to be kinda weird for the next month or two, but I'll still post a least once a week so you really just have to worry about getting sick of me! (Which could totally never happen .... right?) ~___^


Anyway, here is Scott's Christmas present - an Overlord plushie! Yay!
 

He's got kinda funny face, huh? ^___^
 
 
I used a sewing pattern from Arixystix which required more skill than I have! I'm not that experienced making plushies, and so I had some troubles with the pattern which is an advanced one.


But I finished him, and Scott's happy, and that's really all that matters, right? ^___^


Anyway, Scott has named him Gasbag; apparently Overlords are basically full of hot air? *shrug*


 Here's Gasbag with Squishy, for size comparison. They're totally buddies now! ^___^


Our wedding anniversary is coming up soon, so I'll have to hunt around for another Zerg plushie to make for Scott! It's good to have a go-to theme for gifts, don't you think?


So, what do you think? Do you have a thing that people always make or buy for you? For me, it's craft supplies; surprising, huh? ~___^

- Lisa xx 

Friday, 27 December 2013

Cross-stitched rose lavender sachet and faux vintage jars


Hello! Did you have a nice annual festival of togetherness? I'm on to my *fourth* day of celebration today; wowzers! Today is the day I get to open my presents too, but while I'm waiting to do that I thought I'd show you two presents that I made for other people! ^___^


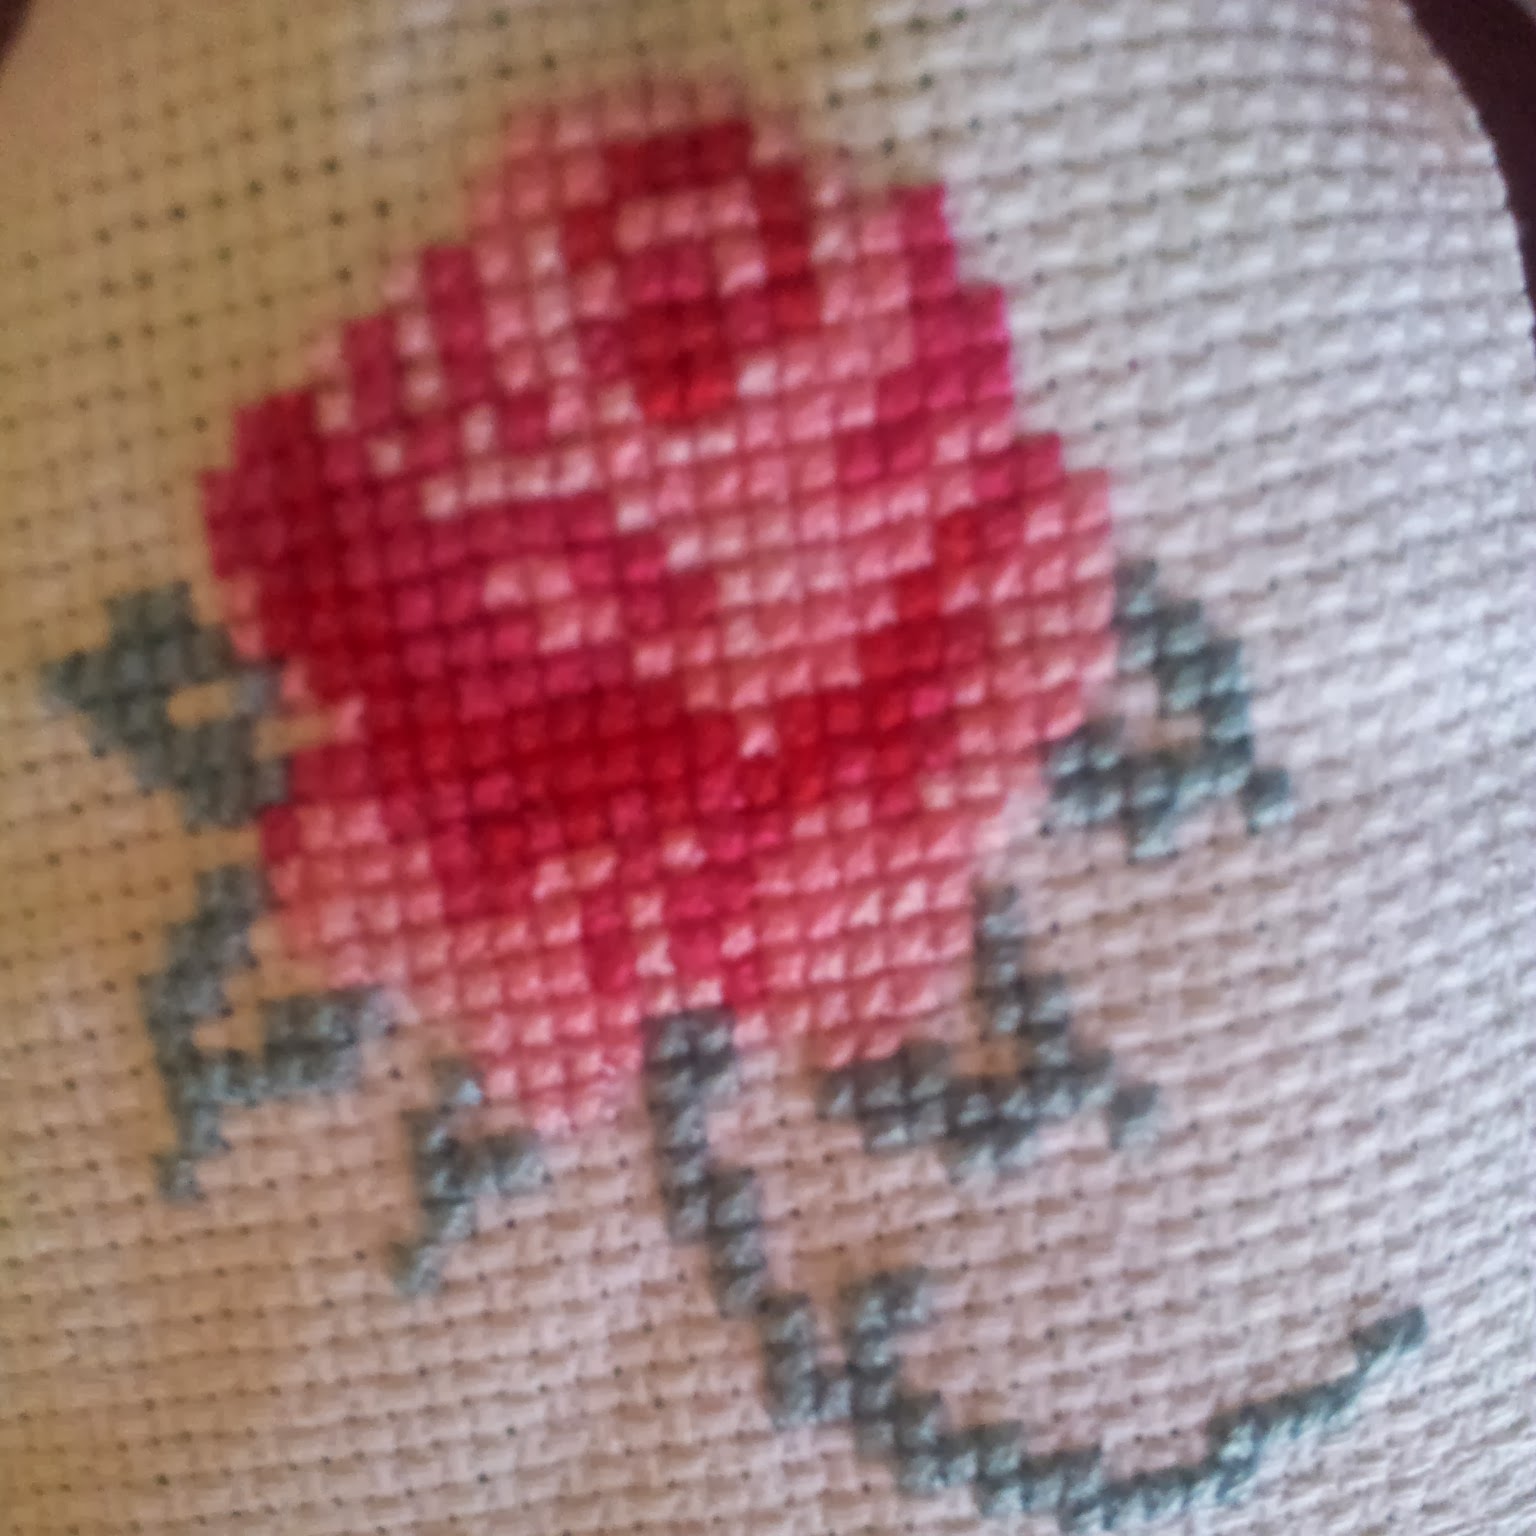
For my Nana I made this lavender sachet, embellished with a cross-stitched rose. Yeah, I didn't really think that one through, huh? ~___^
 

The rose pattern is from Mollie Makes issue thirty, but I did change it a bit. Originally there was a heart to the left of the rose, as well as some additional buds above the main flower; I didn't want the sachet to be huge though, so I reduced the rose into more of a square shape.

Lavender sachets are super easy to make, as all you need to do is sew a rectangle that is open at one end. After scooping in the dried lavender, I added a few stitches across the top and then tied on the ribbon. 

My house smelt like lavender for days after making this; it was so lovely that I may have to make one of these sachets for myself! ^___^
 

For my mum, I made this set of faux vintage bottles. They were also quite simple to make, but they look really effective. I used this tutorial and some of the jars that I kept because they are interesting shapes. (I swear I'm not a hoarder!)


I thought they looked a bit plain straight out of the oven though, so I decorated them a little bit. My mum likes a vintage, country-rustic aesthetic, so I used baker's twine, old book pages, brown paper, vintage buttons, and thick jute twine. The Coca-Cola bottle and the Sarsaparilla bottle I left mainly as is; I just removed everything except the front logos before I coloured the bottles.

I also gifted some bright yellow chrysanthemums with these bottles, but they look pretty good as is, don't you think? ^___^

Did you make any gits this year? Did you receive anything handmade? And did you/ are you having a lovely holiday? I hope you are!

- Lisa xx

Tuesday, 17 December 2013

Leather bat bows


Hello! How are you? I feel like somehow my life has actually been busier since uni finished which really does seem improbable! Maybe it's just been going by quicker since I've been having such fun! ^___^ If you follow me on Instagram you'll already know some of this, but since my last blog post I have dyed my hair blue (well, bluey green with sections of black ... ~___^), crocheted enough granny squares to now have over 100, had a flower crown making party to celebrate my birthday, completed an epic thrifting roadtrip with Rebecca (photos of which I will share with you soon!) and I've also been making myself a scarf (highly practical in this Australian summer heat!), sewing a few Christmas presents, and I even finished a project to share with you today! Omg, right? ^___^


I saw a photo of cute bat-esque bows on pinterest, but unfortunately the image was uncredited (don't you hate it when that happens?). I still wanted to make some though, so I drew up a quick pattern and got to crafting!

https://drive.google.com/file/d/0B_MO0cK8Qg7meERSejlyelFQLXc/edit?usp=sharing

 If you'd like to make some too, you can click on the image above to download the pattern from Google Drive! ^___^


Here's what you'll need to make your own batty hairclips ^___^

1. Some leather or pleather scraps
2. Fabric and paper scissors
3. The pattern
4.  A needle and thread
5. Bobby pins

Firstly, cut out the pattern. I have a special pair of scissors that I use only for cutting paper, because I don't want to dull my lovely fabric scissors ^___^
 

Then use the pattern to cut out the shape from your fabric. If you can, do this without pins because they will often leave marks on leather/pleather. If you find this step tricky though, you can draw the outline on the back of the fabric and use that as your cutting guideline.


You'll also need to cut out a small rectangle of fabric to serve as the middle of your bow. Mine was about 1cm x 2cm, but this doesn't have to be exact.
 

Then fold the middle of your bat shape like the letter 'm' and use your needle and thread to secure the fold.
 

This is what it looks like from the back ^___^
 

Wrap your small rectangle of fabric around the bow and sew it together to make a small tube around the middle of your bow.


Tie off your thread, and then slip a bobby pin through the fabric tube. 
 

The tube should be rather snug so your bobby pin will stay in place without the need for glue or stitches.
 

And then that's it! You're done and now you can make more! ~___^


Yay! I think I'll make an extra big one to wear as a headband too! ^___^
I hope you like it; if you make one then I'd love to see it! ^___^

Now I'm off to refresh my university emails repeatedly until my end of year results come in! Eeek! Wish me luck?

- Lisa x

Monday, 9 December 2013

Cotton string wrapped candelabra


Hello! How are you? I've had a lovely start to my uni break; I've cleaned and gardened my little heart out! One of the things I found while cleaning was this candelabra which was, you know, nice, but not really in keeping with the rustic aesthetic my style.

So, I grabbed some washi tape and some cotton thread and got to work! And now it looks like this:


Ta da!
 

And this is how it looks like when it's lit up! ^___^ Although it's not really traditionally Christmas-y, I think it goes well with my pom-pom tree so I'm going to consider it a Christmas decoration. Plus, anything with candles is automatically extra Christmas-like, right? ~___^


This was a very easy project to do, albeit time-consuming. To wrap the candelabra I cut lengths of cotton thread off the main ball and made them into smaller balls; this really helps make manovering the thread around much easier. I tied on the thread with a knot and then wrapped the thread around both the candelabra and the tail of the knot. Then I just kept wrapping!


For the actual candle-holders, I just tore off strips of washi tape and wrapped them around the glass. I used two strips because, hey, the more washi tape the better! ~___^


And that's that! ^___^ 

The next post I had to share with you was going to be a sewing project, but my machine has thrown in the towel. Oh no! So I'll need to think of something else to finish, but now that I can't do a sewing project, that's all I can think to do! Typical! ~___^

- Lisa xx

Tuesday, 3 December 2013

Mini bud vases


Hello! Today I've got some teeny tiny bud vases to show you! ^___^


Eeep! Aren't they precious? I think small things are always extra cute! ^___^


They were also very easy to make! I used washi tape (not much of a suprise there!) and some of the little bottles that my glucometer test strips came in. I was really pleased to think of something to do with these sweet little containers because I have dozens of them! 

All I did to make them was cut off the lid using a pair of scissors, peel the wrapper off ...
 

... and then decorate with washi tape!
 

So simple! A coating of mod-podge doesn't go astray, since they will be coming into contact with water, but you can also skip that step. Without the mod-podge, the washi tape is easily removable, so you can have bud vases that you can update to suit any occasion! ^___^
 

I know that most people reading this won't have heaps of empty test strip containers lying about, but this would also work for reusing almost any kind of small container. I'm just pleased I've been able to use up some of the waste that my diabetes creates! Now ... to work out something to do with all the empty insulin cartridges ... ~___^

- Lisa xx